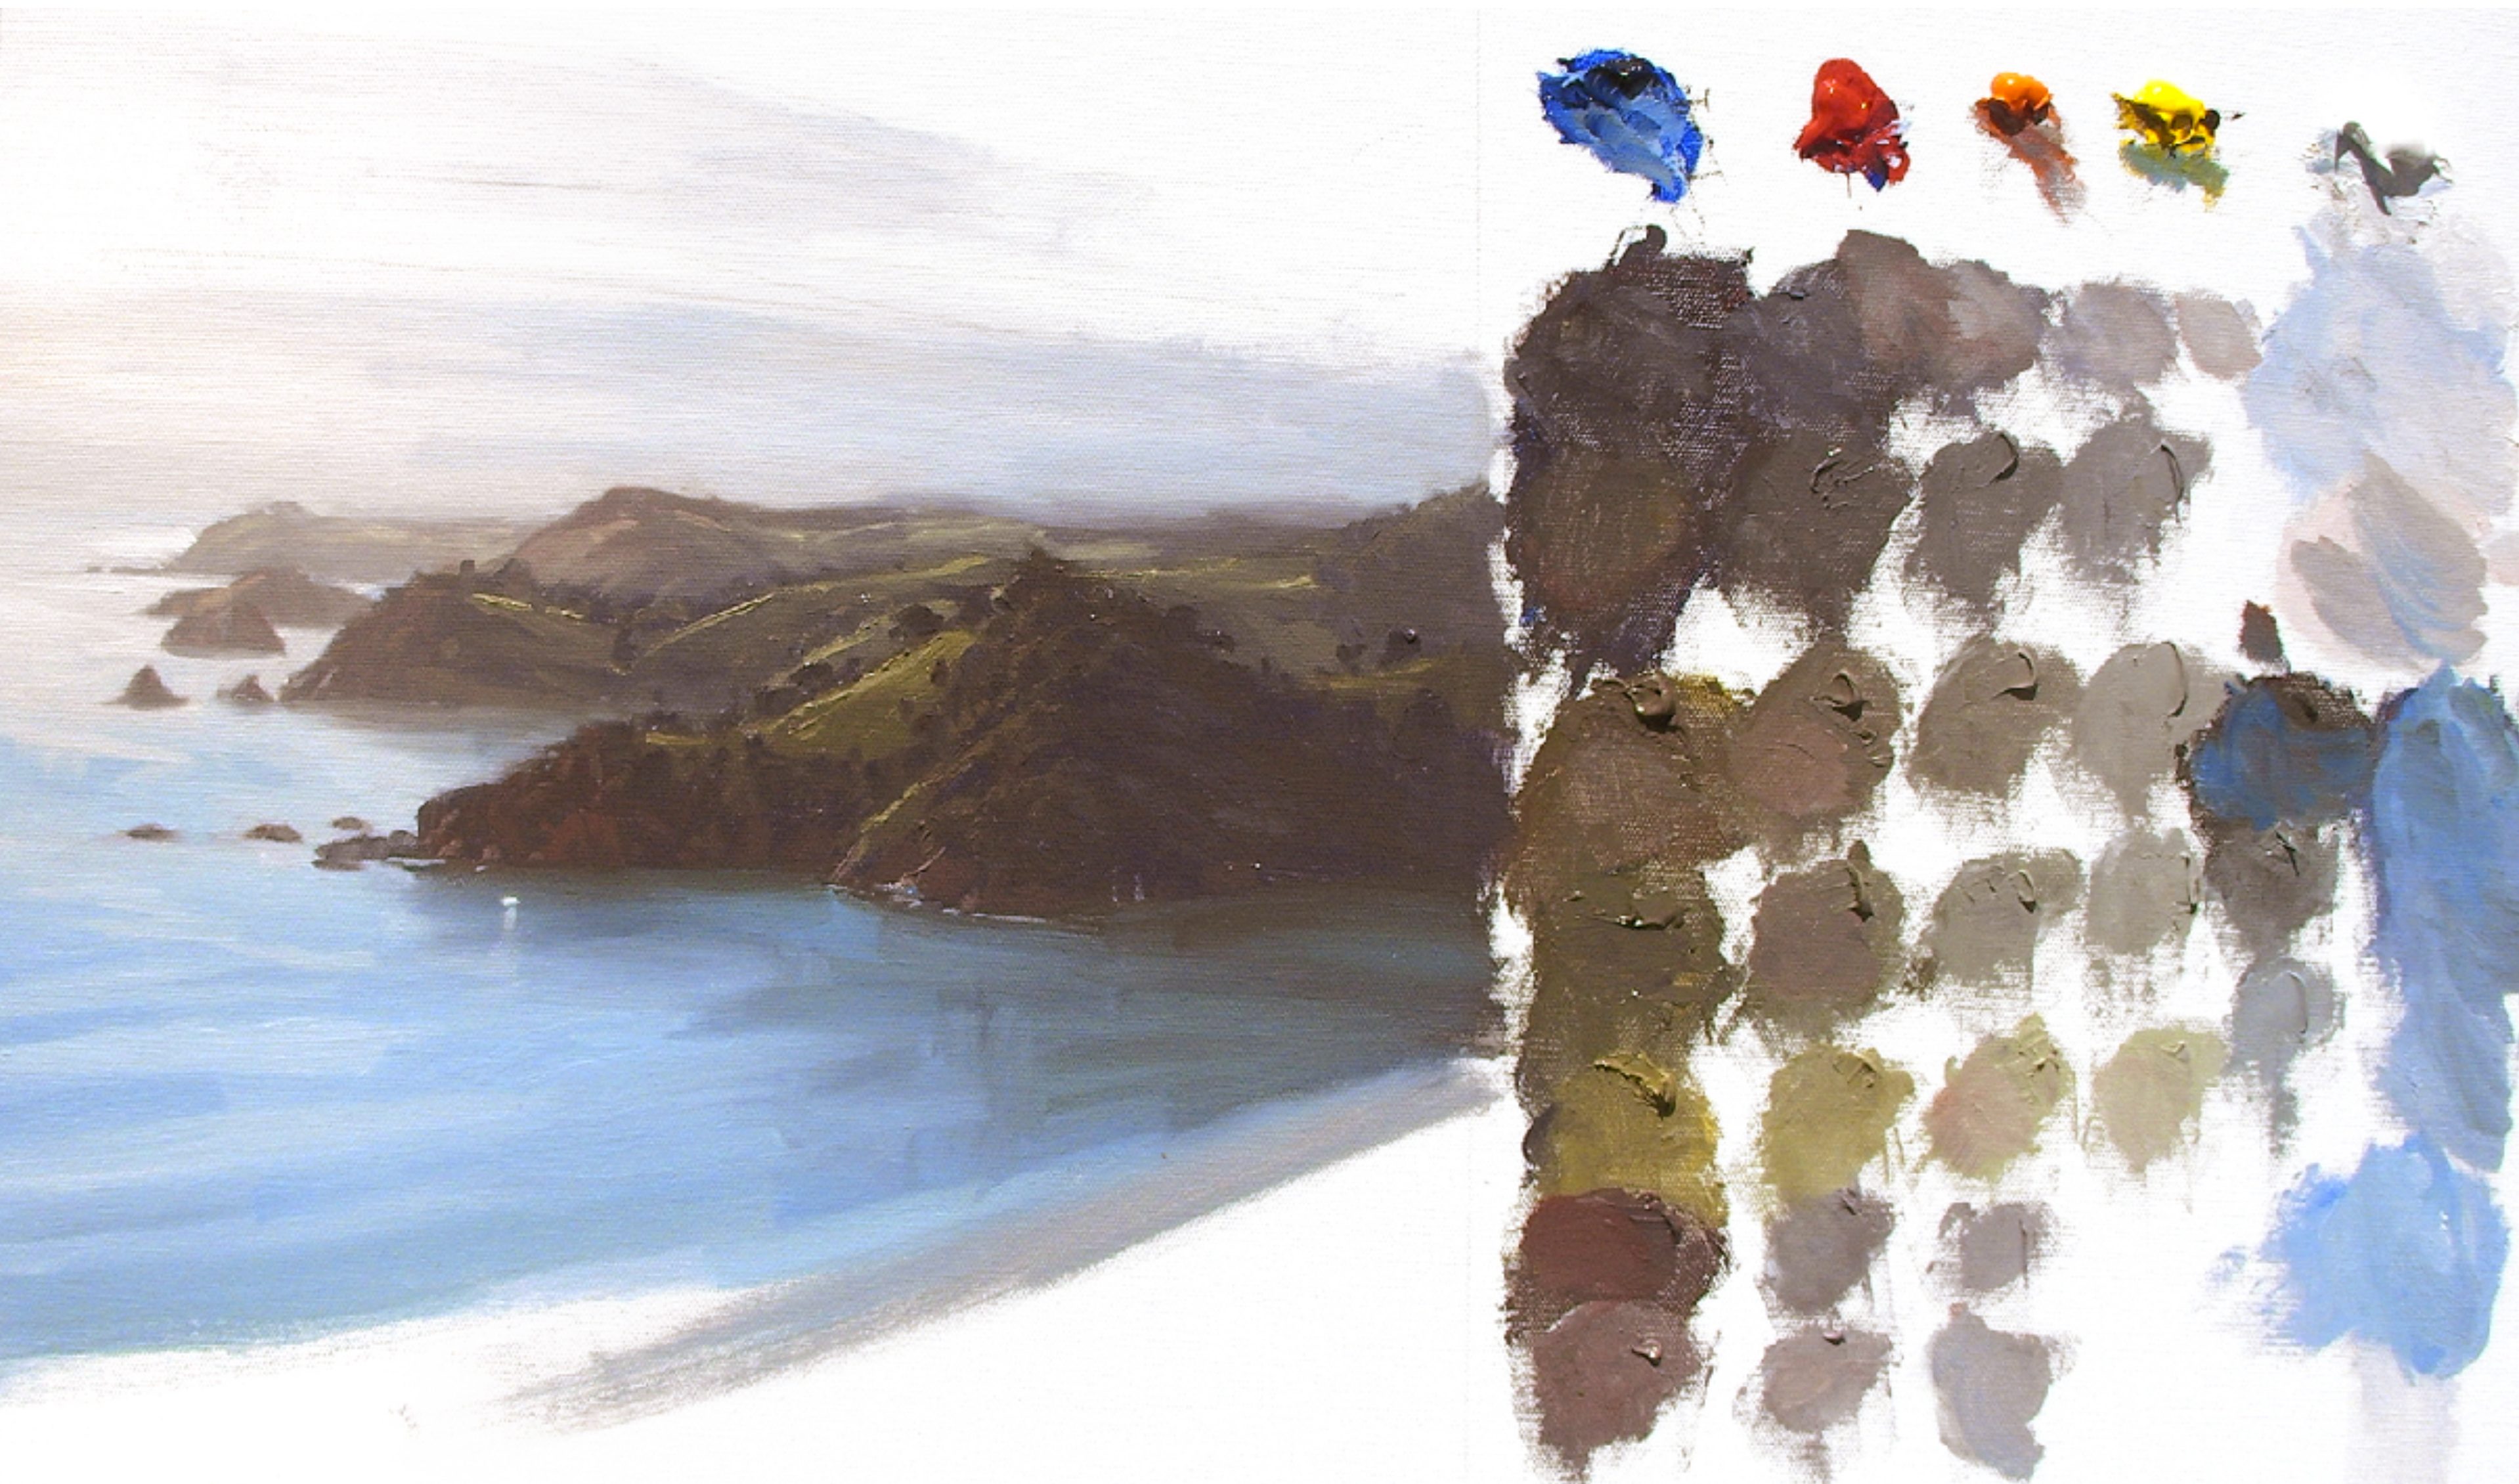
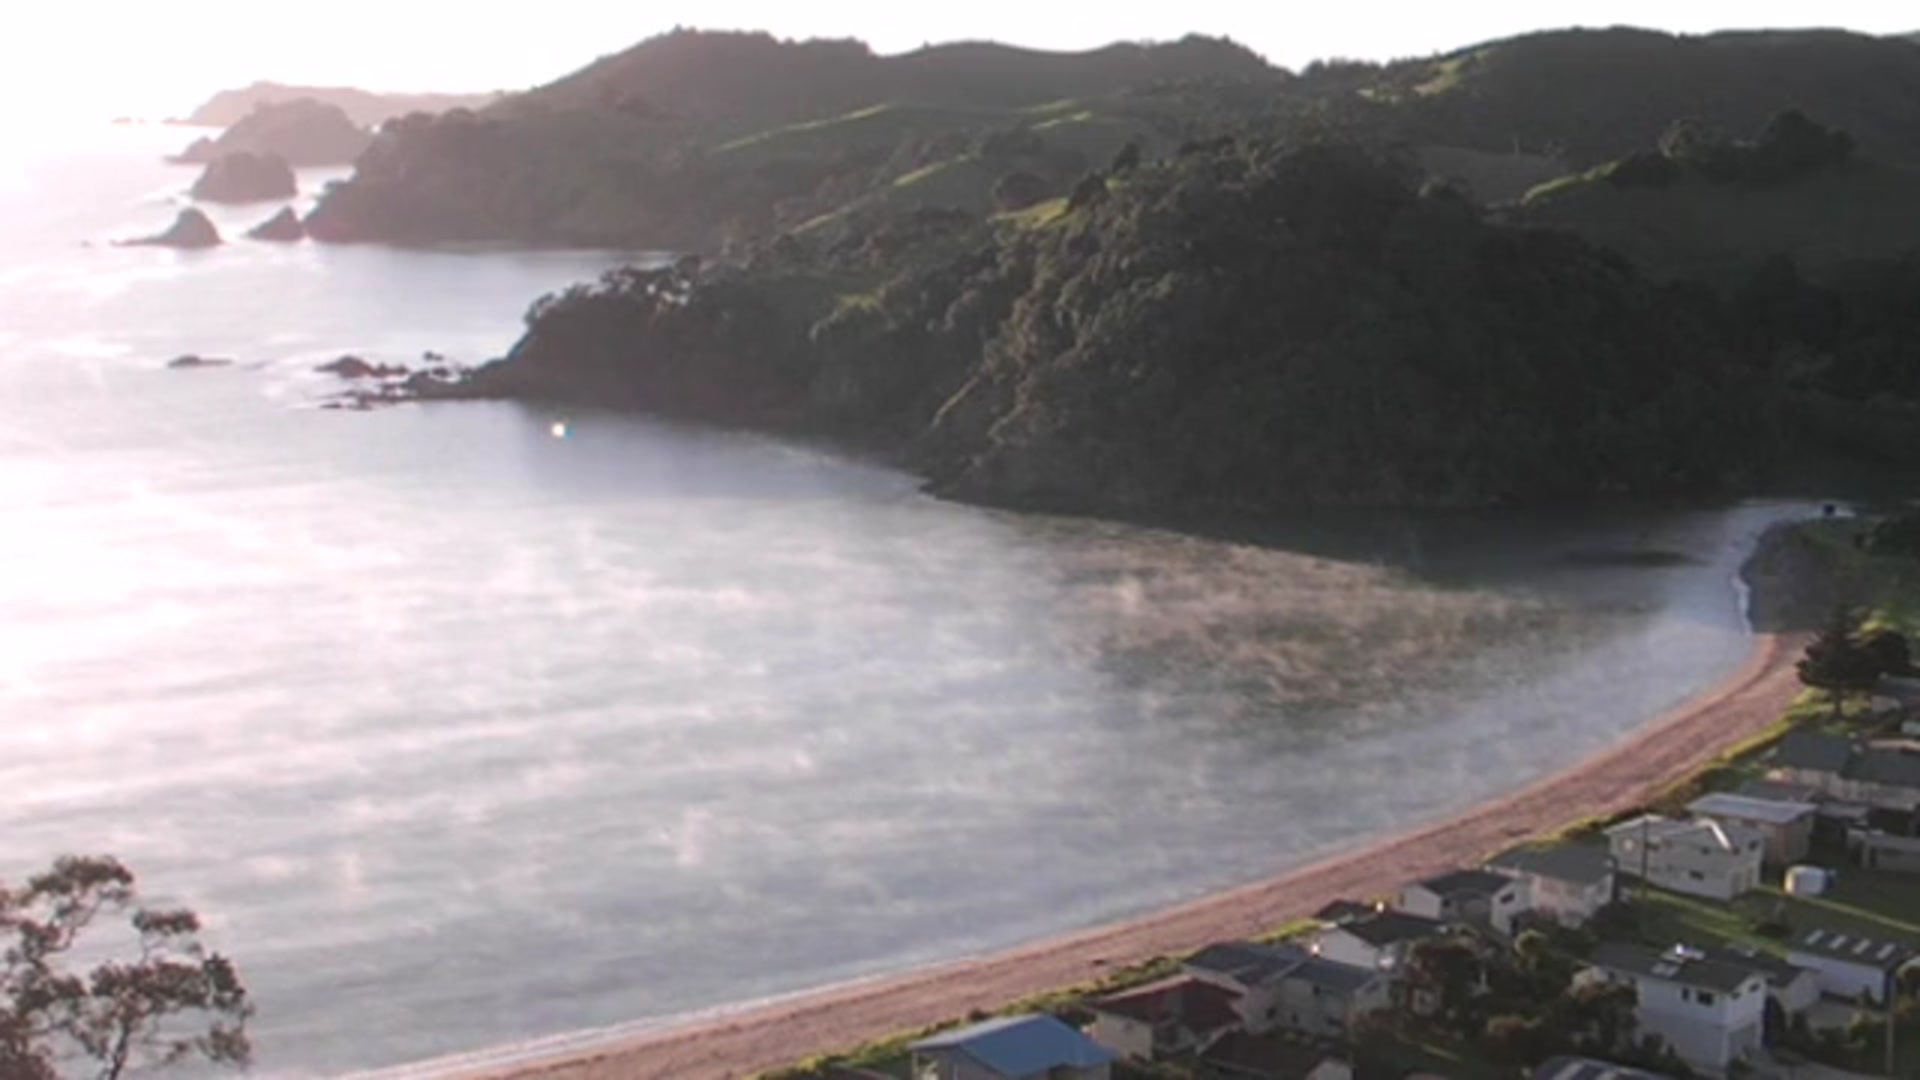
In this chapter, we delve into the captivating world of atmospheric perspective, a crucial technique for infusing your landscape paintings with genuine depth. Join me at the breathtaking Teal Bay in Northland, New Zealand, where the natural beauty of the scene provides the perfect backdrop for our exploration. Over the course of this lesson, you'll learn how to effectively convey distance and softness, transforming your paintings into immersive experiences. We'll focus on how atmospheric perspective can make elements like distant hills appear far away and bathed in light, enhancing the overall realism and mood of your work. This rewarding subject not only challenges your skills but also enriches your understanding of how light and air interact in a landscape. With over three hours of painting instruction distilled into a concentrated 30-minute session, accompanied by comprehensive lesson notes, you'll have all the tools you need to master this technique. Let's embark on this artistic journey together and unlock the secrets of creating paintings that truly resonate with depth and atmosphere.
This guide accompanies the full video lesson. The lesson includes the complete narrated video, the printable PDF chapter, and personalised critique support.
Observe how distant objects, like hills, appear lighter and more like the color of the sky. This is due to atmospheric perspective, where distant objects seem less distinct and bluer.
Understand Light Filtering
Acknowledge that sunlight contains all colors of the spectrum. As it travels through the atmosphere, it filters out some yellow and red colors, leaving more blue and purple hues.
Visualize Atmospheric Layers
Imagine layers of atmosphere like veils or a series of railway tracks extending to the horizon. These layers increase in number towards the horizon, making distant objects appear lighter and less distinct.
Pro tipConsider the increasing atmospheric layers as you paint distant landscapes to achieve realistic depth.
Atmospheric perspective is a powerful tool in landscape painting, allowing you to create depth and convey the illusion of distance. Begin by understanding how distant objects appear lighter and more like the sky due to the layers of atmosphere. Recognize the effect of the sun's position on light and color, and use this knowledge to add warmth and depth to your scene.
As you progress, focus on observing values and mixing colors accurately. Use a value chart and scale to train your eye and ensure your colors reflect the natural tones of your subject. Prepare your palette with a simple selection of colors to maintain harmony, and always mix atmospheric colors to enhance the sense of distance.
When applying paint, start with the darkest values and gradually build up lighter tones. Use brushwork to create smooth transitions and capture the essence of the scene rather than every detail. By incorporating atmospheric and linear perspective, you can achieve a painting that feels both realistic and expressive, with a strong sense of depth and atmosphere.
Points to remember
Use atmospheric perspective to create depth and softness in landscapes.
Consider increasing atmospheric layers for realistic depth in distant landscapes.
Everything gets lighter and warmer the closer it gets to the sun.
Use a value chart to improve your ability to judge lightness or darkness accurately.
Add more atmospheric color for each hill further in the distance.
Start with the horizon line to maintain accurate perspective and depth.
Use a simple palette to maintain color harmony.
Mix atmosphere color into tree shadows to reflect the sky and add depth.