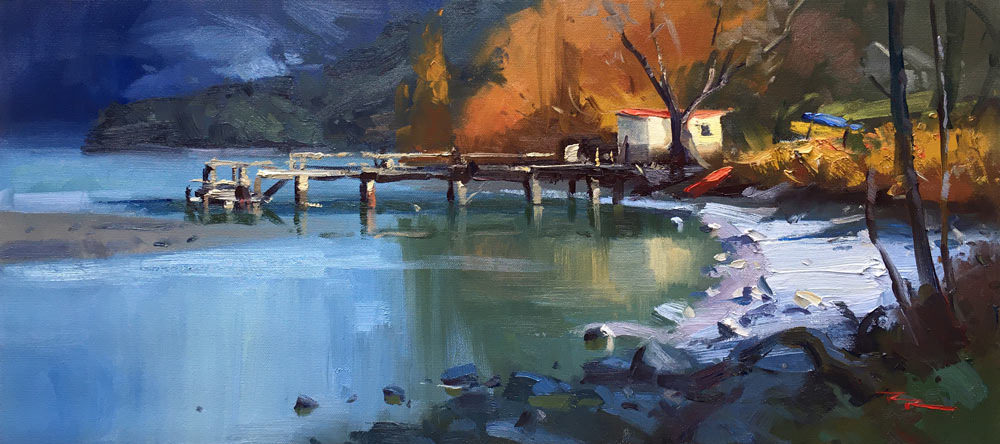
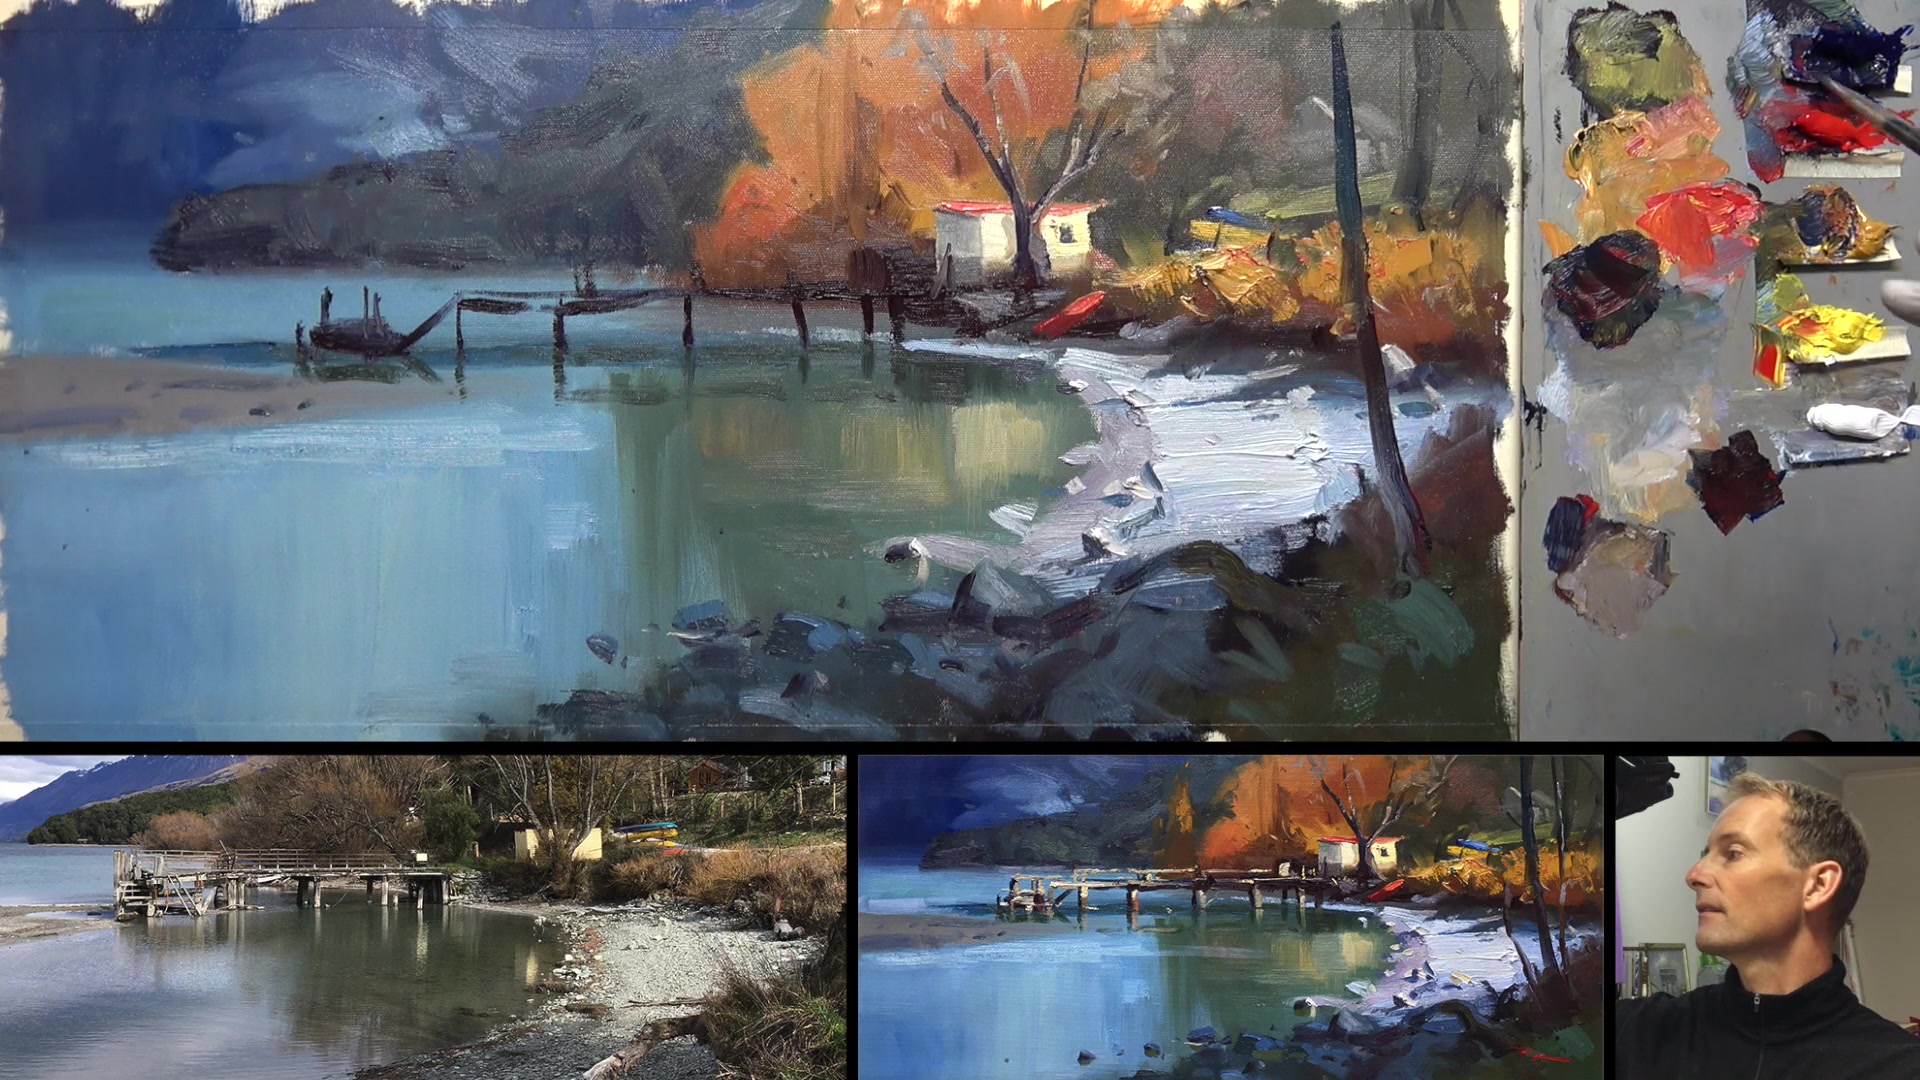
Join me as we embark on a creative journey to capture the enchanting beauty of a lakeside scene in New Zealand. With a 12 by 24 inch Frederick's Ultra Smooth Canvas as our starting point, we'll explore the vibrant world of impressionistic painting. Using M. Graham & Co oils, including ultramarine blue, cadmium red, yellow ochre, cadmium yellow light, and plenty of titanium white, we'll bring this light-filled landscape to life. Our tools will include a variety of brushes, primarily size 12 bristle flats, a rigger for fine details, and a synthetic flat for those finishing touches. To begin, we'll sketch out the scene with a touch of Gamsol. This chapter will guide you through designing an inviting composition and painting with freedom, employing a range of fun techniques. Whether you're stuck indoors or simply seeking a new artistic challenge, this lesson offers a rewarding opportunity to enhance your skills and enjoy the process of painting a colorful, impressionistic masterpiece. Let's dive in and create something beautiful together.
This guide accompanies the full video lesson. The lesson includes the complete narrated video, the printable PDF chapter, and personalised critique support.
Mix a neutral gray and use a large brush to build up the lights on the dock. Avoid going straight for the strongest lights to maintain variety and depth. Ensure the base of the light poles is slightly lower than the dark ones behind them for accuracy.
Enhance with Lighter Tones
Add some white and a little yellow ochre to your mix for lighter tones. Apply these lighter tones with the edge of a big brush to create chunky, painterly strokes that stand out against the dark background.
Maintain a Painterly Style
Avoid creating a uniform picket fence look by varying your brush strokes. Aim for a variety of textures and avoid repetitive dabbing to keep the painting dynamic and interesting.
Pro tipUse the edge of a big brush to achieve chunky, painterly strokes for added texture and interest.
Embark on your painting journey by immersing yourself in the vibrant scenery of Kinloch, capturing its essence through photo editing to enhance your references. Begin with an initial sketch, focusing on the big shapes and ensuring an interesting composition by avoiding central placements. Pay attention to the light and shadow play across the scene, setting the stage for a dynamic painting.
As you block in the background, use a playful approach with your brush and palette knife to establish foundational colors and textures. Gradually build up the scene by adding reflections and shadows, using vertical strokes to create realistic water effects. Introduce warm autumn colors and subtle contrasts to bring life and depth to your painting.
In the final stages, focus on adding texture and detail with chunky paint and varied brushstrokes. Use a palette knife for dynamic effects, and ensure your colors remain vibrant by cleaning your brushes regularly. Add final touches to the trees, rocks, and reflections, maintaining interest and variety throughout your composition. Let your personal style shine through as you incorporate techniques from artists you admire.
Points to remember
Boost saturation in photos to capture vibrant colors.
Break curves into straight angles first for easier sketching.
Avoid glare by painting in the shade and wearing a black top.
Use vertical down strokes for realistic water reflections.
Keep darks thin to prevent muddiness when layering colors.
Start with dark colors and lighten them to avoid muddiness.
Ensure vertical strokes for reflections to maintain water's surface.
Mix paint directly on the canvas for dynamic textures.