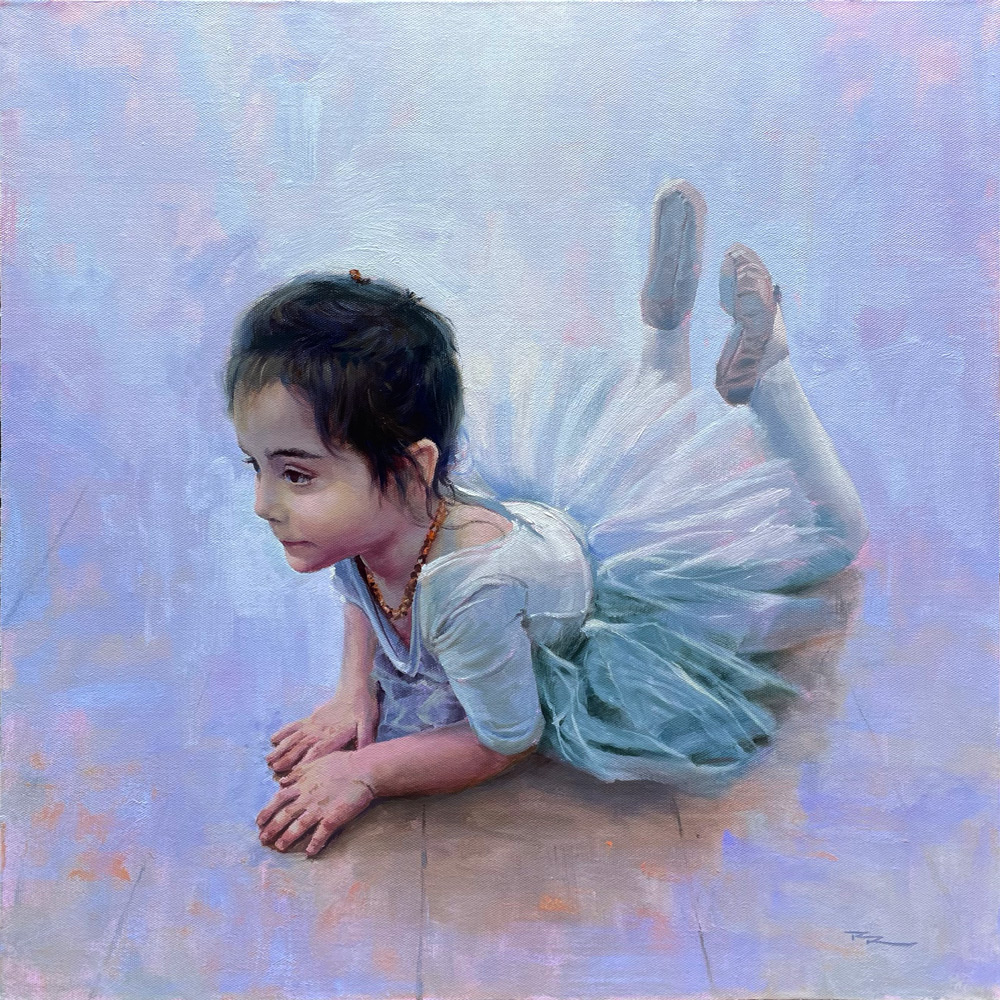
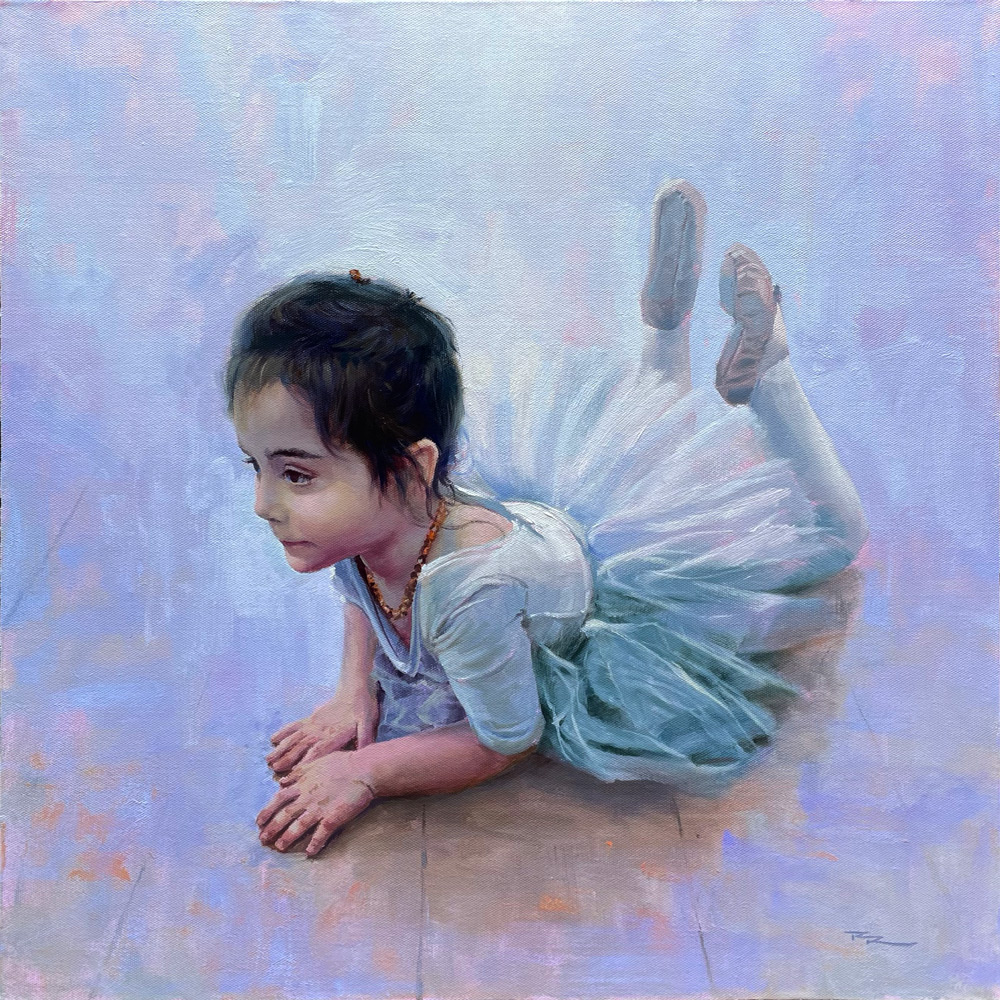
'Ballerina' 21x21" Oil on Canvas
This one's a little different for me! I used to paint in a methodical layer by layer style building detail meticulously over time, but that was nearly 30 years ago. It was great to get back to this actually and really knuckle down and hone my visual skills. The slow pace was very meditative. Put on some nice music or an audiobook and settle in for some zen time.
Here's the process:
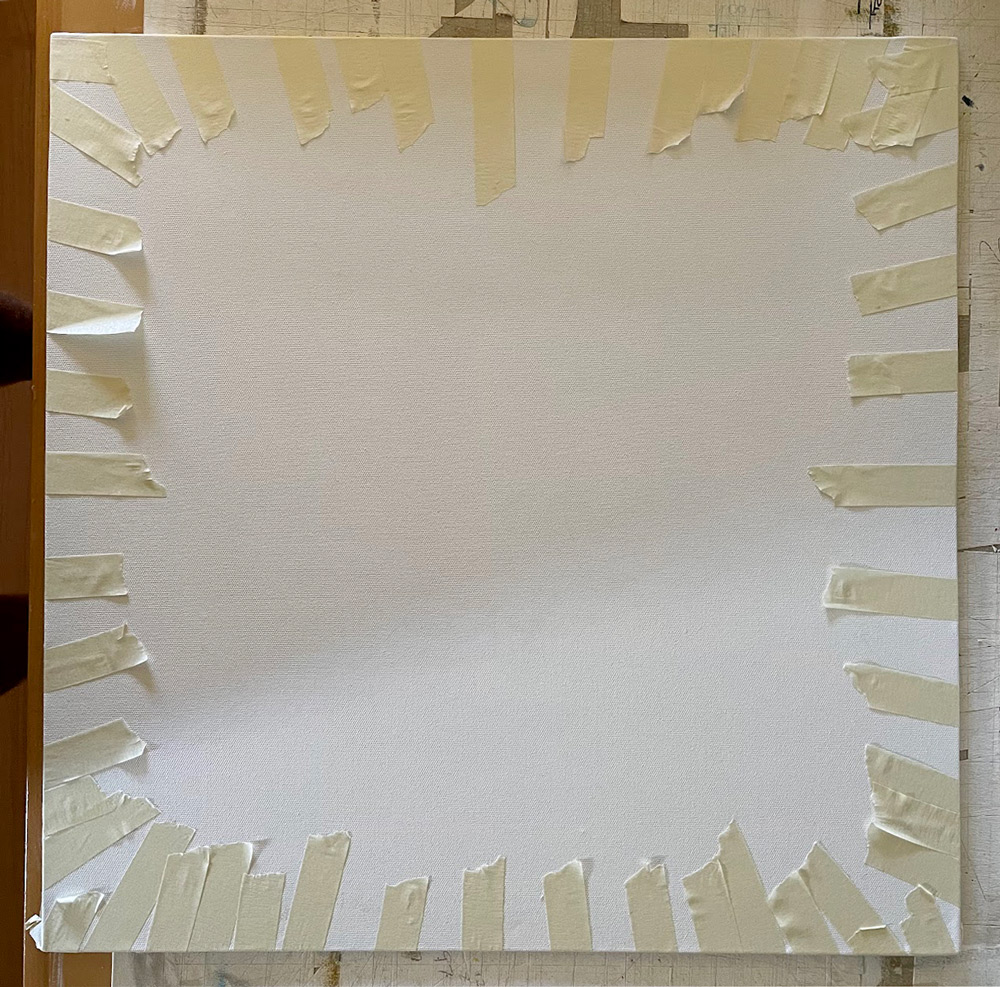
Preparing the canvas
First of all I prepared a 21x21" MDF board over a few days by coating it with 3 layers of white acrylic undercoat on both sides, including the 3mm sides. That's to keep moisture out of the wood and avoid swelling in the future. Next I glued the Fredrix Ultrasmooth Canvas to the board with PVA glue, which is acid-free, brush it onto the board and canvas, then stretching the canvas taught with masking tape. The canvas wraps an inch onto the back. I left that to dry weighted down with books so it didn't warp.
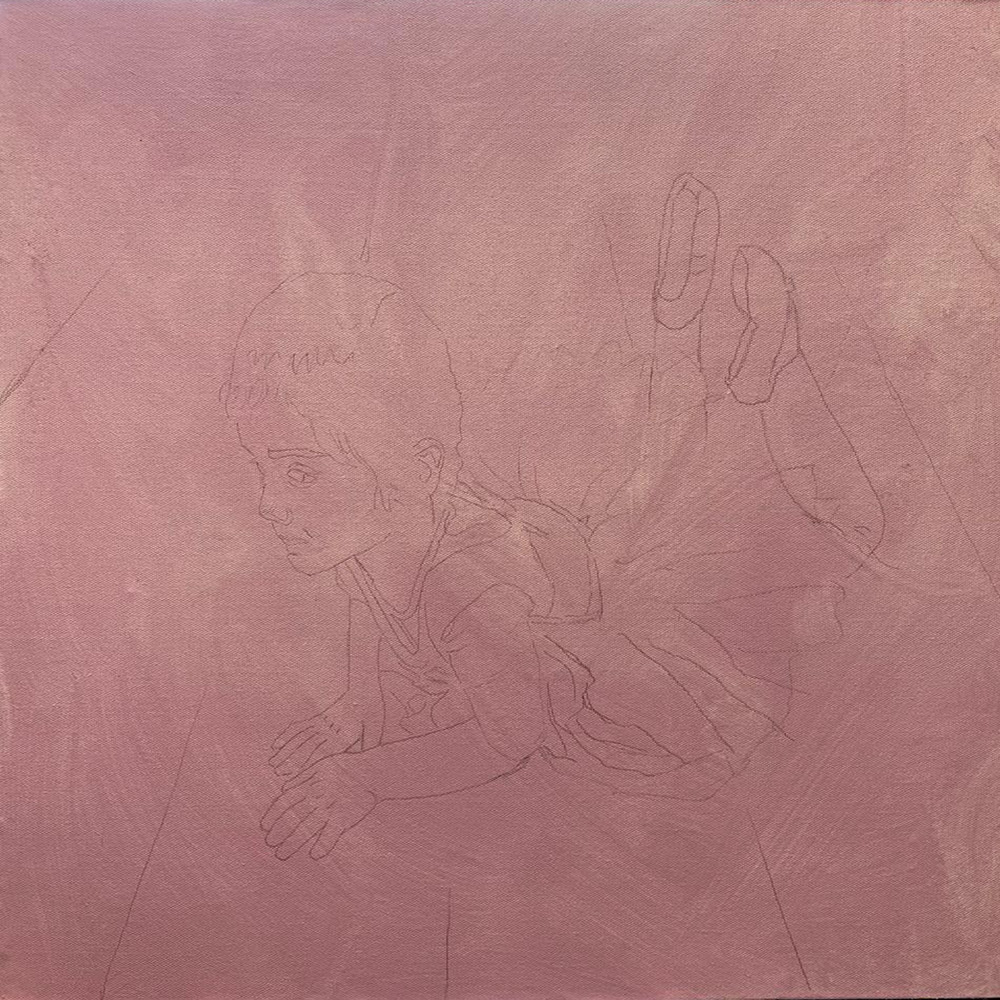
Undercoat and sketch
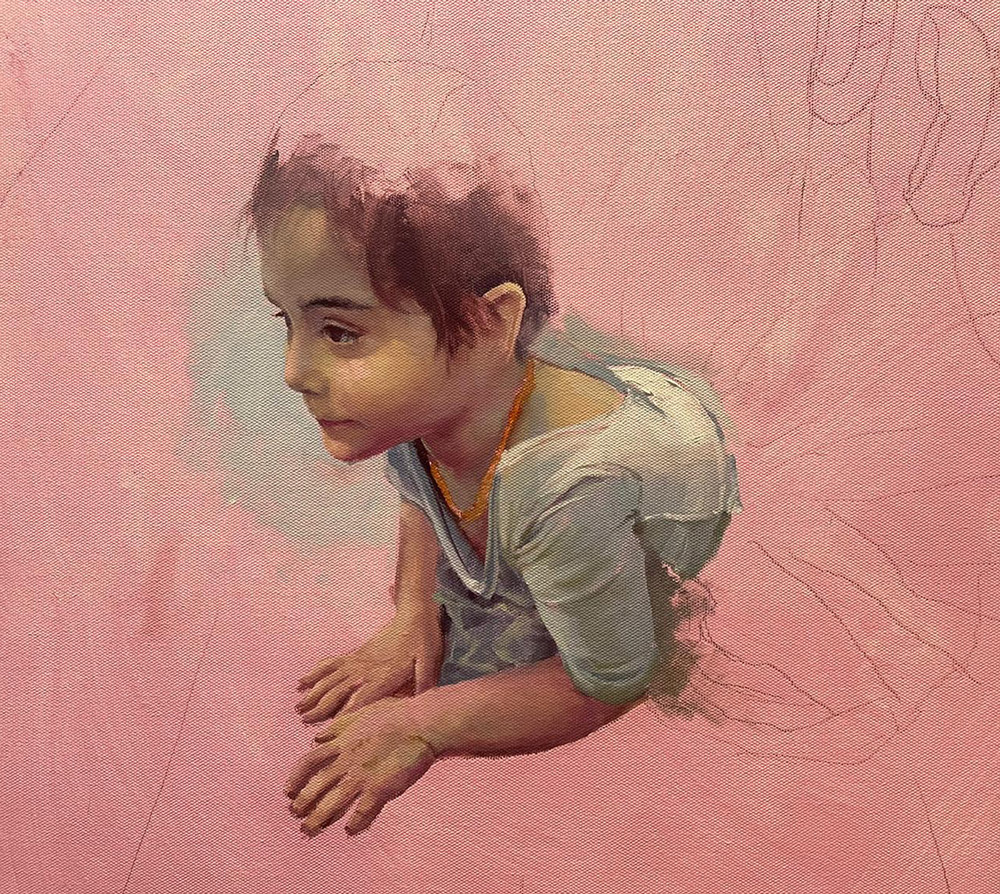
Next I coated the canvas in a wash of acrylic yellow ochre and cadmium red. When dry I projected the image onto the canvas and marked it on with a 2B pencil.
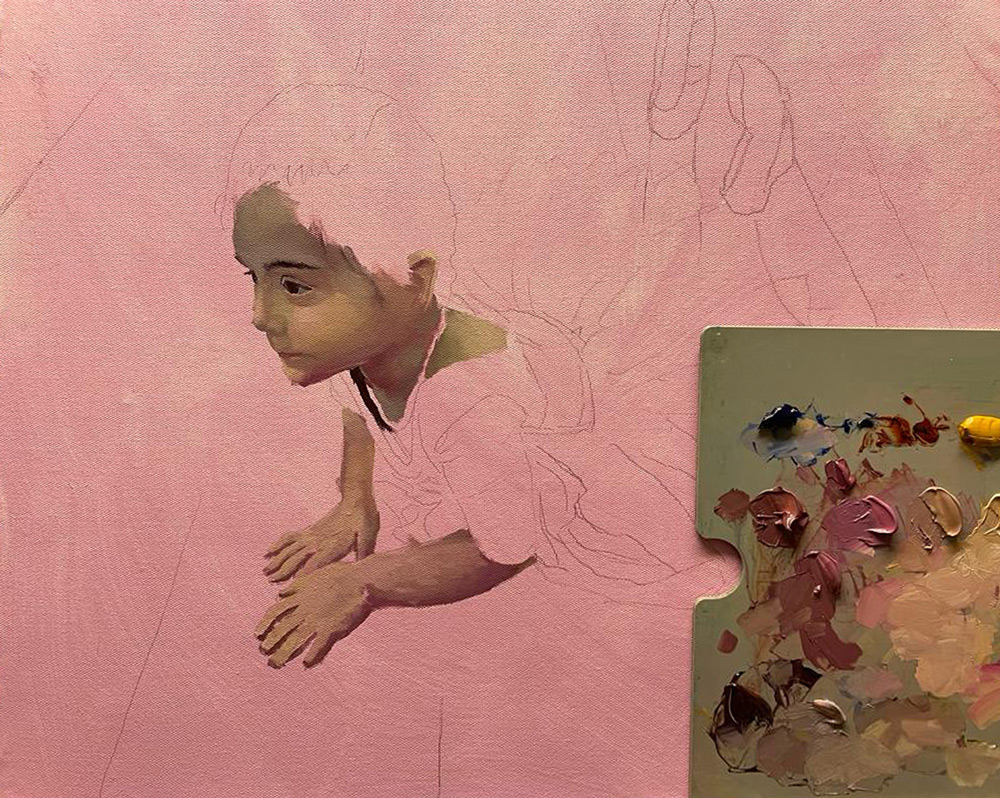
Block in
Starting with the face and hands I premxed a range of warm grays to block in the flesh tones. My palette was Ultramarine Blue, Burnt Sienna, Cadmium Red, Alizarine Crimson, Yellow Ochre, Cadmium Yellow Light and Titanium White. I used Alkyd Walnut Oil as the painting medium to keep it thin and dry fast. This stage is just the blockin so I was careful to not get carried away with details. I basically wanted to paint what I saw when I squinted at the photo - big soft shapes of colour.
Fleshing out
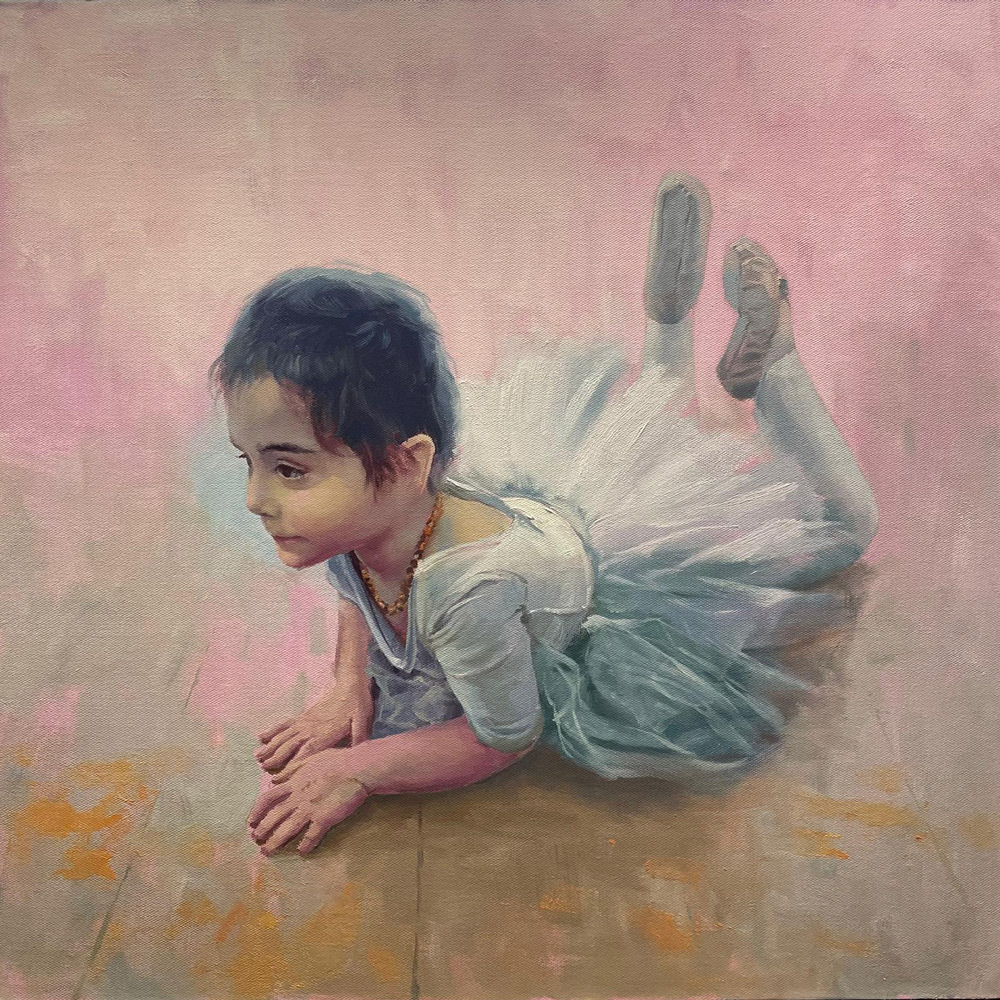
3 days later I gave the painted the work areas in a light coat of Alkyd Walnut Oil, rubbed thin with a cloth to moisten the area to paint over and also bring back the dark tones which tend to lighten a little when dried. I spent a lot of time just observing the subtle shifts in colours between areas and trying to replicate that in paint. I found that after 10 minutes of struggling it became much easier, it became intuitive rather than mathematical. I was using the same mixed piles on my palette as the previous session, but tweaking them as needed. The clothing flowed on quite easily with a simple grey mixture of Ultramrine Blue and Burnt Sienna and white, and a touch of cad yellow. Just dark and light variations of that basic grey green colour.
Background block in
The background was to be a cool blue grey, but I wanted the impressionistic shimmer of 'broken colour' there so I blocked in the whole background in warms of mostly the same value as what I wanted the final layer to be. Warm and cool colours shimmer next to each other if they are the same value.
Finishing touches
3 more sessions saw the background covered with energetic brushwork in cools, leaving little bits of the warm undercoat to peak through. The whole figure was treated to another coat of subtle adjustments and finer details. I was careful to contrast rough paint with smooth paint, sharp edges with lost edges, dark areas with light, cools with warms. During these final session I photographed the work often, flipping the photo in my phone to see the mirrored version. This helped me see it with fresh eyes.
I really enjoyed this more studied approach and will do more in the future. It's a very different vibe to bashing out a big painting outdoors in 3 hours, flying by the seat of my pants. It's slow, considered and meditative, with plenty of coffee breaks. So convivial! Give it a try!
Happy Painting,
Richard.
Login to your account to post a comment.