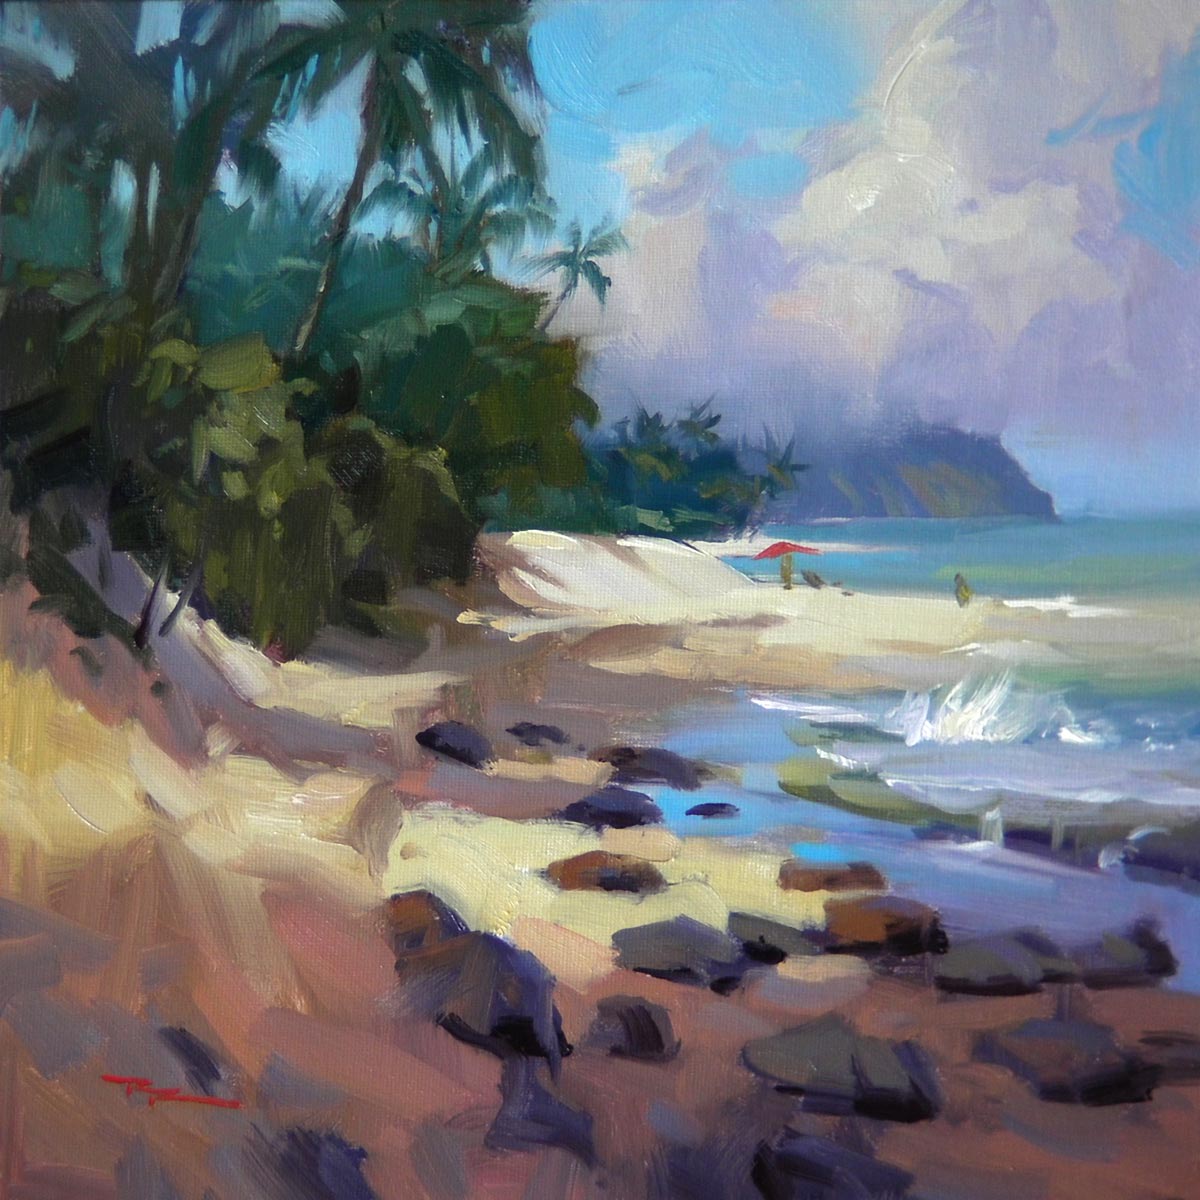
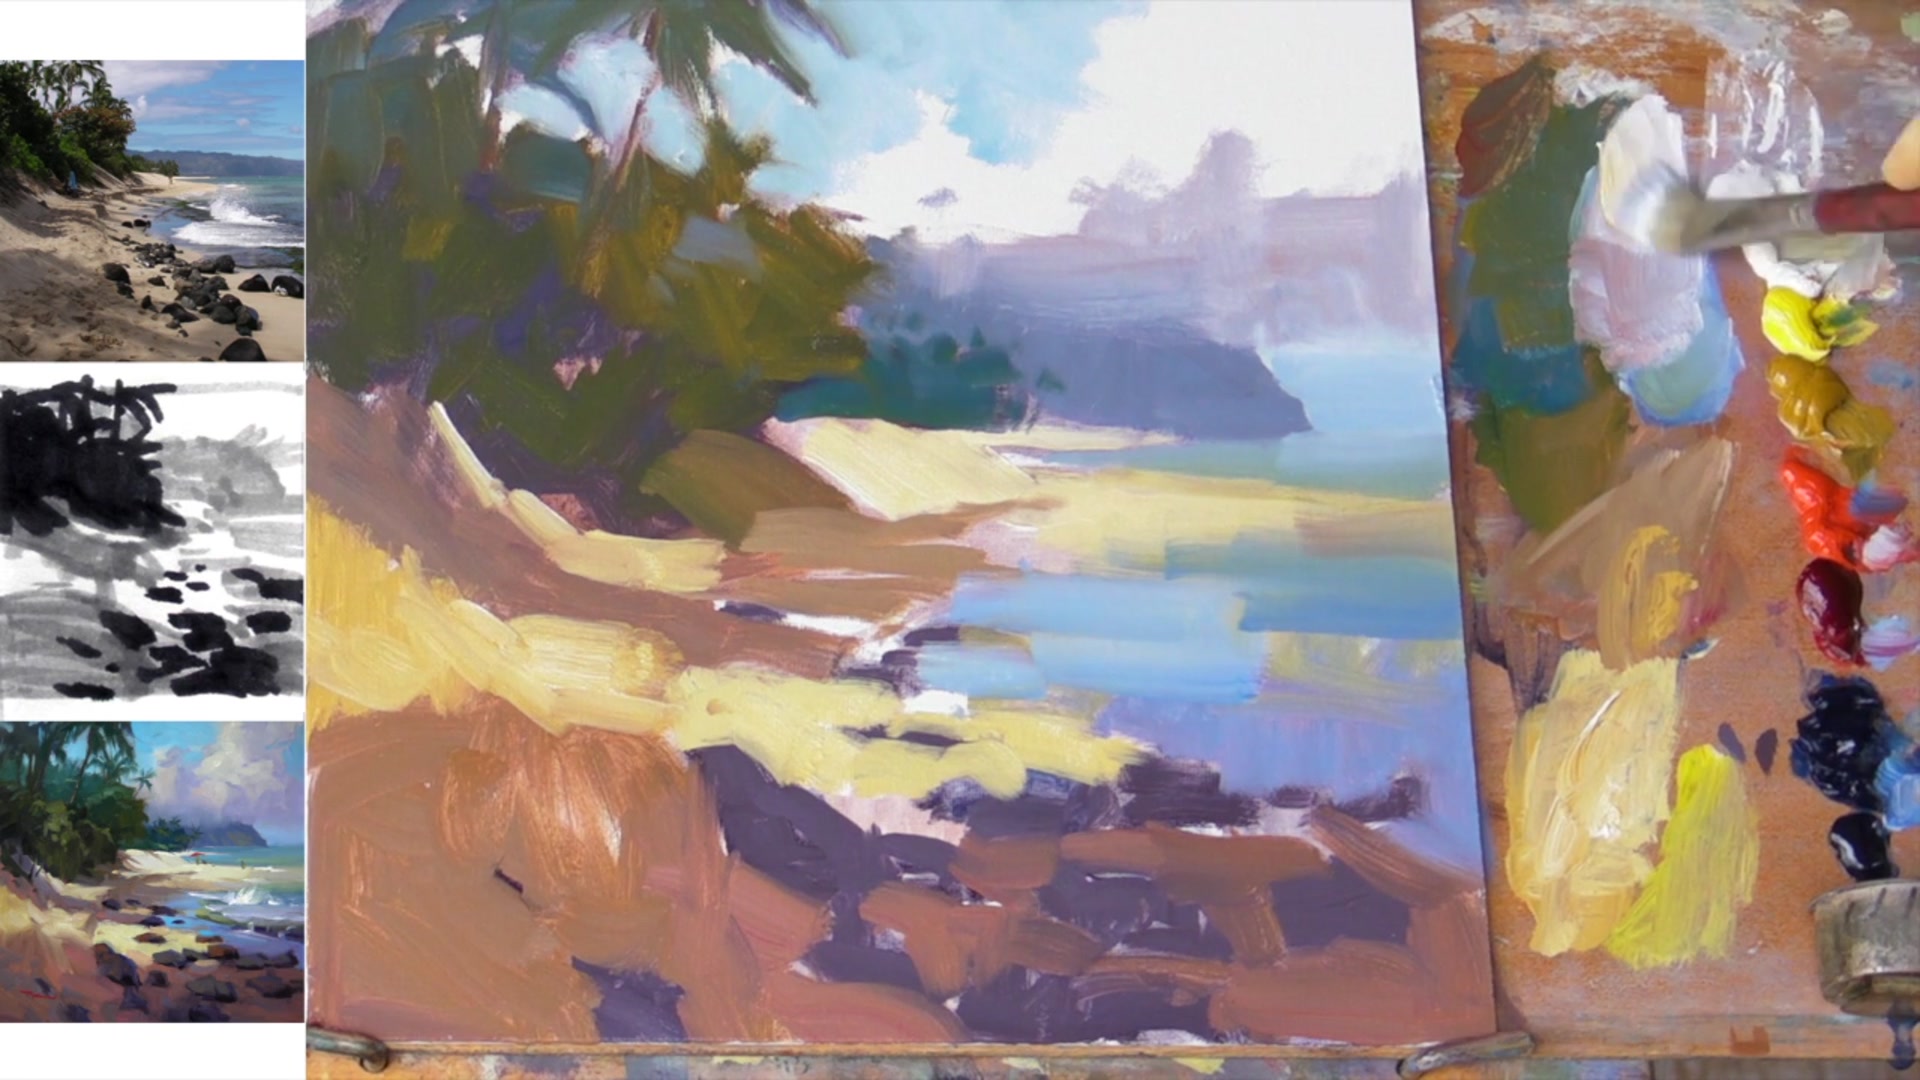
In this chapter, we dive into the vibrant world of Laniakea, a breathtaking tropical beach that offers a rich tapestry of color and contrast. As we embark on this painting journey, I'll guide you through the process of capturing the essence of this stunning scene on an 11-inch square canvas board. With my no tans at the ready for easy reference, and a selection of flat bristle brushes and softer ones for blending and detail, we'll explore the dynamic interplay of light and shadow. My trusty palette knife and walnut oil medium will help us achieve the desired texture and depth. You'll learn how to create richly colored shadows and discover my latest technique for infusing your brushwork with more dynamism. By pausing the video at moments where the waves captivate you, and utilizing additional reference photos, you'll be equipped to capture the movement and intricate details of the waves. This scene is a rewarding subject that will enhance your skills and bring the beauty of Laniakea to life on your canvas.
This guide accompanies the full video lesson. The lesson includes the complete narrated video, the printable PDF chapter, and personalised critique support.
"Laniakea" 11x11" Oil on Canvas by Richard Robinson
Step 11Painting clouds
Create Cloud Shapes
Invent some clouds using a cool grey color. Focus on creating soft edges to give the clouds a natural appearance.
Add Warmth to Halftones
Warm up the color slightly as you move into the halftones of the cloud. This adds depth and dimension to the cloud structure.
Use a Three-Value Structure
Keep the clouds simple and blocky by using a three-value structure. Start with a cool gray for the shadow side, a slightly warmer mid-value, and a much lighter and warmer light value.
Manage Edges
Pay attention to the sharp and soft edges of the clouds. This will enhance the realism and softness of the cloud forms.
Pro tipUse a three-value structure to keep clouds simple and blocky, enhancing their dimensionality.
Embark on your painting journey by selecting reference materials that capture the essence of the scene you wish to portray. Whether it's the mesmerizing movement of waves or the vibrant colors of nature, these references will guide you in capturing realistic details. As you paint, remember that working outdoors allows you to perceive colors more accurately than photographs, offering a true representation of natural light.
Begin your composition by blocking in major shapes with a thin purple mixture, ensuring a balanced scene with a straight horizon and accurately drawn beach angles. As you progress, distinguish between light and dark areas, keeping your darkest darks slightly lighter to maintain vibrant shadow colors. Use a variety of colors and brush techniques to create depth and dimension, from the sunlit sands to the lush foliage and reflective waters.
In the final stages, focus on adding variation and details that bring your painting to life. Soften edges where needed, introduce warm reflected lights, and ensure your clouds and foliage have depth and realism. Pay attention to the finer details, such as the texture of rocks and the dynamic movement of foam, to create a cohesive and engaging composition. Finish with thoughtful touches that enhance the vibrancy and scale of your scene, and don't forget to sign your masterpiece.
Points to remember
Use reference materials to capture realistic details.
Painting outdoors helps capture true colors more accurately.
Accurately capture angles where water meets sand.
Keep darkest darks slightly lighter for vibrant shadows.
Keep sunlit sand color away from cool darks to prevent muddiness.
Squint to observe broad shapes and transfer them to canvas.
Maintain a gap between sky and dark areas to avoid muddy colors.
Use a three-value structure for clouds to enhance dimensionality.