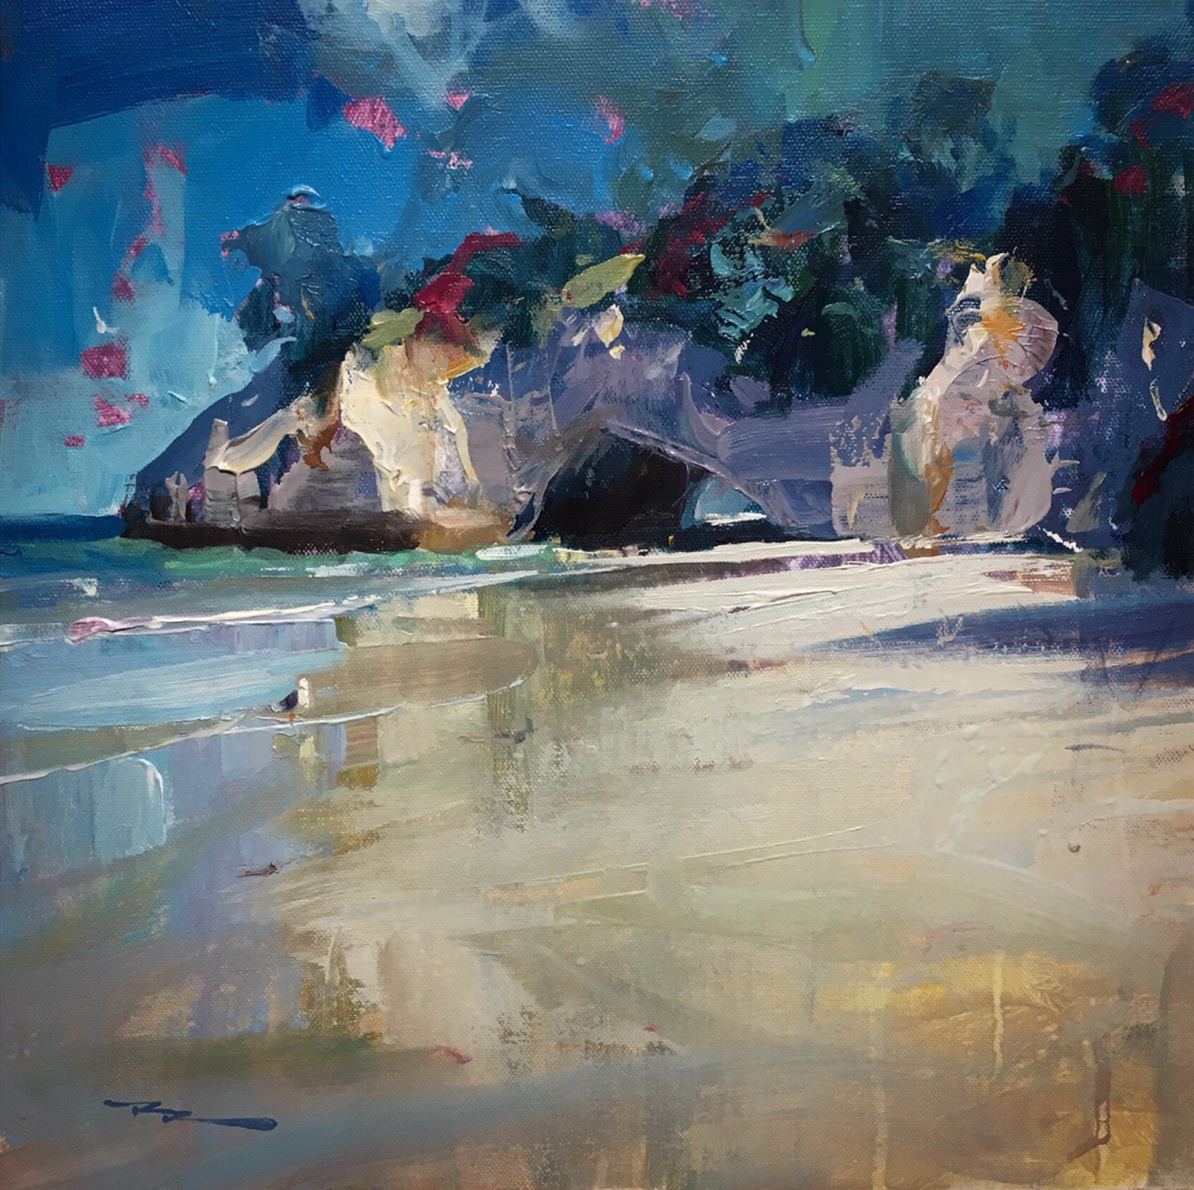
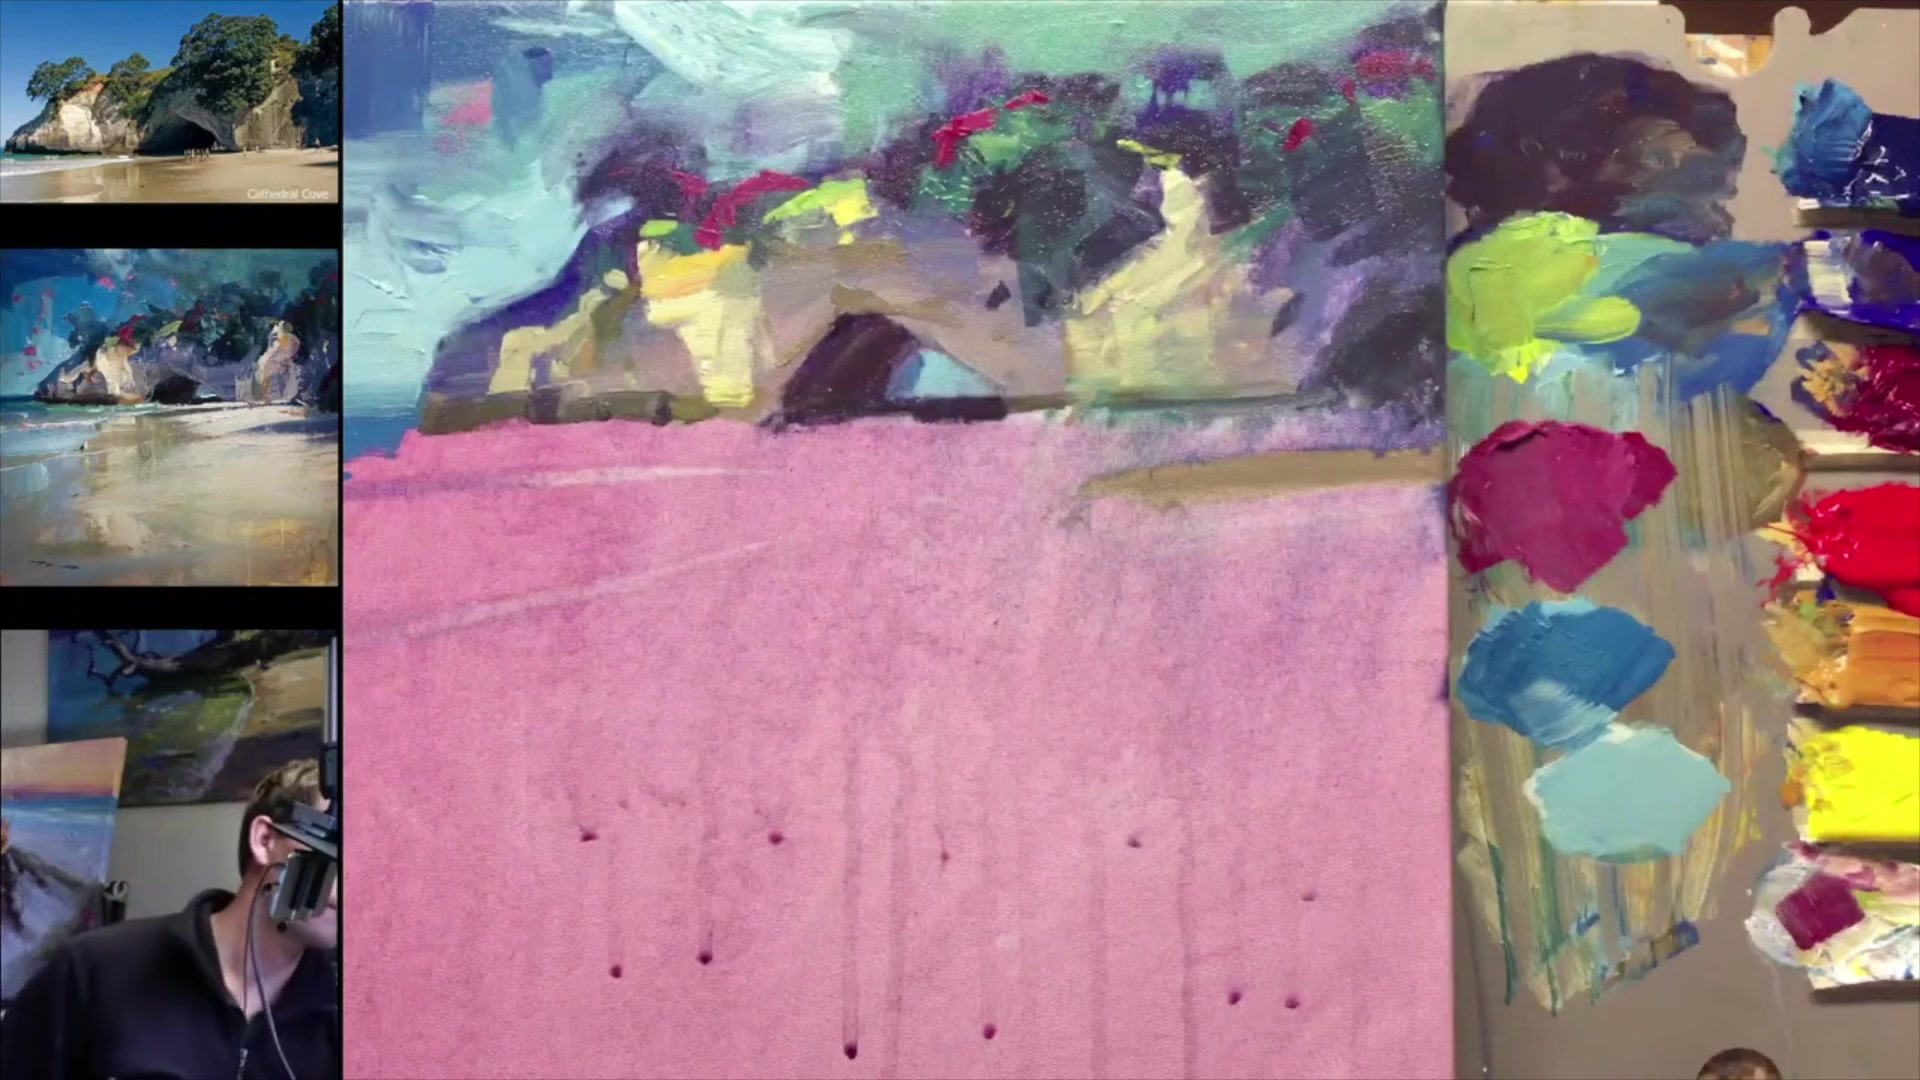
In this chapter, I invite you to join me on a journey to Cathedral Cove, a stunning natural wonder that offers a perfect blend of challenge and inspiration for any painter. We'll focus on loosening up our painting techniques, a task that's often easier said than done. Together, we'll explore the five keys to achieving a fresh, painterly look without losing the essence of realism. This lesson is designed to be interactive and engaging, as it includes a pre-recorded livestream with student questions and answers. You'll have the opportunity to paint along with me, stroke by stroke, and you can pause and replay the session as needed. We'll delve into creating expressive and abstract brush strokes using acrylics, testing just how gestural and painterly we can get. As we transition from smaller to larger canvases, we'll adjust our brush sizes and paint quantities to maintain that expressive quality. So, grab your favorite beverage and a cookie, and let's enjoy the experience of a live workshop together!
This guide accompanies the full video lesson. The lesson includes the complete narrated video, the printable PDF chapter, and personalised critique support.
Combine phthalo blue, bright yellow, and white to create a vibrant turquoise color. These colors are close on the color wheel, resulting in a punchy and beautiful turquoise for the water.
Maintain Clean Color Piles
Keep your color piles clean by avoiding dipping back and forth into mixed colors. This prevents all colors from blending into the same shade and maintains vibrancy.
Add Waves with Impasto Technique
While the paint is still wet, use white paint to create waves with an impasto technique. This will cast its own shadow, adding a 3D effect to the waves.
Pro tipUse impasto technique with white paint to create waves that have a natural 3D effect.
Embark on your painting journey by embracing gestural strokes and expressive brushwork. Begin with a magenta wash to set a vibrant undertone, then sketch the composition with an eye for the scene's big shapes and natural curves. As you block in the darks, remember to keep your acrylics moist and workable, establishing a strong tonal foundation for your piece.
As you progress, explore the infusion of light and color variations. Use complementary colors to mix vibrant grays and allow natural blending on the canvas for painterly effects. Maintain texture and vibrancy by letting some canvas show through and using a variety of brushes and techniques to add depth and interest.
In the final stages, focus on adding shadows, light balance, and reflections to bring your painting to life. Use impasto techniques to create dynamic waves and reflections, and employ a palette knife for intriguing textures. Balance gestural strokes with detailed work to achieve a harmonious blend of abstraction and realism.
Points to remember
Upsize brushes and paint quantity on larger canvases to maintain expressiveness.
Use a thin magenta wash as an undertone to enhance blues and greens.
Ensure the line at the base of the rocks has a slight curve to depict the beach's slope.
Use complementary colors instead of black to mix more colorful grays.
Allow some canvas to show through for color vibration and added interest.
Use a new brush when changing major color areas to keep colors clean and vibrant.
Spray acrylics with water regularly to keep them workable and maintain soft edges.
Use a palette knife to add texture and depth to your painting, enhancing its visual interest.