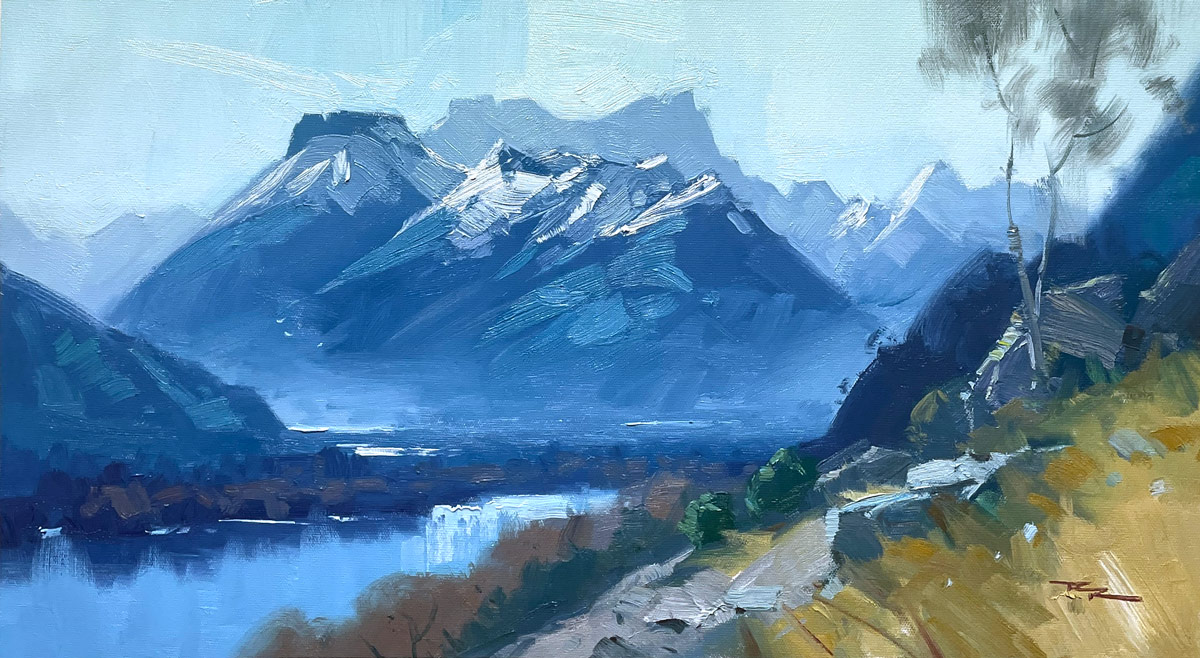
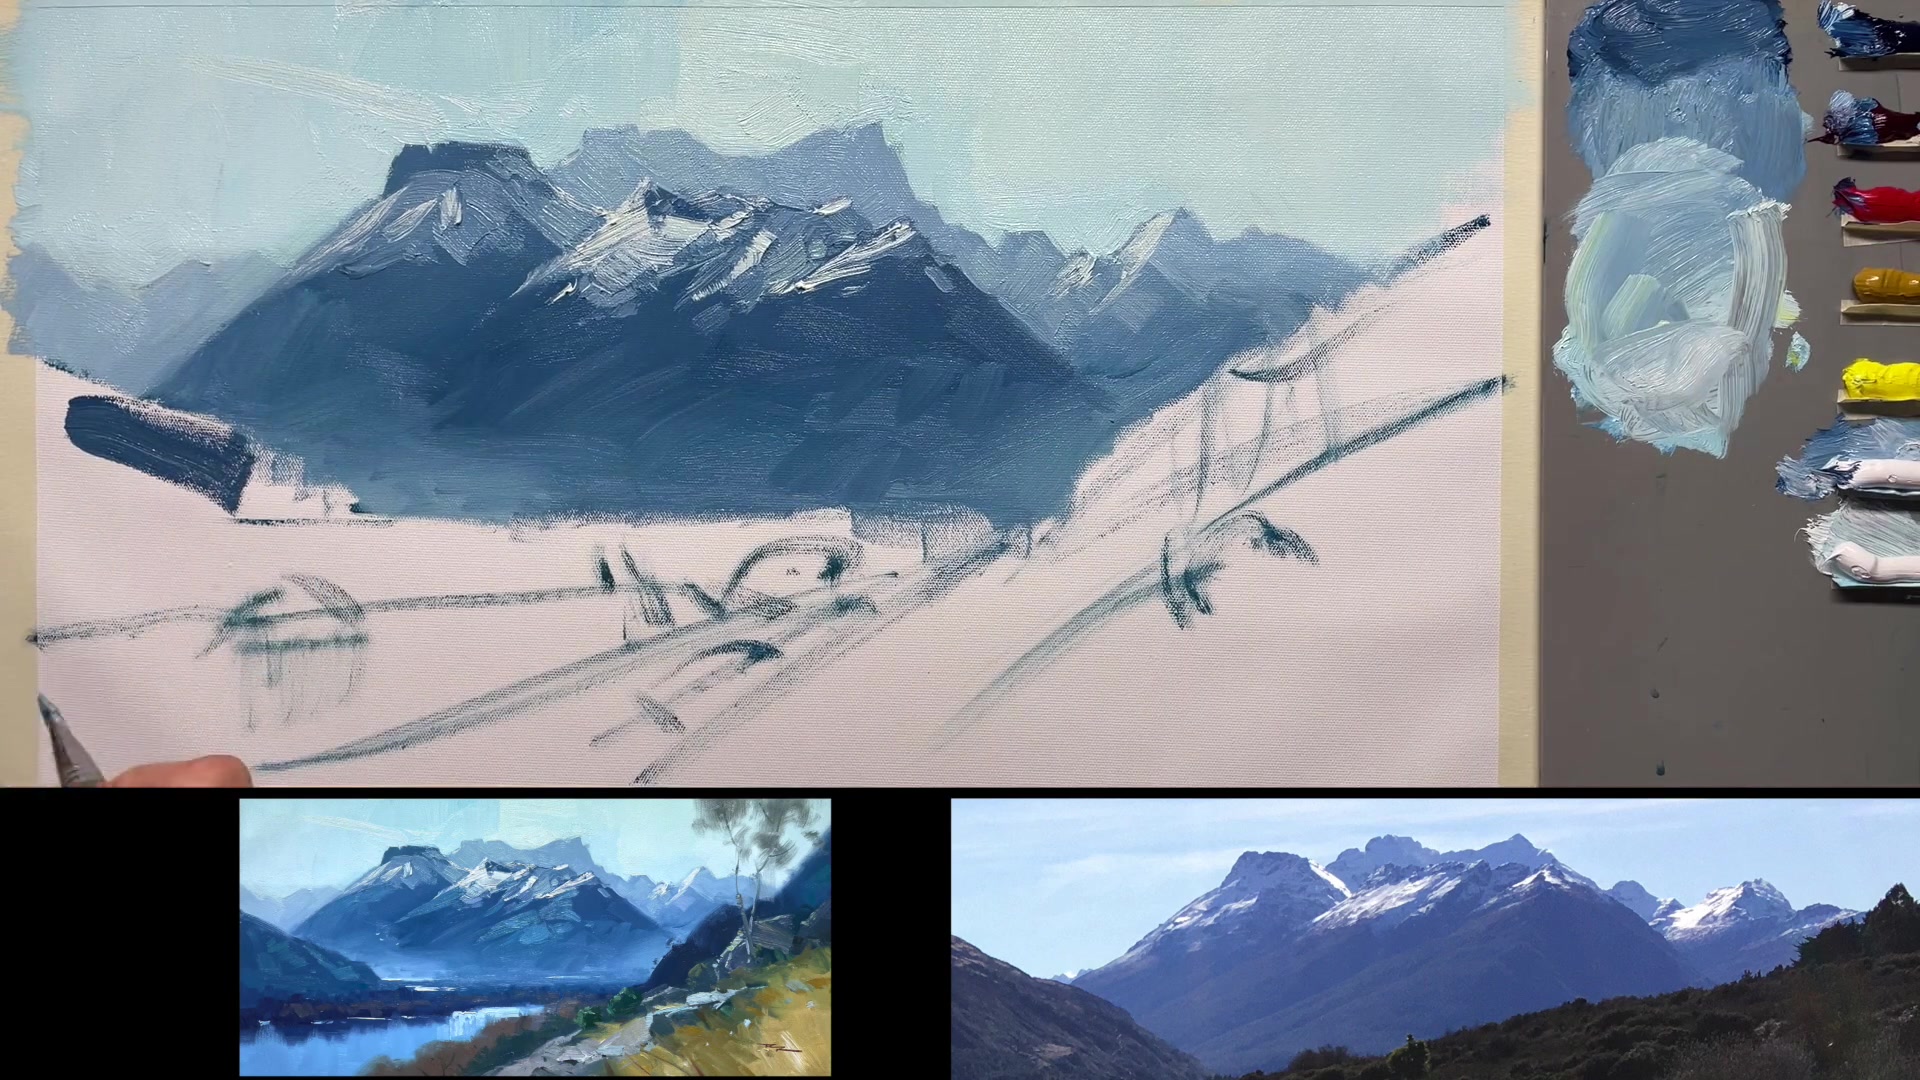
As we embark on this painting journey together, I'm excited to guide you through capturing the majestic beauty of Mount Earnslaw, a stunning alpine scene from New Zealand. With a 12 by 24 inch Fredericks ultra smooth canvas secured, we'll dive into the process using M. Graham oils and a selection of Rosemary & Co long flats, synthetics, and bristles from my painting brush set. To enhance the flow of our paint, I'll incorporate walnut oil as our medium. This chapter will teach you how to create dynamic movements of light and depth, achieve soft-edged brushwork, and add sparkling impasto highlights that bring the scene to life. We'll focus on good design, accurate drawing, and passionate brushwork, employing a variety of enjoyable techniques. Starting with sketching the horizon line, you'll learn to arrange the big shapes that form the main elements of your composition, ensuring a harmonious balance with additional details like trees. Whether you're using oils or acrylics, this lesson promises to be a rewarding exploration of both technique and creativity.
This guide accompanies the full video lesson. The lesson includes the complete narrated video, the printable PDF chapter, and personalised critique support.
Start with the mountain color by mixing blue, red, and a little crimson. Add white and a touch of yellow ochre to lighten it. Be cautious with yellow, as too much will create a green hue that brings the mountain forward.
Adjust and Apply Color
Test the color on the mountain. If it's too dark, add more white and a little red to tone it down. Aim for a soft integration of light from the snow into the foliage.
Refine Mountain Shapes
Work softly into the mist, considering the large shapes you're creating. Ensure the light flows naturally from the snow to the foliage. Break any lines that appear too straight or man-made to maintain a natural look.
Pro tipBe mindful of adding too much yellow ochre, as it can make the mountain color appear too green and push it into the foreground.
Embark on your painting journey by establishing a strong foundation with a well-thought-out composition. Begin with a clear horizon line and sketch the major shapes that will define your scene. As you block in the mountains, focus on capturing the essence of their forms with broad strokes, leaving the finer details for later. This approach allows you to build a cohesive and balanced landscape.
As you progress, pay attention to the interplay of light and shadow to create depth and realism. Use a variety of colors to depict atmospheric perspective, and carefully layer your paints to capture the subtle nuances of reflected light and snow. Remember to keep your brush clean and your colors pure, especially when working on snow and highlights, to maintain the vibrancy and clarity of your painting.
In the final stages, integrate foreground and background elements seamlessly, using soft transitions and varied edges to enhance the natural look of your scene. Add the finishing touches with careful attention to detail in foliage, water reflections, and rock textures. These final accents will bring your landscape to life, capturing the majestic beauty of Mount Earnslaw.
Points to remember
Start with the horizon line to anchor your composition.
Focus on blocking in big shapes first; details can be refined later.
Use a color very close to the sky for distant mountains to create atmospheric perspective.
Use a clean brush for snow to avoid contaminating the white with underlying dark colors.
Vary the edges of the mountains to avoid a paper cutout look.
Avoid diagonal brush strokes in the water reflections to prevent the appearance of a tilted water plane.
Use soft edges to depict willow trees, creating a natural transition in the foliage.
Avoid over-mixing colors to allow for natural variations and happy accidents in your painting.