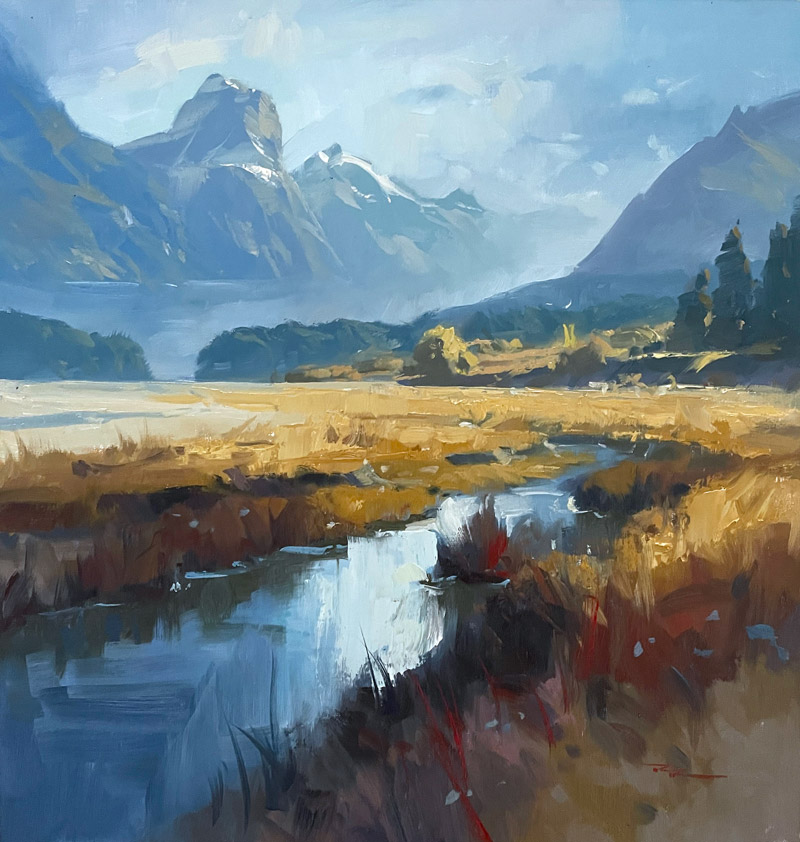
In this chapter, we embark on an artistic journey through the breathtaking Paradise Valley in New Zealand, a scene that offers a wealth of inspiration for any painter. As we explore this majestic landscape, I'll guide you through five essential techniques to master the art of painting mountains. We'll start by focusing on the unique shapes of each mountain, moving away from the common mistake of repetitive triangles, and instead, capturing their distinct character. You'll learn to exaggerate the steepness and height for dramatic effect, a technique employed by many great mountain painters. We'll delve into the subtleties of atmospheric perspective, where distant mountains blend with the sky, and I'll show you how to achieve the perfect balance of warm and cool colors to create depth. Adding mist at the mountain bases will enhance this depth, introducing a touch of mystery and romance. Our brushwork will be crucial, with flat strokes in the distance and bolder ones in the foreground to amplify scale. Finally, we'll use spotlights to highlight key areas, adding drama and interest. This lesson is suitable for oils or acrylics and designed for intermediate to advanced painters. Let's paint together, one brushstroke at a time, and unlock the expressive potential of this stunning landscape.
This guide accompanies the full video lesson. The lesson includes the complete narrated video, the printable PDF chapter, and personalised critique support.
"Paradise Valley" 19x20" Oil on Linen by Richard Robinson
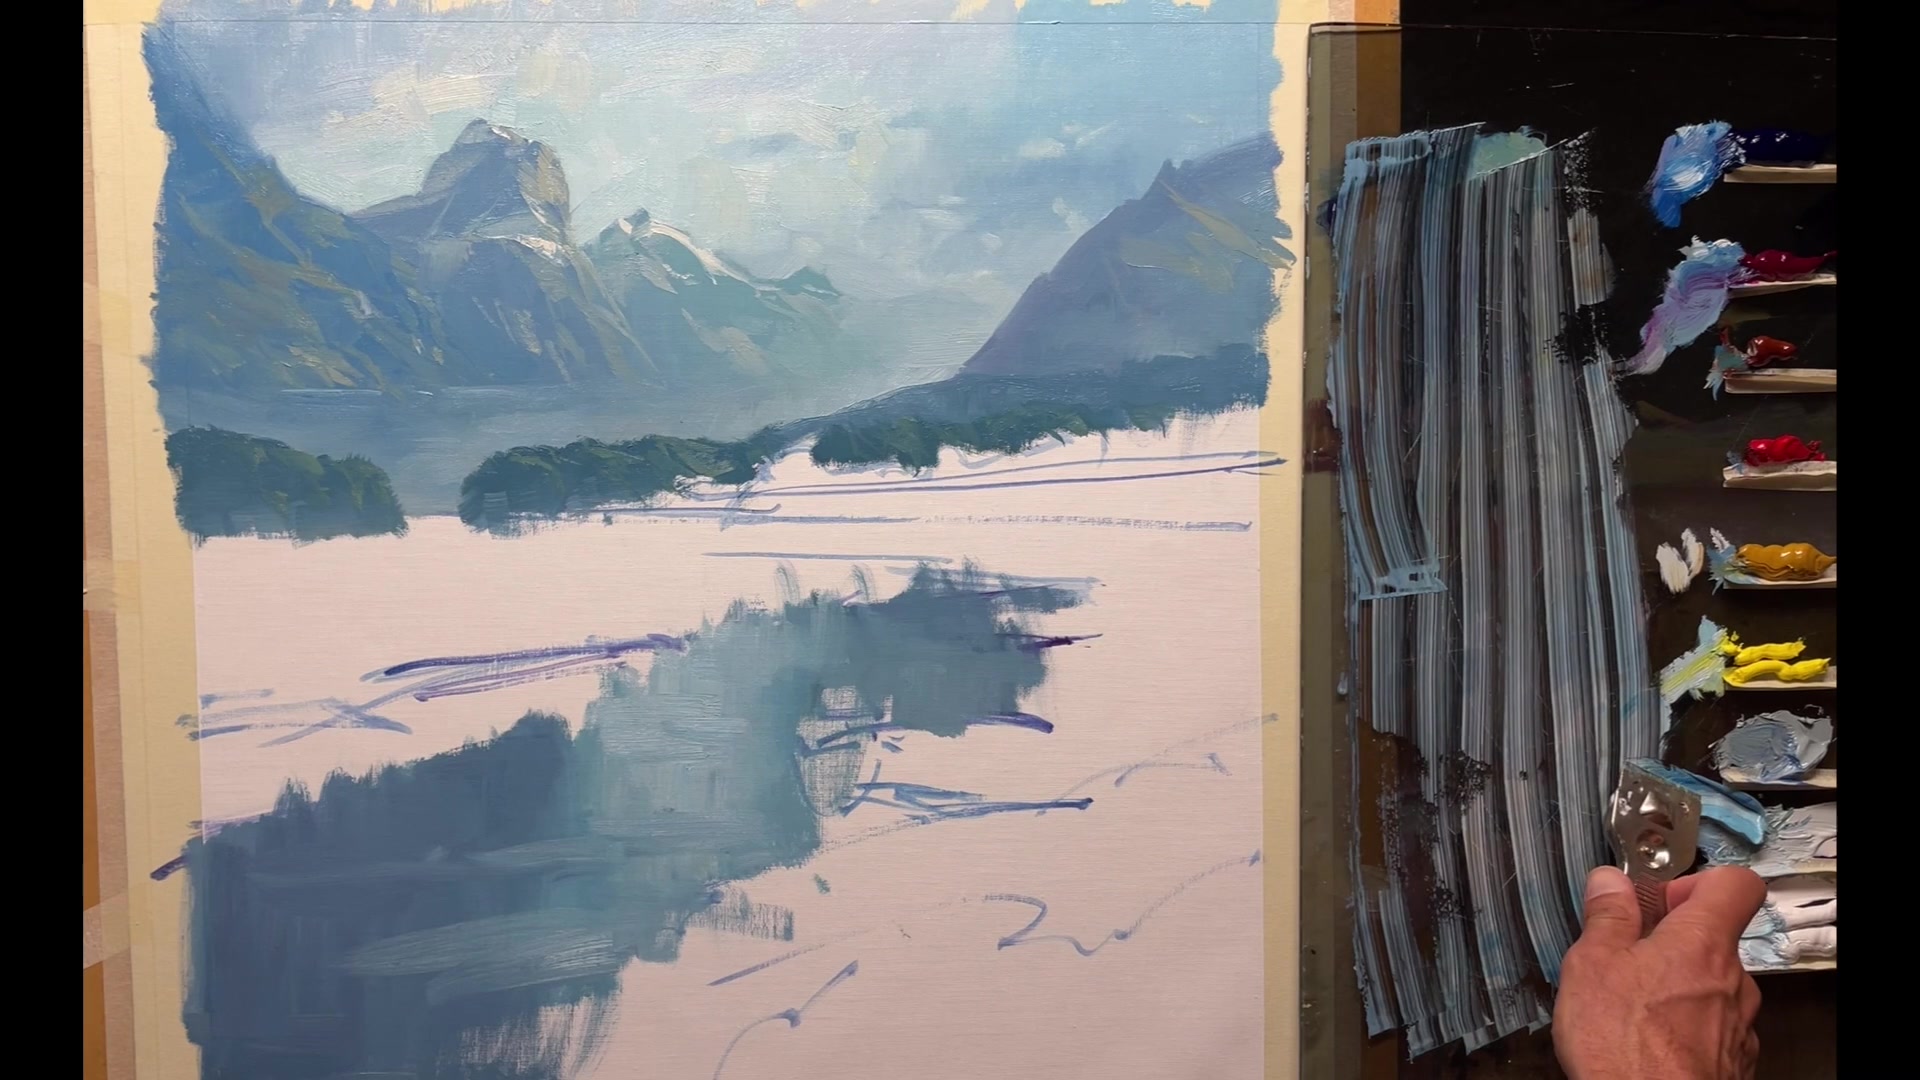
Step 21Foreground Shadows and Darks
Prepare the Foreground
Wet your brush slightly and add some darker gray mixed with a touch of yellow ochre. Lightly brush this mixture into the area, softening it into the existing paint. Avoid muddying the colors to maintain the glowing effect of light.
Create Darker Blue-Gray
Mix the gray with a bit of blue and sienna to create a darker, warmer blue-gray. This shade should be slightly darker than the previous area to bring it forward in the composition. Brush this color into the designated triangular area, keeping the spatial drawing in mind.
Add Bushy Shapes
Create small gaps at the base of the shape to suggest bushes. Add bushy shapes on top, breaking into the main shape slightly. Ensure the trees are broad and avoid forming repetitive patterns.
Enhance Dark Shapes
Gently brush the darker color throughout the space, letting it fade out. Connect dark shapes to create an organic form, brushing down and up to achieve shadows and reflections. This connection helps the darks read better from a distance.
Refine and Adjust
Lightly add warmth to the dark shapes without overwhelming them. Extend the dark shape slightly and ensure soft edges into the water. Avoid creating a plain shape by adding variety and maintaining soft edges.
Pro tipConnect your dark shapes to create a large, cohesive form that reads well from a distance.
Embark on your painting journey by carefully mixing a neutral gray, setting the foundation for your Paradise Valley masterpiece. Choose your canvas and painting medium wisely, as these decisions will influence the texture and technique of your work. Whether you opt for oils or acrylics, remember to maintain the workability of your paints and embrace the unique qualities each medium offers.
As you progress, focus on the composition and the dynamic flow of shapes and angles. Use your brushes to sketch and block in the major elements, ensuring variety and avoiding repetitive patterns. Pay attention to atmospheric perspective and color variety to create depth and interest in your landscape. Allow the mist and light effects to enhance the mood and distance within your painting.
In the final stages, refine your work with highlights and details that bring the scene to life. Use careful brushwork to add texture and dimension, and apply color adjustments to emphasize the natural beauty of the mountains and sky. Remember, the key to a successful painting lies in the balance between detail and simplicity, allowing the viewer's imagination to fill in the gaps.
Points to remember
Start with small amounts of color to mix a neutral gray.
Choose a smooth canvas for visible brushstrokes.
Use a stay-wet palette for acrylics to keep paint workable.
Pre-mix major colors for consistency on large canvases.
Ensure variety in shapes and angles to avoid repetition.
Keep initial paint layers thin for easy adjustments.
Leave some areas unblended for a painterly texture.
Use a clean brush for adding green tints to maintain clean color.