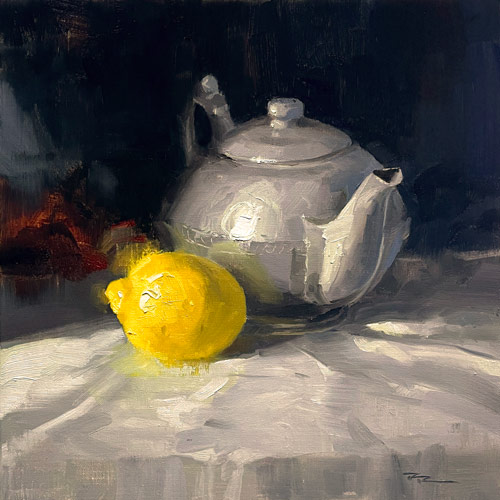
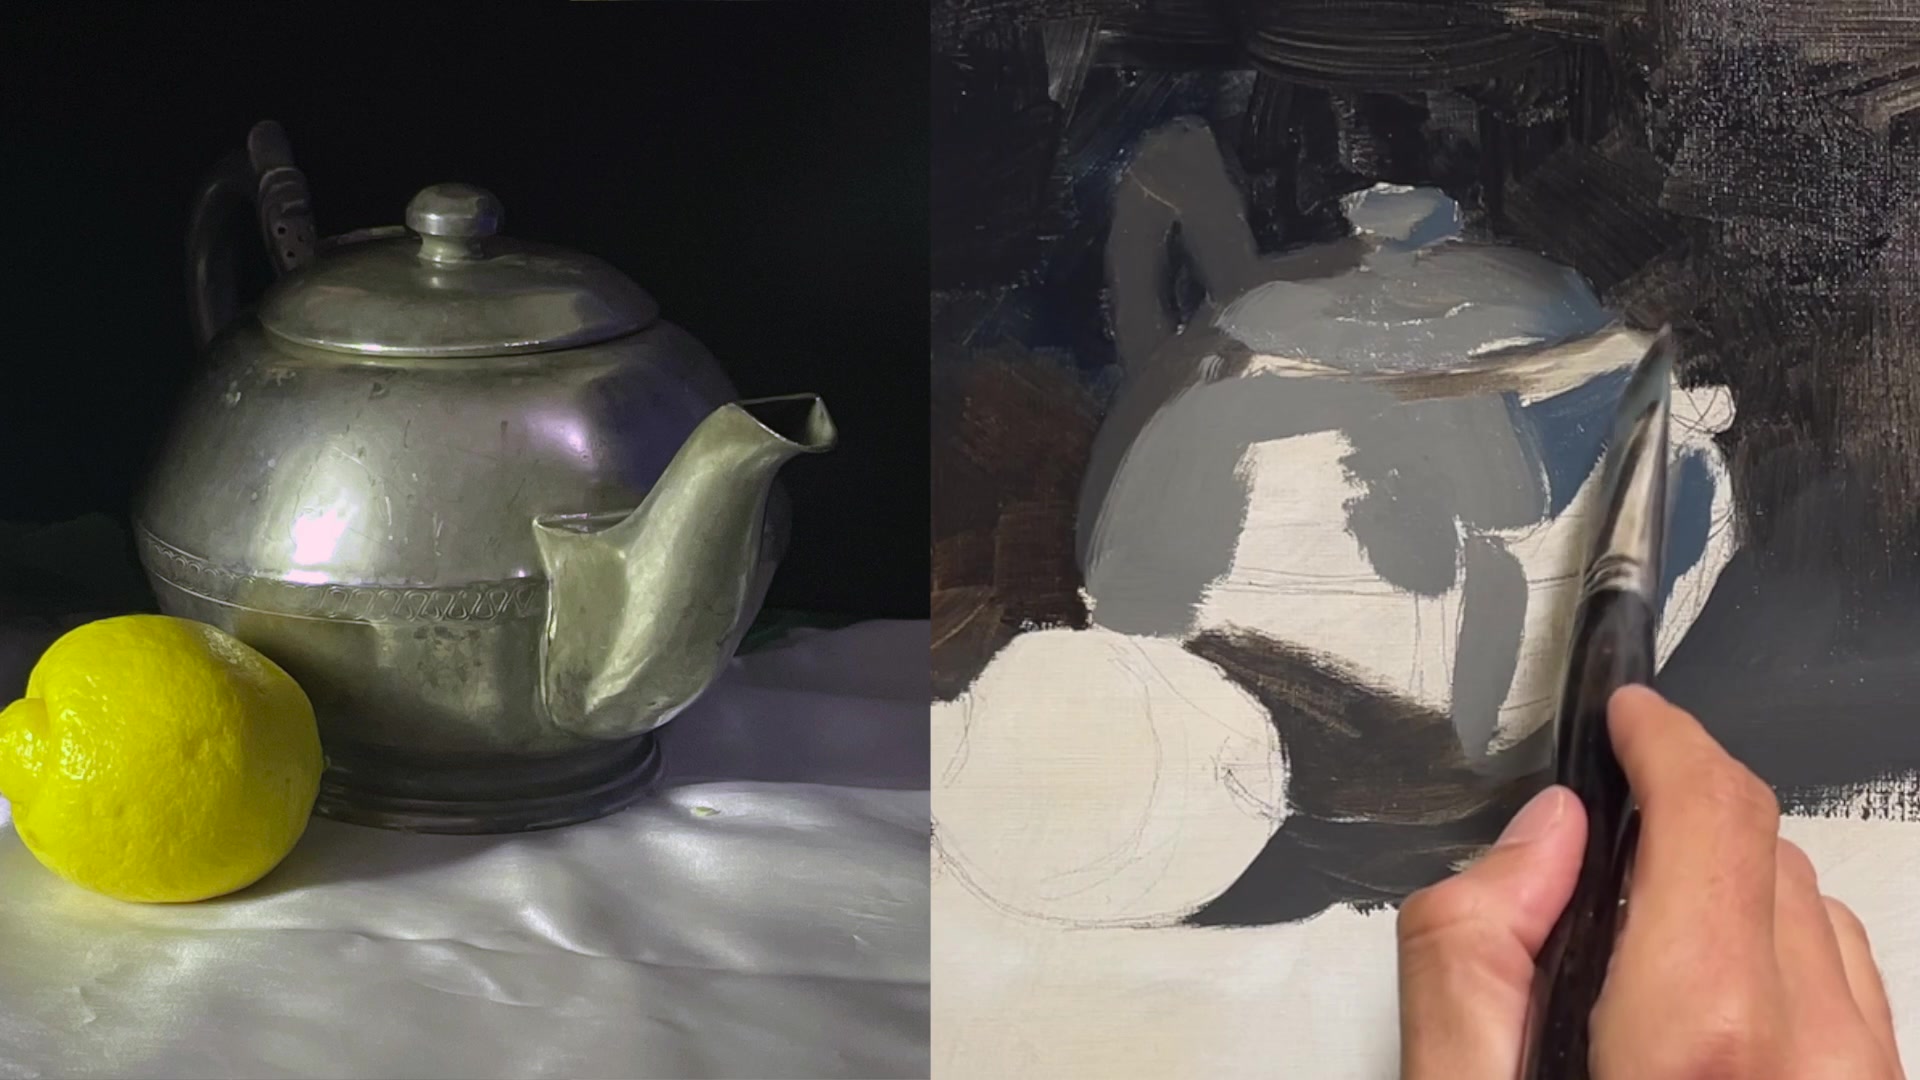
In this chapter, I invite you to explore the tranquil world of still life painting in oils or acrylics, a practice that is both meditative and enlightening. We'll delve into the art of selecting simple objects and arranging them to create a harmonious composition. The beauty of a still life lies in its simplicity, and by choosing basic shapes and forms, we can focus on the essentials of composition and color without feeling overwhelmed. I've opted for a straightforward setup with a black background and a white cloth, allowing the colors of our chosen objects to truly shine. This lesson will guide you through the process of setting up your still life in a way that enhances its features, using directional lighting to craft captivating shadows and highlights. You'll learn how to maximize vibrant color and create beautifully three-dimensional objects with just five values. With my step-by-step guidance, you'll discover new techniques and tips that will elevate your painting from ordinary to extraordinary, all while enjoying the calming process of creation. Let's embark on this artistic journey together, one brushstroke at a time.
This guide accompanies the full video lesson. The lesson includes the complete narrated video, the printable PDF chapter, and personalised critique support.
Lemon Tea 12x12" Oil on Canvas by Richard Robinson
Step 24Analyzing highlights and shadows
Capture the Big Idea
Focus on capturing the overall impression of the scene with as few brush strokes as possible. Don't worry about subtle differences at this stage; you can add details later. Aim to get the big idea down first.
Enhance Reflective Surfaces
Reflective surfaces won't appear shiny until you add the final highlight. Until then, they may look dull, like pottery. Extend any necessary colors with a small brush without remixing.
Clean Brushes Efficiently
Use a paper towel or rag to squeeze out excess paint and clean your brushes between mixtures. This keeps your colors pure and your brushwork clean.
Adjust Highlight Colors
Since the light is warm, add a bit of yellow to your lighter areas. Squint at your subject to see the subtle variations in highlight color and lightness.
Analyze and Compare
Pay close attention to the differences in lightness and color of highlights and shadows. The more you analyze and compare these elements, the more realistic your painting will appear.
Pro tipSquint at your subject to better see subtle variations in highlight and shadow colors.
Embark on your still life painting journey by carefully selecting simple objects that resonate with you. Set them up in an environment that enhances their features, using lighting to create captivating shadows and highlights. Begin with a straightforward composition, focusing on basic shapes to avoid feeling overwhelmed. As you arrange your subjects, consider their placement and how they interact with each other and their surroundings to create a balanced and engaging composition.
As you progress, use techniques like overlapping and adjusting your viewpoint to create depth and interest. Pay attention to lighting, ensuring your subject and canvas are well-lit without interference. Experiment with light intensity and color to find the perfect mood for your painting. Choose your materials wisely, from the canvas to the brushes and palette, to support your artistic vision.
Finally, prepare your canvas with a toned surface to ease the painting process. Consider different methods for drawing your subject, whether through projection, grid transfer, or freehand sketching. These foundational steps will guide you in capturing the essence of your still life, allowing you to express your creativity and refine your skills with each brushstroke.
Points to remember
Choose simple objects to focus on composition and color.
Keep your composition simple with two main subjects.
Avoid placing objects so they just touch at their outlines.
Use overlapping objects to enhance the sense of depth.
Adjust your viewing angle to see how it affects the composition.
Position your light source at a 45-degree angle to enhance roundness.
Use a combination of daylight and normal bulbs for balanced lighting.
Use the grid transfer method for precise and proportionate drawings.