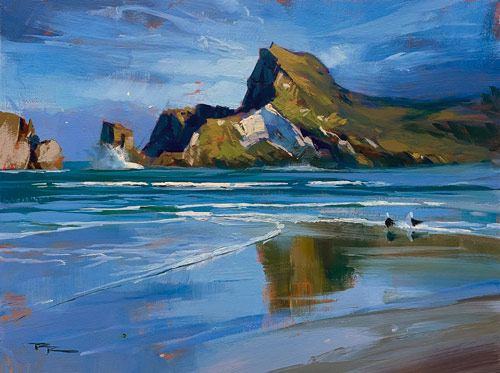
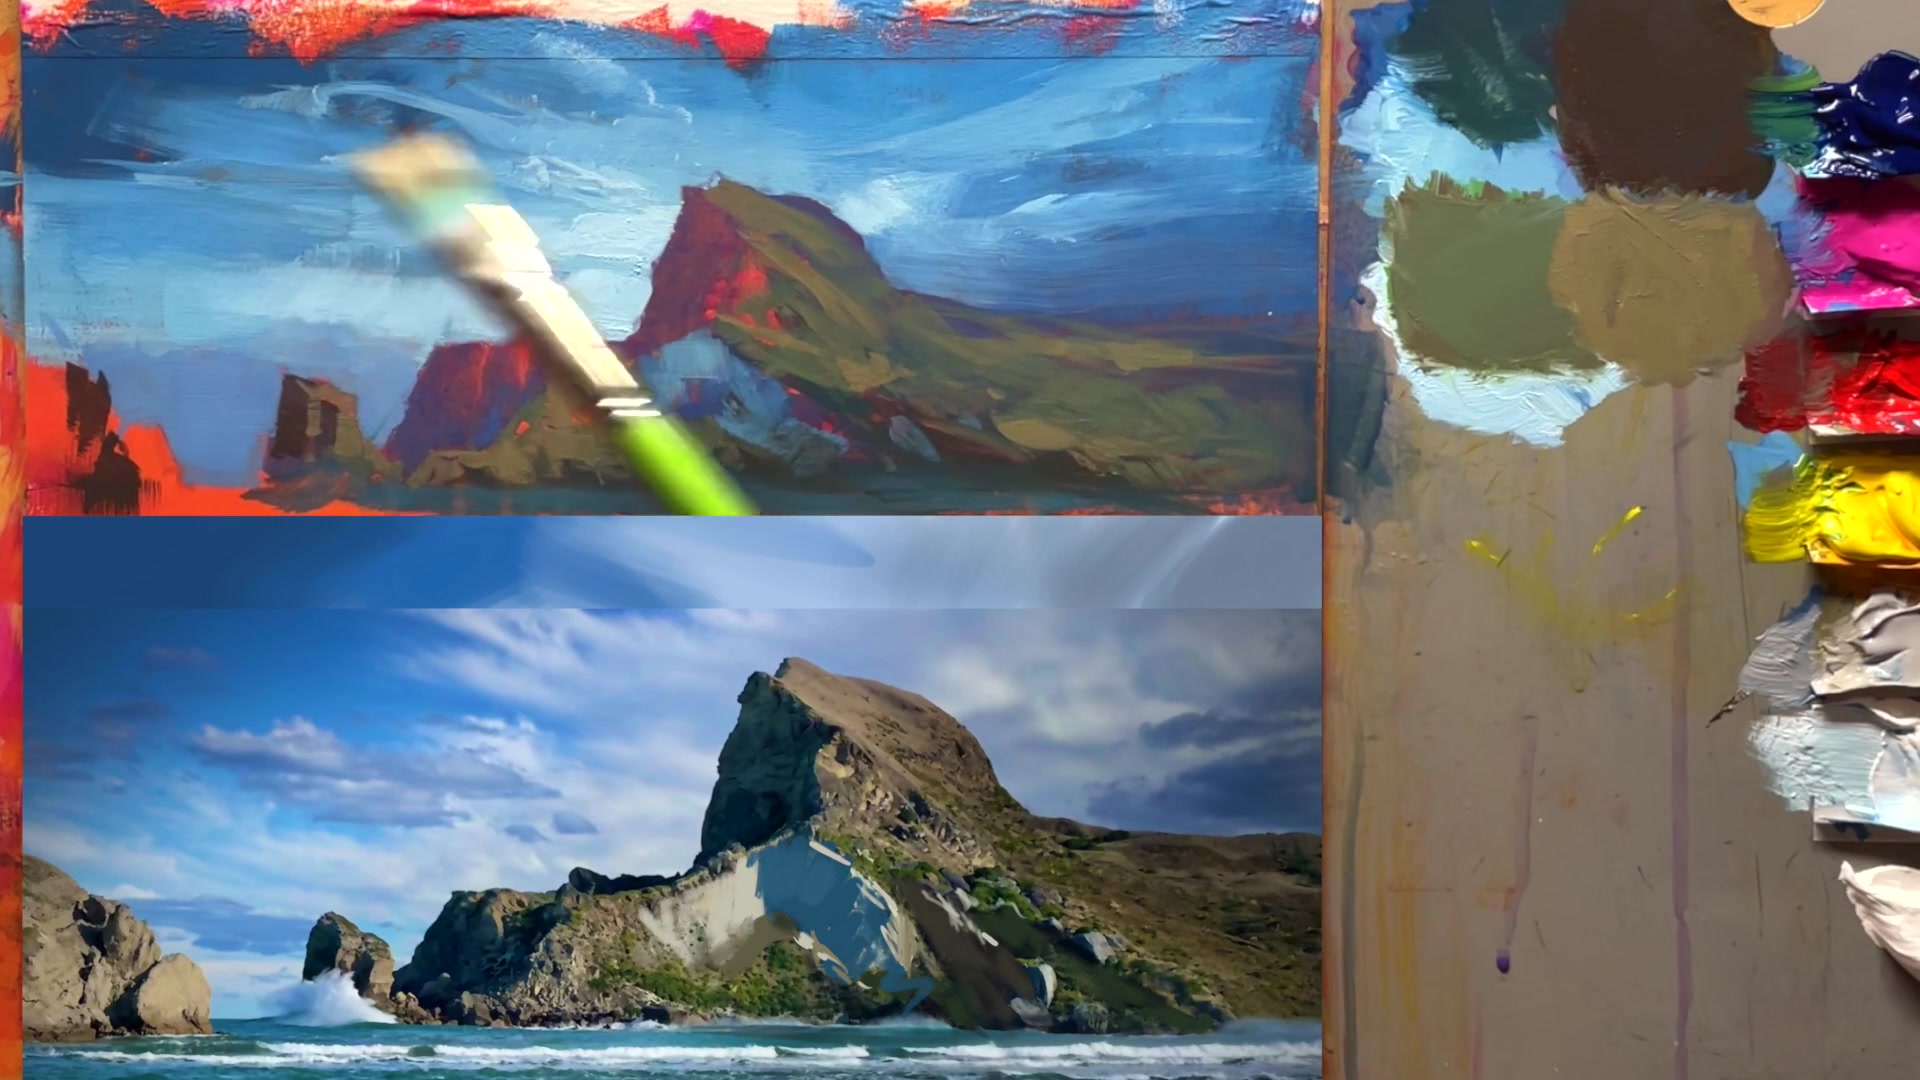
As I stand before the breathtaking landscape of Castle Point, I'm reminded of the incredible vibrancy and movement that a scene like this can bring to a painting. In this chapter, we'll explore how to infuse your work with that same energy and color, using a dramatic New Zealand landscape as our muse. You'll learn how to create a vibrant base layer that sets the tone for the entire piece, starting with a mid-value orange to complement the final blue hues. We'll work through the process step by step, from sketching major shapes to painting the sky in motion, focusing on soft edges and spotlight effects. With large brushes, we'll simplify complexity, achieving the illusion of detail effortlessly. The ocean will come to life in minutes with a few key details, and the headland's reflection will be a pivotal element, painted with soft blurring strokes. By the end, you'll have a beautiful beach painting, complete with the crisp details of foam and gulls that bring scale to the scene. I hope you'll find this process as rewarding and enjoyable as I do, and perhaps even discover new paths in your own artistic journey.
This guide accompanies the full video lesson. The lesson includes the complete narrated video, the printable PDF chapter, and personalised critique support.
"Castle Point" 12x16" Acrylic on Panel by Richard Robinson
Step 26Finalizing rock details
Use Crisp Brushes for Sharp Edges
Utilize synthetic square and angle brushes to achieve sharp, crisp edges on your rocks. These brushes are excellent for adding precise details that enhance the realism of your painting.
Add Light Details on the Hill
Observe the light hitting certain areas of the hill, even though most of it is in shadow. Apply a lighter tone to these areas to create a striking contrast and add interest to your landscape.
Pro tipUse synthetic square and angle brushes for sharp, crisp edges in your painting.
Embark on your painting journey by selecting a captivating photo that inspires you. Use digital tools to enhance the image, adjusting brightness, contrast, and colors to align with your artistic vision. As you prepare your canvas, consider the composition and orientation to highlight the most striking elements of your scene, such as towering rocks or reflective waters.
As you begin painting, focus on establishing a strong foundation with your underpainting. Use broad strokes and vibrant colors to set the stage for your masterpiece. Pay attention to the interplay of light and shadow, using techniques like vignetting and diagonal lines to guide the viewer's eye through your composition. Embrace the dynamic flow created by these elements, ensuring that your painting captures the essence of the scene.
In the final stages, refine your work by adding details and textures that bring your painting to life. Use varied brushstrokes to achieve painterly effects, and focus on creating crisp edges where needed to enhance clarity. Balance these with softer transitions to maintain a natural and cohesive look. Remember, each stroke contributes to the overall harmony of your painting, so approach each layer with intention and creativity.
Points to remember
Use digital editing tools to enhance your reference photo before painting.
Experiment with both auto and manual adjustments to find the best preparation for your painting.
Lower sharpness to remove unnecessary detail, achieving a softer, painterly effect.
A vertical canvas orientation can enhance the impact of tall elements in your composition.
Use diagonal lines to create a dynamic flow and guide the viewer's eye through the painting.
Combine small shadows into larger shapes to enhance visual strength.
Use gloss medium to seal your underpainting and enhance the vibrancy of the colors.
Work wet-on-wet to maintain soft edges and a painterly effect in your sky.