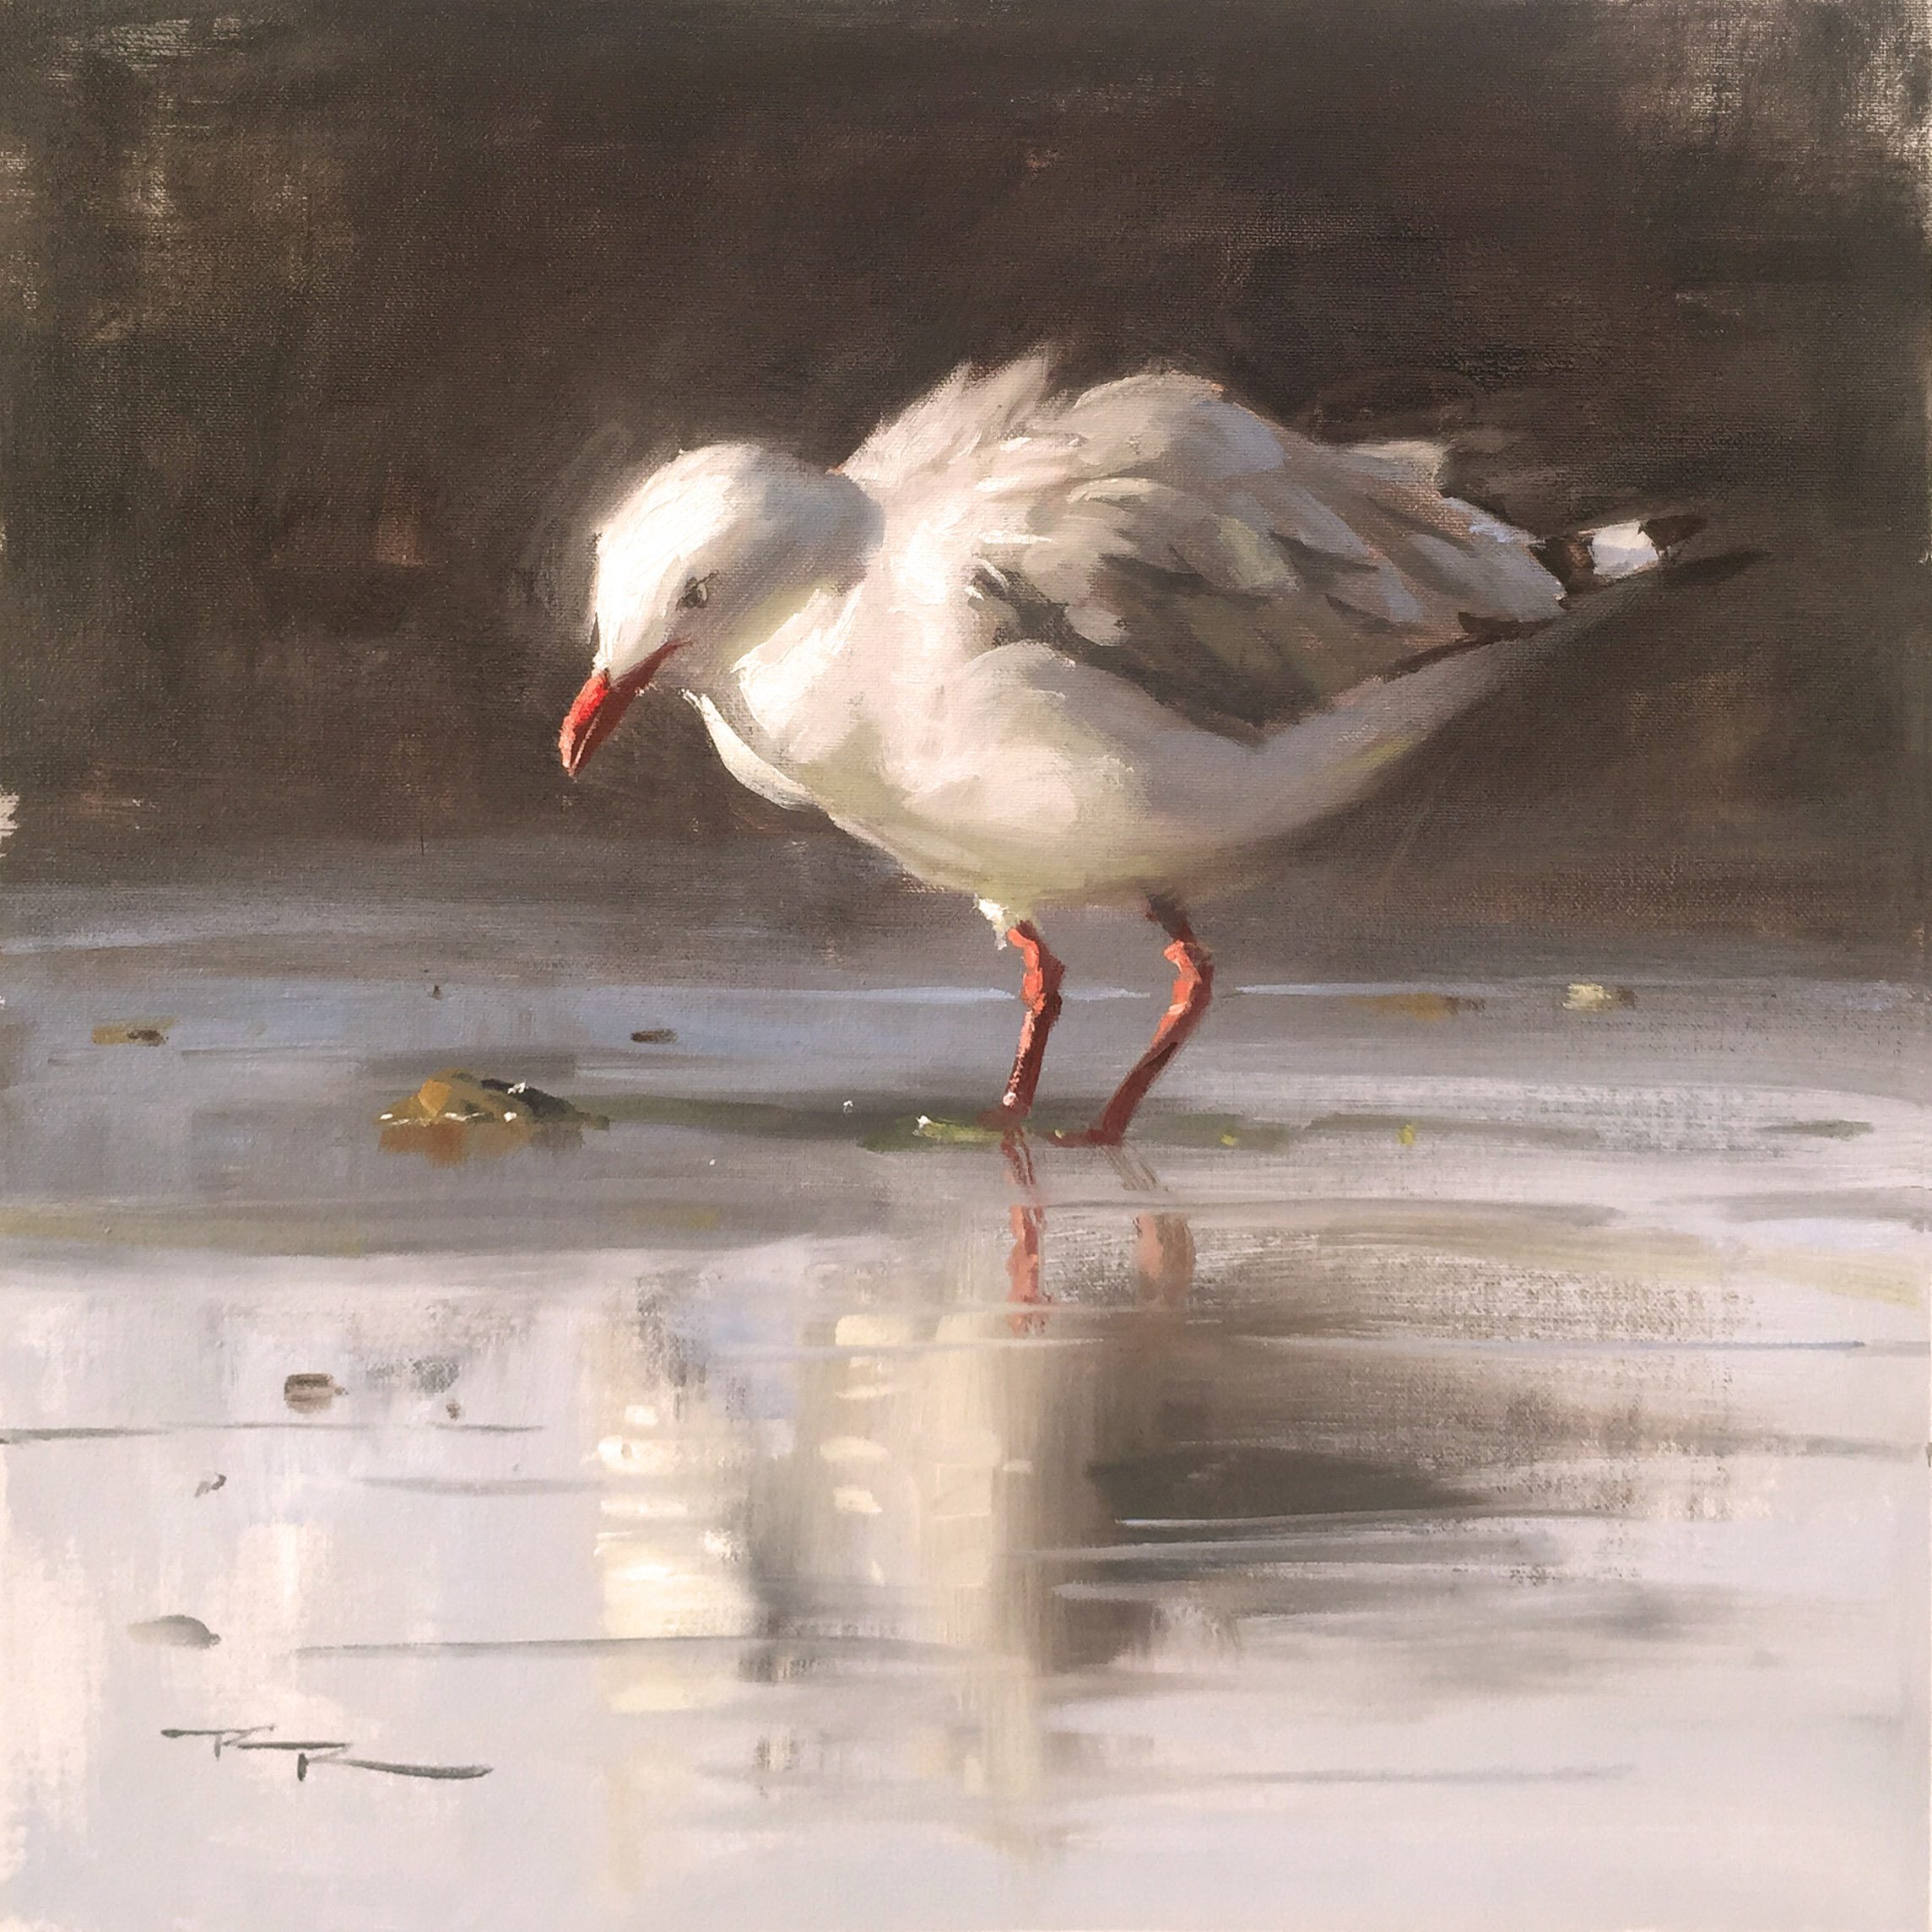
Here at One Tree Point in New Zealand, I'm excited to guide you through painting a portrait of a seagull, a subject that is often overlooked despite its beauty and elegance. Seagulls are a common sight along the coast, and their graceful flight and sculptural form make them a rewarding subject for any artist. In this chapter, we'll focus on capturing the essence of these magnificent birds, honing in on their simple yet striking black, grey, and white plumage. You'll learn to draw a seagull with accuracy, sculpt its form using large planes, and create an elegantly subdued color scheme with a simple palette. By incorporating just a few sharp details, we'll bring our seagull to life on the canvas. Whether you follow my step-by-step guidance or use the resource photos to create something uniquely yours, this lesson will enhance your skills and deepen your appreciation for these beautiful creatures. Let's embark on this artistic journey together and transform a commonplace sight into a captivating work of art.
This guide accompanies the full video lesson. The lesson includes the complete narrated video, the printable PDF chapter, and personalised critique support.
"Jonathan Seagull" 15 x 15" Oil on Canvas by Richard Robinson.
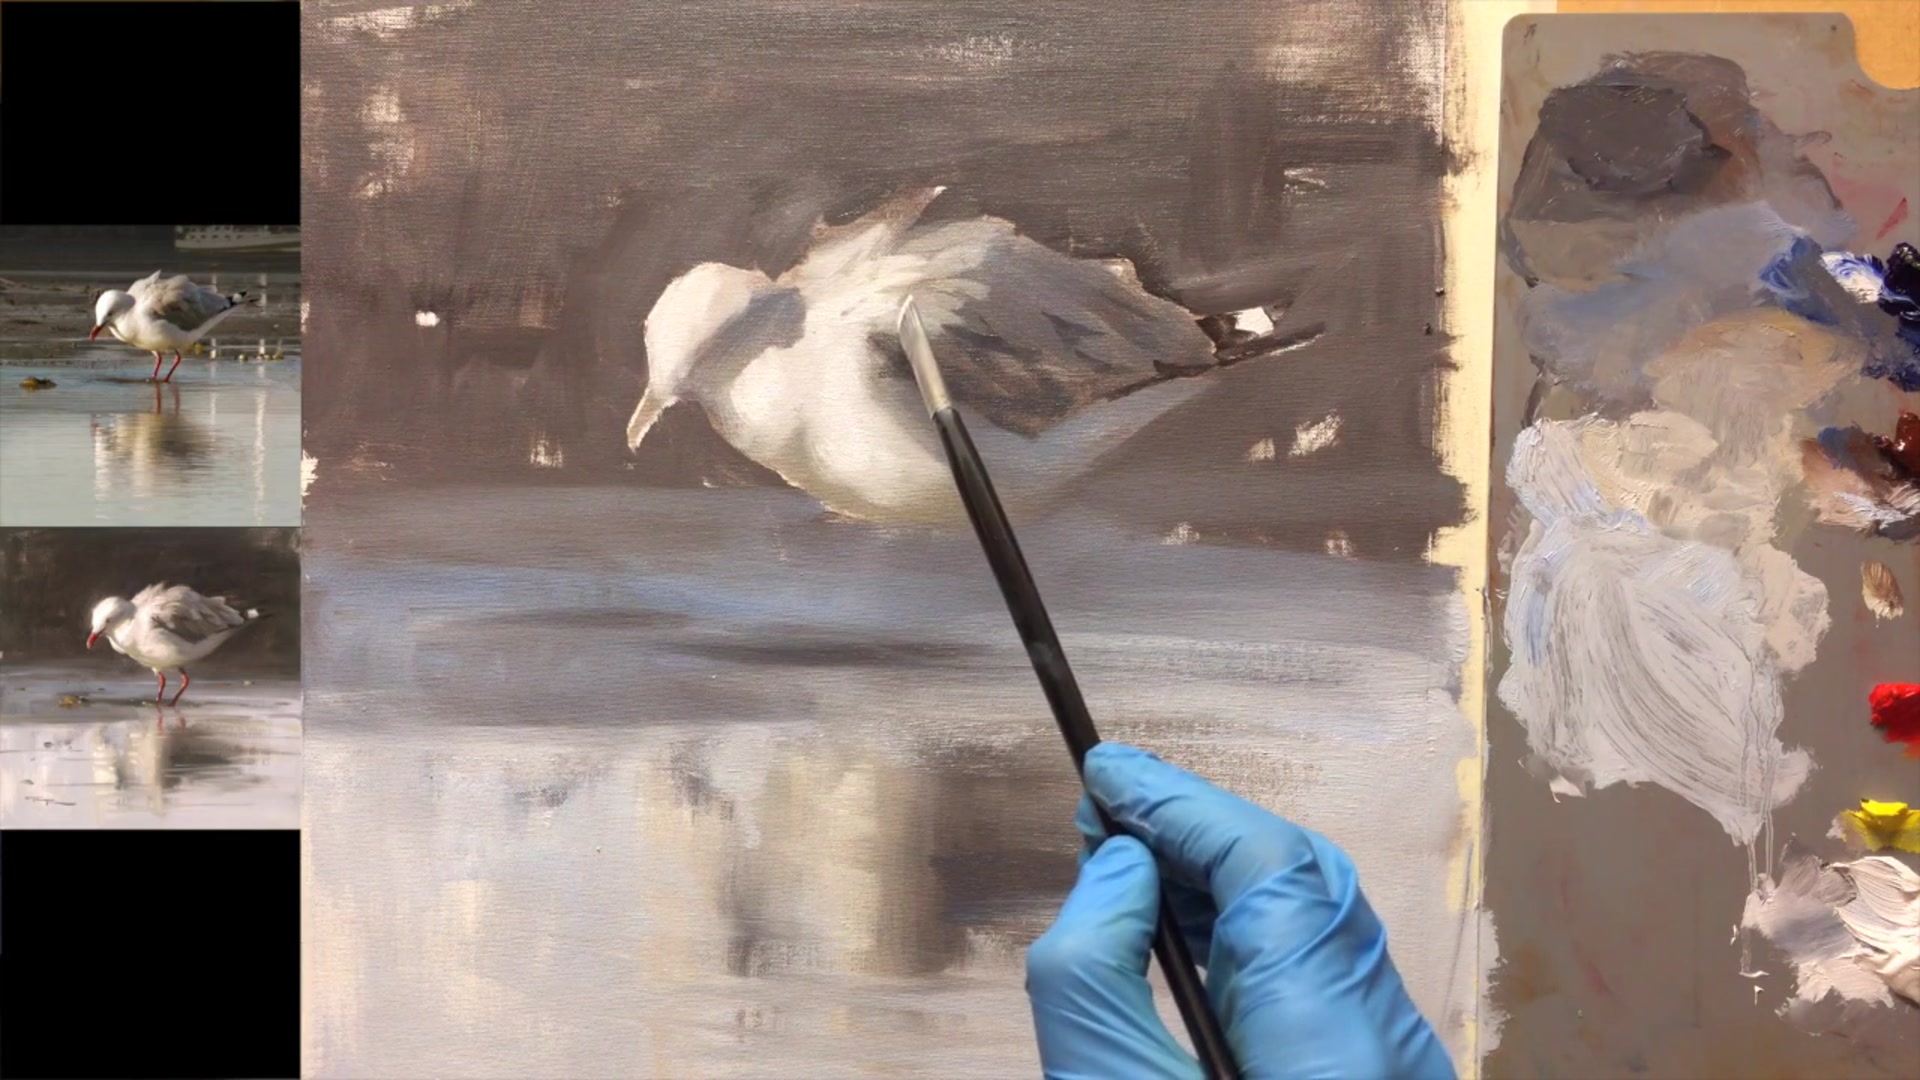
Step 15Reflected Light and Halftones
Paint Big Shapes
Focus on painting the big shapes you see in the detail of the seagull. This helps in capturing the essence without getting bogged down by the number of feathers or their exact placement.
Add Cool Grey
Switch to a cool grey to capture the reflected light from the sky on the seagull's back. Mix in a little blue to maintain subtle color variations.
Adjust Reflected Light
Ensure the reflected light is slightly lighter than the shadow color. This subtle difference is key to achieving a realistic effect.
Incorporate Halftones
Transition from shadow to halftone and then into light on the seagull's body. Notice how light penetrating through feathers warms up the color, especially in the halftone areas.
Reflect Warm Light
Add warmth to the halftone areas by incorporating warm light bouncing off the sand. This enhances the natural light effect on the seagull's body.
Pro tipEnsure reflected light is slightly lighter than the shadow color for realism.
Embark on your painting journey by preparing your canvas meticulously. A smooth, well-stretched canvas sets the foundation for your artwork. As you begin, simplify your palette with ultramarine blue and burnt sienna to create a harmonious base of neutral tones. These will guide your values throughout the painting process, allowing you to focus on form and light.
As you progress, use a variety of brush sizes to efficiently block in shadows and lights, paying close attention to the overall shapes and values. Squint at your reference to simplify the scene into large, manageable shapes. This approach helps in capturing the essence of the subject without getting lost in the details. Remember to mix generous amounts of your color values to ensure a consistent application.
In the final stages, focus on refining details and adding texture. Use a light touch to create the illusion of feathers and apply highlights with thick, warm paint to add depth and shimmer. Pay attention to the reflections and ensure they align with the body of the bird. By maintaining a balance between detail and overall impression, you bring your painting to life with realism and vibrancy.
Points to remember
Lightly sand the canvas for a smooth painting surface.
Use ultramarine blue and burnt sienna for a harmonious palette.
Mix generous amounts of each value to ensure consistency.
Squint at your reference to simplify the scene into big shapes.
Paint lights thicker than darks for depth.
Use a smaller brush for detailed areas like tail feathers.
Avoid over-mixing paint to allow for spontaneous effects.
Use thick, warm white paint without medium for highlights.