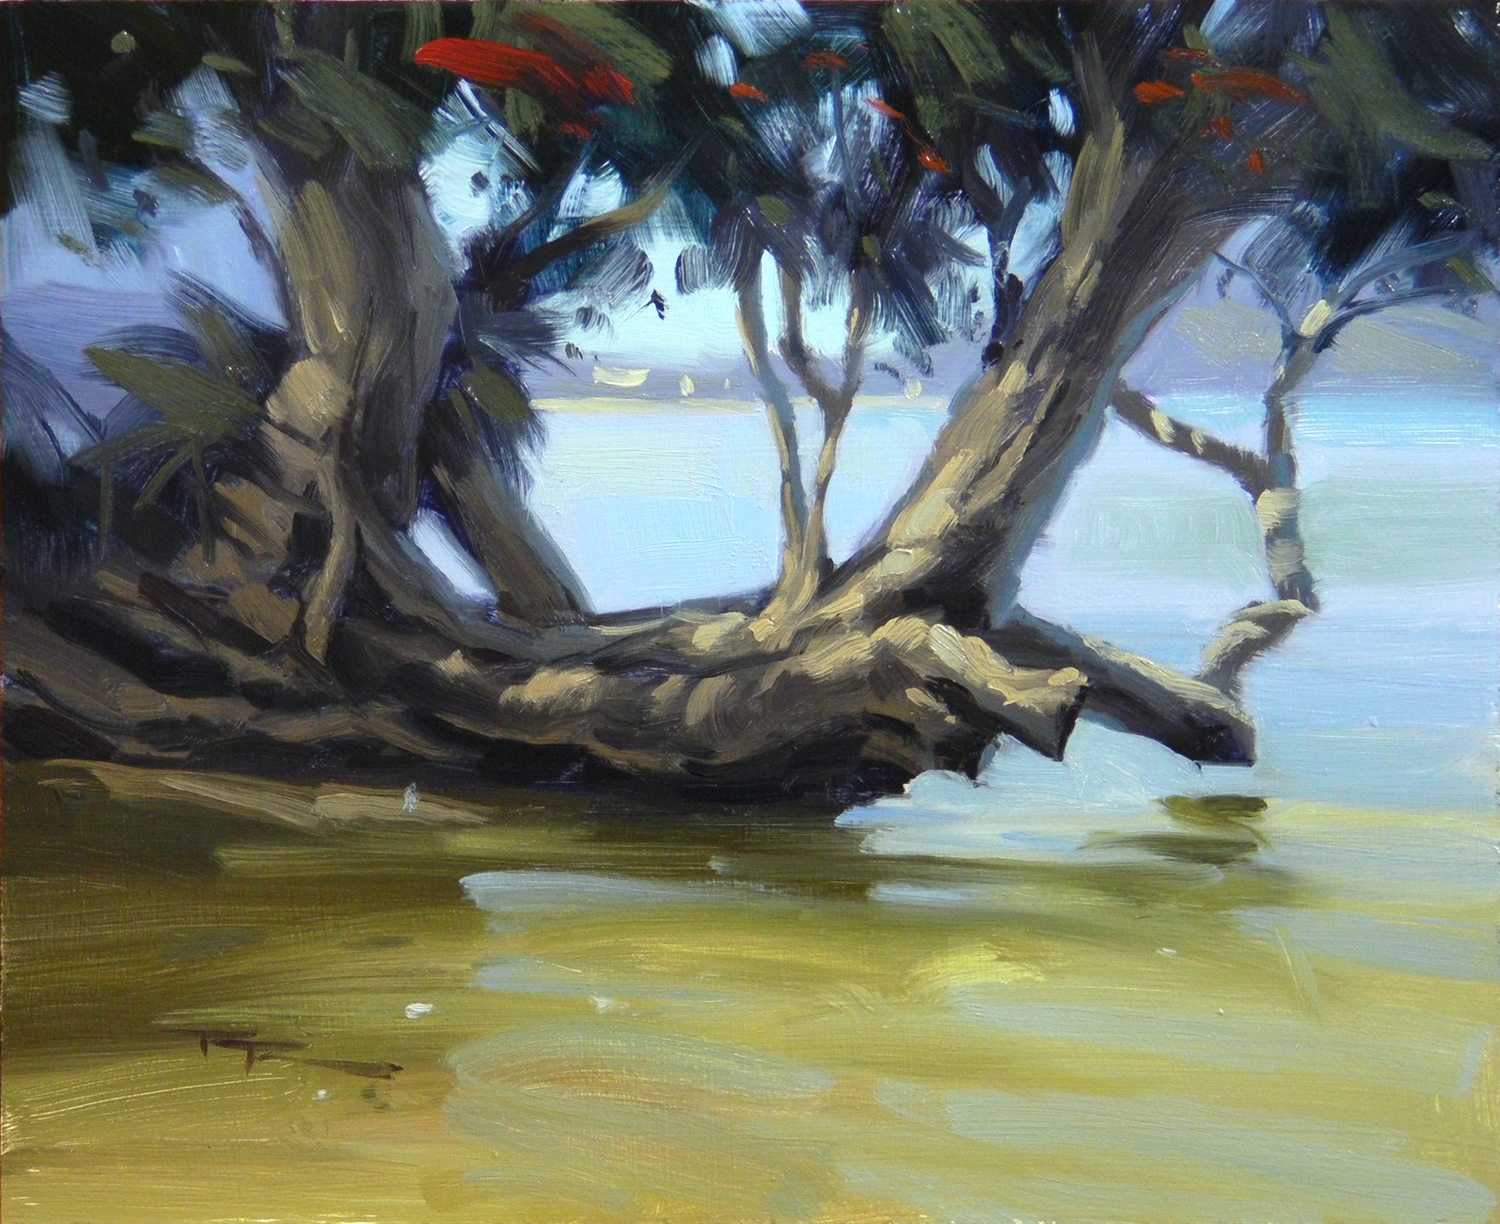
In this chapter, I invite you to join me in capturing the breathtaking beauty of Pataua, a place that epitomizes the natural splendor of New Zealand. During a summer camping trip, I was struck by the tranquil charm of this spot, where the interplay of light and shadow creates a dynamic yet harmonious scene. The dramatic contrast between the richly organic shapes and the expansive, simple areas of color in the water and sky offers a perfect balance that is both visually stimulating and soothing. This lesson will guide you through the process of painting this captivating scene on a 10 by 8 inch wood panel, prepared with acrylic primer to ensure durability. We'll explore a warm cool primary palette, with a twist—using orange instead of a warm yellow to create intriguing greys with ultramarine blue. As you engage with the video and the Virtual Art Academy course, you'll gain practical insights and structured assignments to deepen your understanding of these principles. Together, we'll uncover the variety and balance that are the hallmarks of great painting, enriching your artistic journey with the vibrant essence of this New Zealand jewel.
This guide accompanies the full video lesson. The lesson includes the complete narrated video, the printable PDF chapter, and personalised critique support.
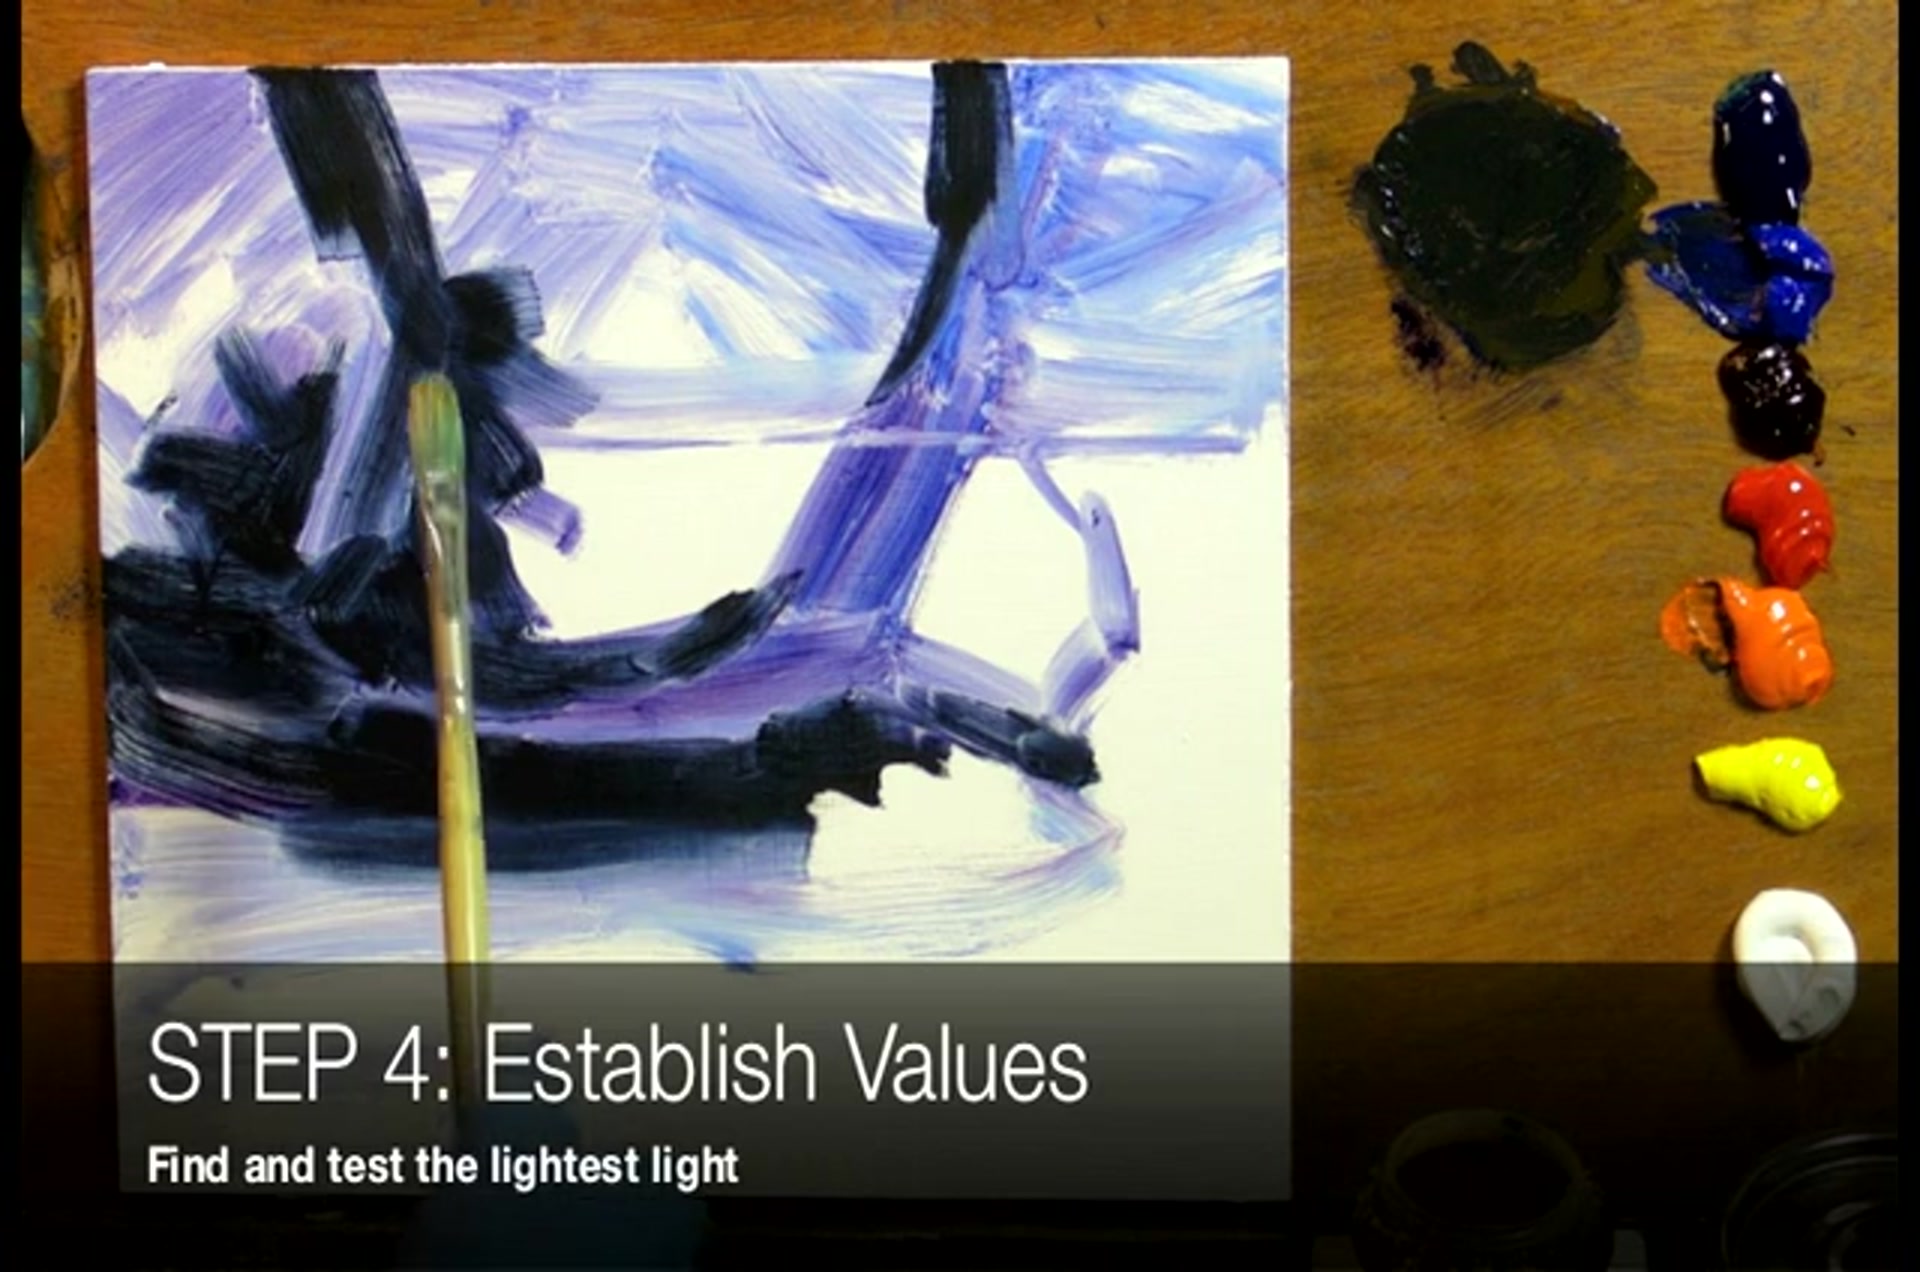
Determine the lightest light in the sky to establish your value range. This ensures no part of the painting will be lighter than this point.
Mix Sky Color
Add a touch of yellow to your mixture to achieve the greenish cast of the sky color near the horizon.
Test Value Relationship
Place a small daub of the lightest light next to the darkest dark. Squint at your scene and painting with one eye to check if the value relationship is correct.
Pro tipSquint at your painting to better assess the value relationships.
Embark on your painting journey by immersing yourself in the rich resources of the Virtual Art Academy. Begin with foundational principles through structured assignments and video demonstrations, which will guide you in mastering the essential techniques. As you progress, focus on understanding the interplay of light and shadow, and how these elements define the structure and mood of your painting.
As you move from initial sketches to more detailed work, pay attention to the tools and mediums you use. Start with broad strokes to establish your composition, using a no tan sketch to map out the major dark and light shapes. Gradually build up your painting by blocking in darks and lights, ensuring that your value relationships are accurate. This will set a strong foundation for your work.
In the final stages, refine your painting by focusing on the center of interest and adding intricate details. Use geometric simplification to tackle complex forms, and carefully plan your highlights and focal points to enhance depth and texture. Remember to incorporate atmospheric perspective to create a sense of distance and realism. With these techniques, your painting will come to life with vibrancy and balance.
Points to remember
Engage with video and structured assignments for foundational learning.
Use a no tan sketch to establish your painting's design.
Begin with large, simple shapes to form a strong foundation.
Squint at your painting to assess value relationships.
Plan your approach to painting water to avoid muddiness.
Visualize complex objects as basic geometric shapes.
Keep the value of reflected lights within the darks for depth.
Apply the thickest paint at the focal point for texture and emphasis.