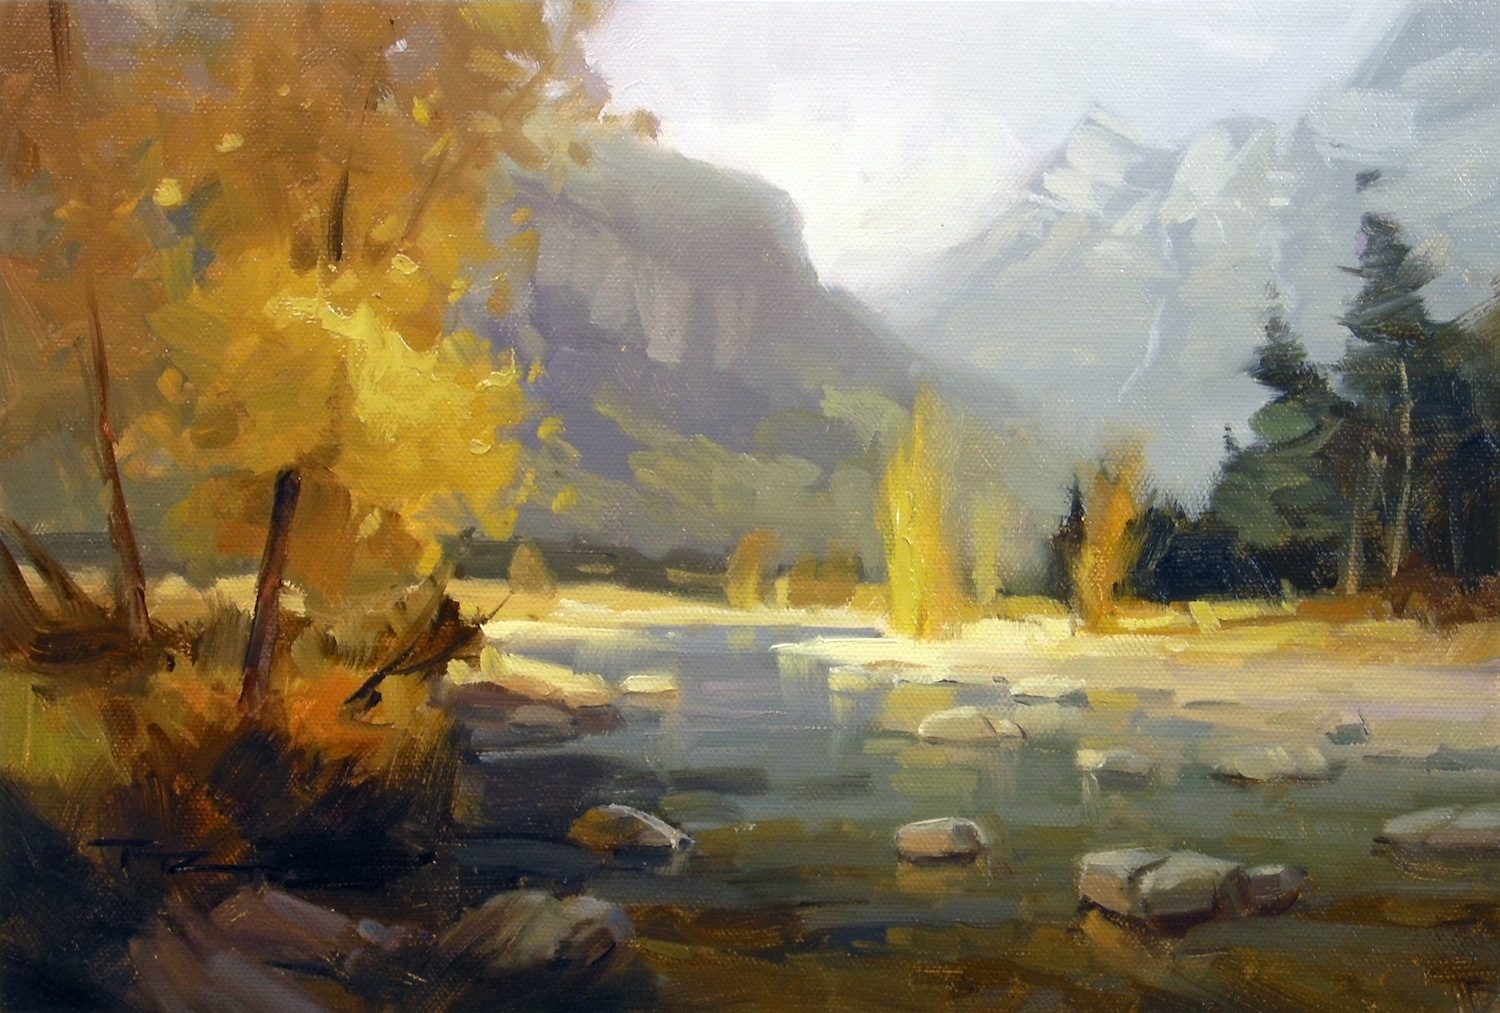
This chapter invites you to join me at Chinaman's Bluff, nestled at the end of the majestic Dart Valley in New Zealand's South Island. It's a place that holds fond memories of painting alongside talented artists like John Crump and Kevin Macpherson. The scene is a painter's dream, offering a perfect backdrop to explore atmospheric perspective and the spotlight effect. Although I began a painting here during that memorable trip, I never quite finished it in the studio, leaving me eager to revisit and capture the essence of this stunning location. Now, I encourage you to take up the challenge of creating your own masterpiece from the resource photos provided. This is your opportunity to unleash your creativity, using your artistic license to transform the scene into something uniquely yours. Start by crafting tiny no tan sketches to experiment with composition and design, allowing you to explore various possibilities and refine your vision. This approach will guide you to unexpected creative solutions, making the journey as rewarding as the destination itself.
This guide accompanies the full video lesson. The lesson includes the complete narrated video, the printable PDF chapter, and personalised critique support.
"Chinamans Bluff" by Richard Robinson 14 x 8" Oil on Canvas
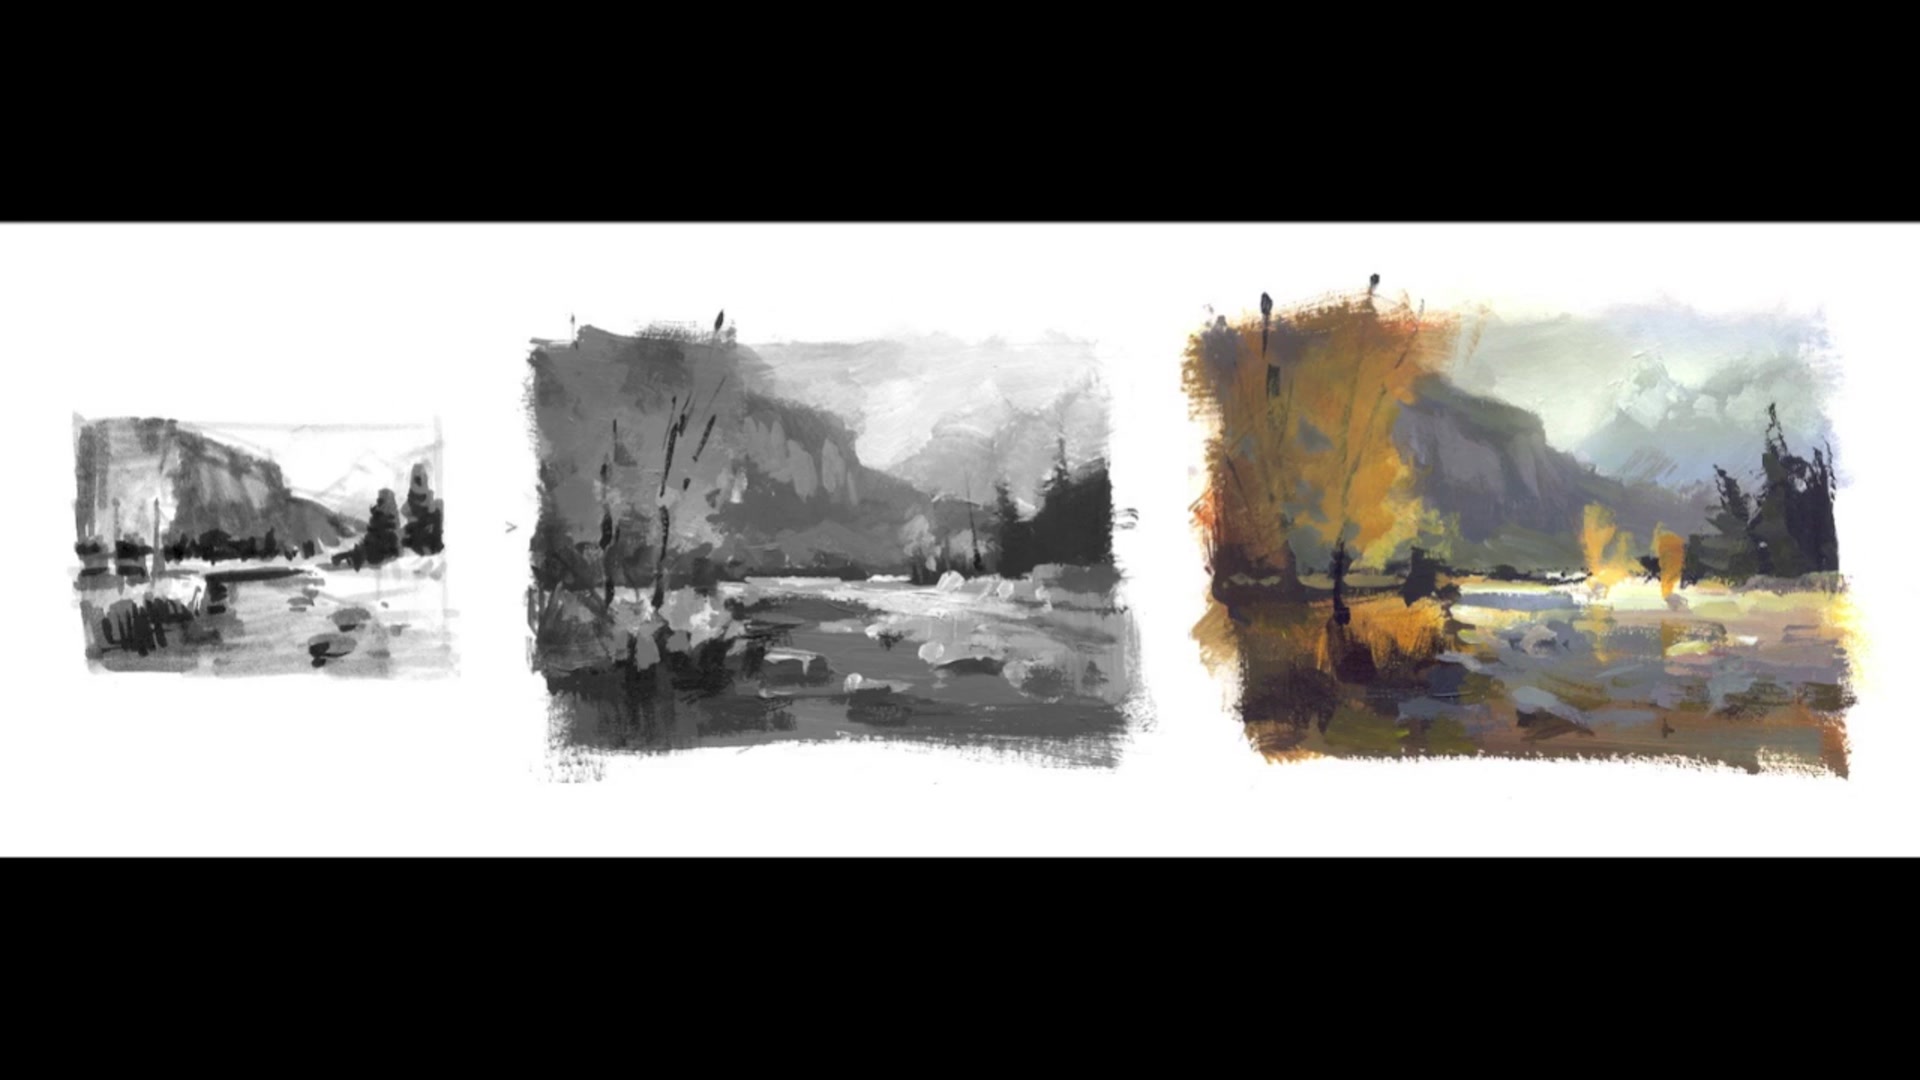
Step 2Thumbnail to Final Painting Process
Transition from Thumbnail to Value Study
Begin with a thumbnail sketch and transition to a limited value study in black and white. This helps establish the composition and values before adding color.
Create a Simple Color Study
Develop a simple color study based on your value study. Keep it similar to the thumbnail, focusing on key elements like the spotlight area and gradients in the trees.
Refine in Photoshop
Use Photoshop to clean up your color study and experiment with compositional ideas. This digital refinement allows you to explore different possibilities before finalizing your painting.
Finalize the Painting
Return to your initial idea if it resonates most with you. Compare your final painting with the color study to ensure consistency and coherence. This preparatory work will guide you confidently through the final painting process.
Pro tipStick closely to your thumbnail sketch to maintain the essence of your initial vision throughout the painting process.
Embark on your painting journey by designing with no tan sketches, allowing your creativity to flow and refine your ideas before committing to the canvas. Transition from thumbnail sketches to a limited value study, setting a strong foundation for your composition and values. As you progress, maintain the essence of your initial vision by sticking closely to your thumbnail sketch, ensuring consistency and coherence throughout your painting process.
Prepare your workspace and materials to enhance your creativity and efficiency. Experiment with techniques like the spotlight effect to add drama and focus, and balance warm and cool colors to create depth and interest. Use atmospheric perspective to simulate depth by adjusting colors as they recede into the distance, and start with the sky to establish the value range and atmospheric perspective for your entire painting.
As you approach the final stages, focus on blocking in large areas of color and using painting mediums to keep the paint thin for easy adjustments. Pay attention to value relationships, especially in shadowed areas, and enhance the form of elements like trees to add depth and interest. Trust your initial brush strokes, and use your color study as a guide to make confident color decisions. Finish with final details and adjustments, adding textural interest and your signature to complete your masterpiece.
Points to remember
Use no tan sketches to explore and refine your painting ideas before starting on the canvas.
Stick closely to your thumbnail sketch to maintain the essence of your initial vision throughout the painting process.
Experimenting with the spotlight effect can add dramatic focus to your painting.
Balance warm and cool colors to create more interest and depth in your painting.
Mix a large amount of the atmosphere color and use it to adjust colors of distant objects, enhancing the sense of depth.
Avoid painting the river entirely blue; instead, use subtle variations to capture the reflective and transparent qualities of water.
Ensure your initial layers are thin to allow for easy adjustments later.
Squint at your subject to simplify it into major shapes of light and dark, making it easier to paint.