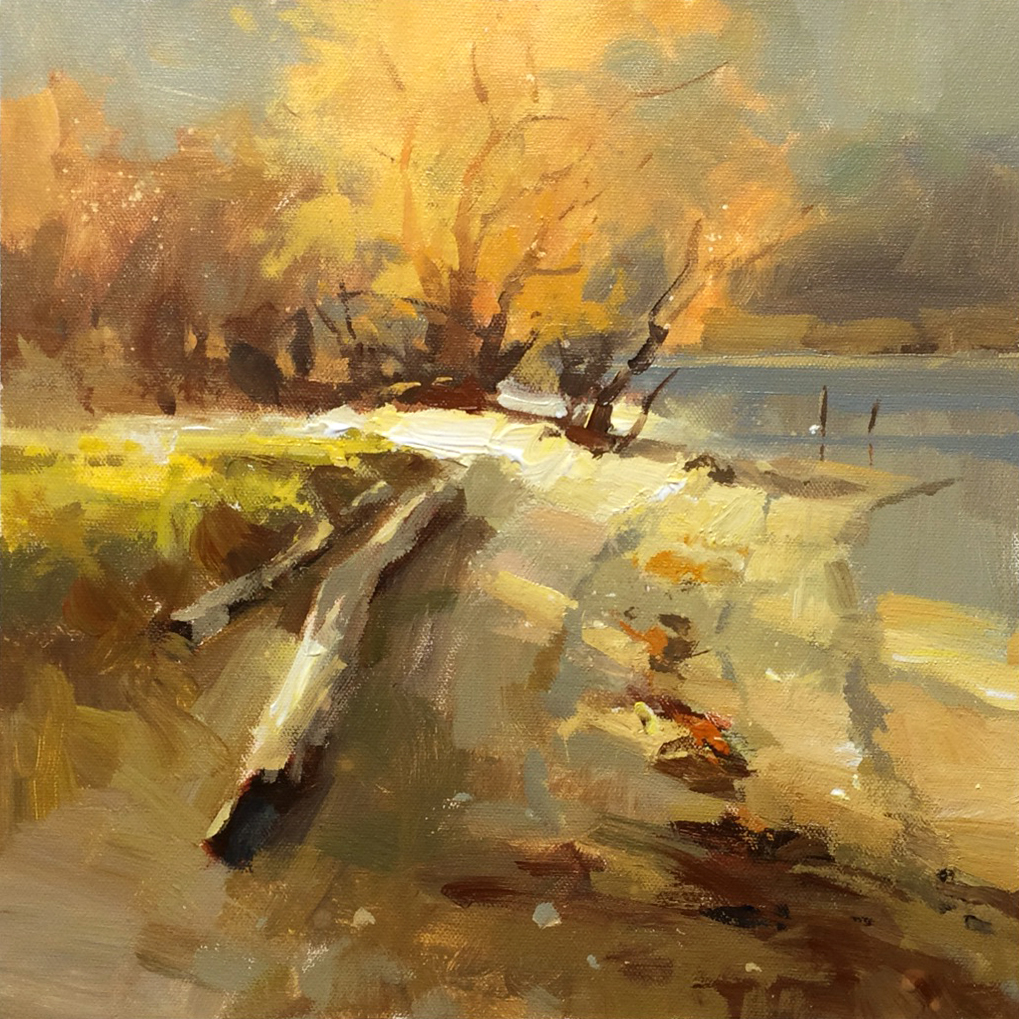
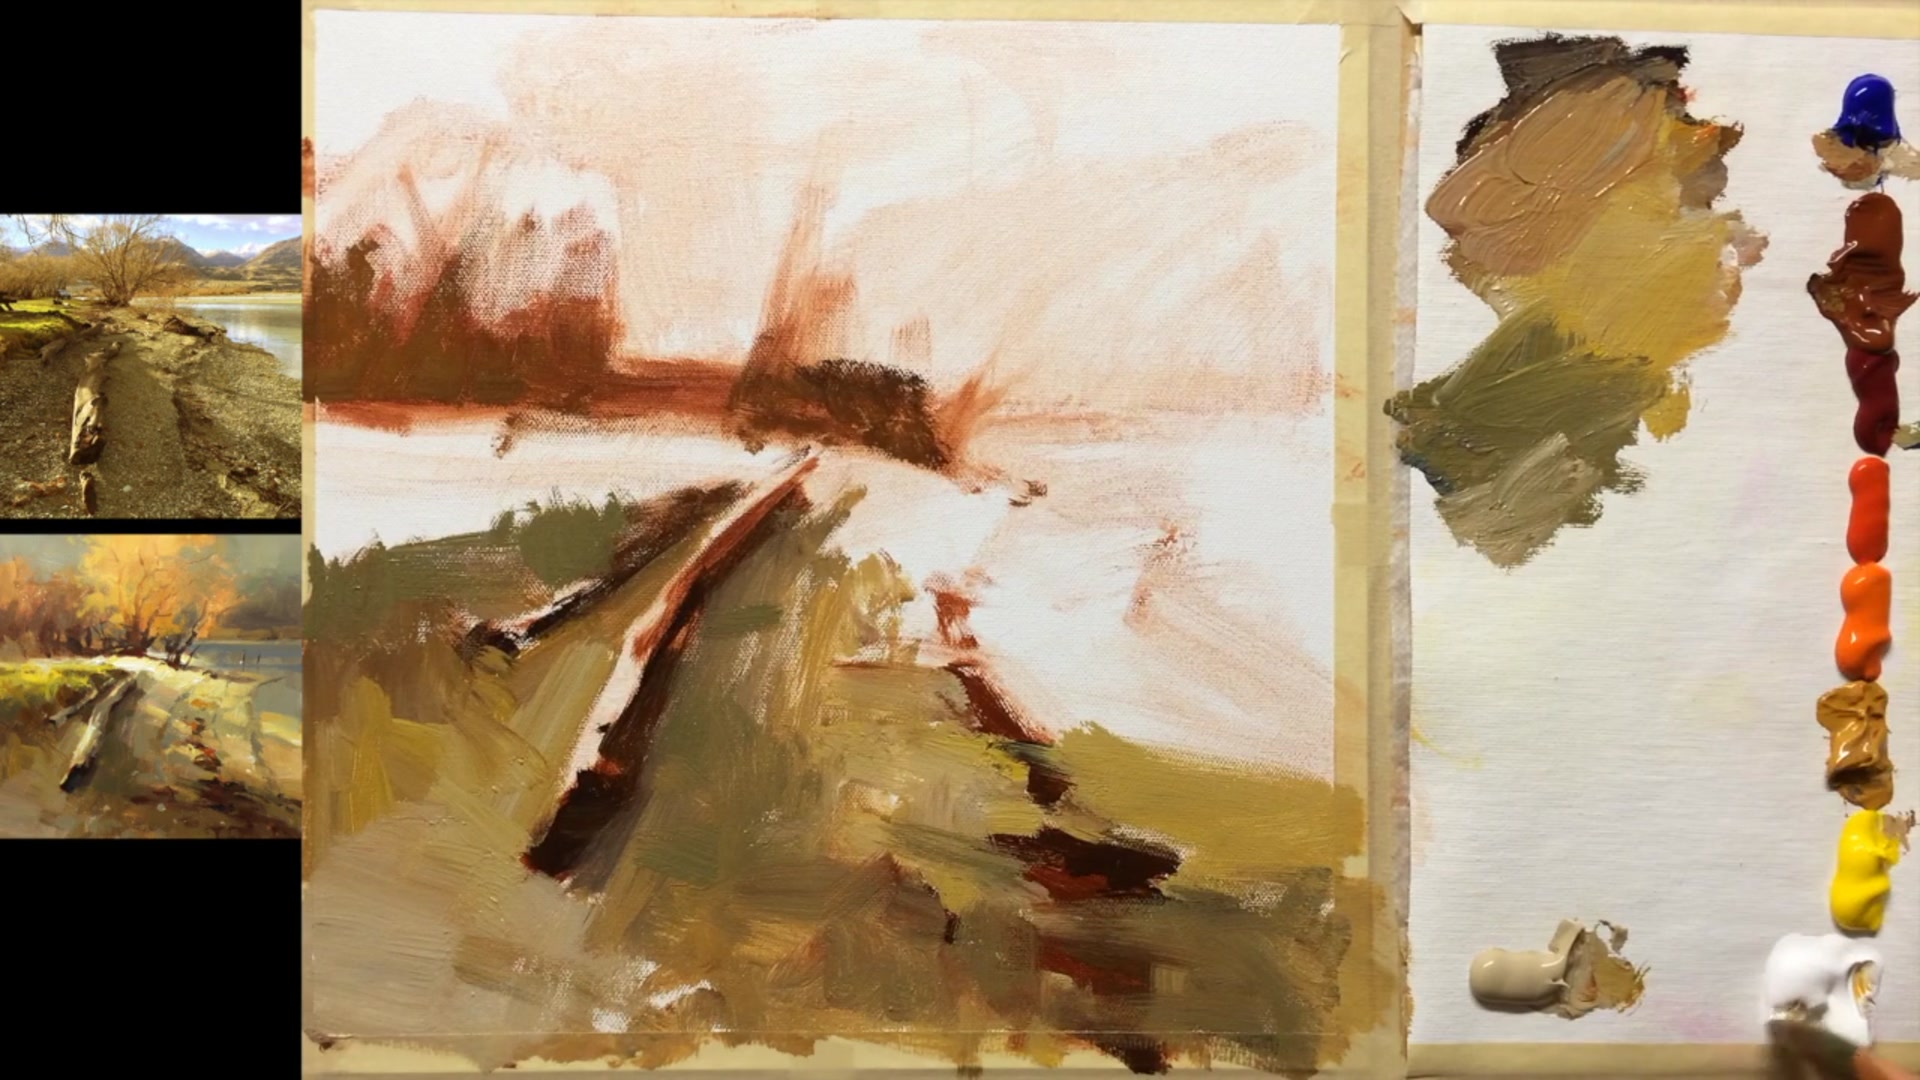
Nestled at the far end of Lake Wakatipu in New Zealand's South Island, Kinloch is a charmingly tiny village with a population of just six. It's here that I found the perfect scene to explore the interplay of subtle greys and vibrant colors in our painting journey. In this chapter, we'll delve into the techniques that bring out glowing light and interesting textures using acrylics. I initially captured this scene in oils and later enhanced it with digital warmth, sparking the idea to recreate it in acrylics. Together, we'll focus on crafting subtle warm and cool variations within your greys, a skill that adds remarkable depth and intrigue to your work. This scene offers a rewarding challenge, inviting you to master the balance between muted tones and bursts of color, ultimately enriching your painting repertoire. Join me as we bring the tranquil beauty of Kinloch to life on canvas, step by step.
This guide accompanies the full video lesson. The lesson includes the complete narrated video, the printable PDF chapter, and personalised critique support.
"Last Light" 12x12" Acrylic on Canvas by Richard Robinson.
Step 6Shadow and Light Variation
Unify Shadow Colors
Use a greenish grey to paint the shadow areas of the grass. Introduce this greenish grey into other darker shadow areas along the beach to help unify the colors in the painting.
Lighten Distant Shadows
As shadows move further from the log, allow more light from the sky to reflect into those areas. Gradually lighten the shadows as they extend away from the log to create a natural transition.
Pro tipUse a consistent shadow color to unify different areas of the painting.
In this lesson, you embarked on a journey to capture the essence of 'Last Light' by skillfully manipulating grays and exploring subtle temperature shifts. From the initial sketch to the final details, you learned how to create depth and interest through warm and cool variations. By paying close attention to the temperature of your grays, you enhanced the overall mood and atmosphere of your painting.
Starting with a damp canvas, you laid the foundation with big shapes and lines, softened for a gentle effect. You then moved on to blocking in the darkest areas using a near-black mix of ultramarine blue and burnt sienna, maintaining wet layers for a soft, alla prima look. As you progressed, you modified grays with hues rather than values to create dynamic color shifts, ensuring a cohesive and realistic scene.
Throughout the process, you employed techniques to keep your acrylics wet, unified shadow areas with consistent colors, and built up textures and details in the foreground. By using impasto techniques and refining light effects, you added depth and vibrancy to your painting. With each step, you focused on creating a harmonious balance between light and shadow, ultimately bringing your vision of 'Last Light' to life.
Points to remember
Pay attention to the temperature of your grays to enhance mood.
Soften initial sketch lines with a paper towel for a blended effect.
Mix ultramarine blue with burnt sienna for the darkest areas.
Modify gray by adjusting hue without changing value.
Use a fine mist spray to extend the working time of acrylic paints.
Use a consistent shadow color to unify different areas.
Ensure highlights are horizontal and straight for natural light.
Use thick body acrylic paints for impasto effects at the end.