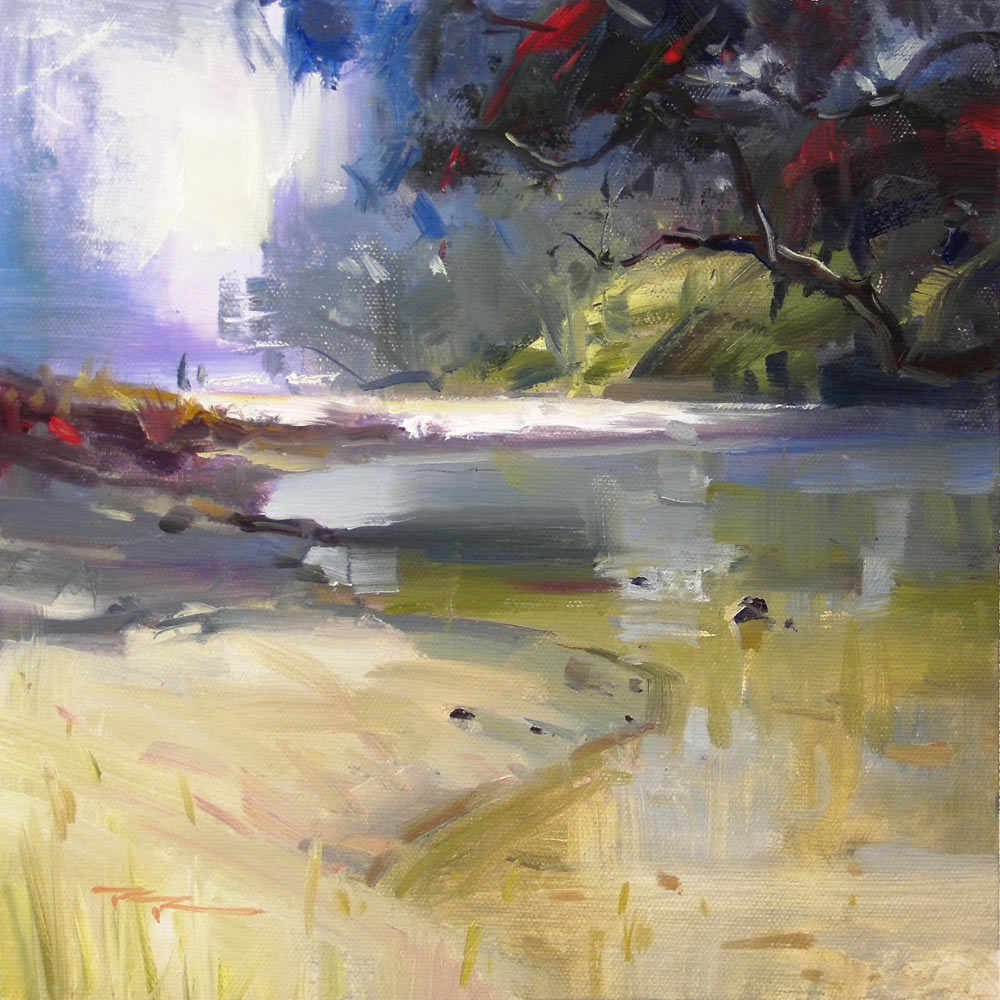
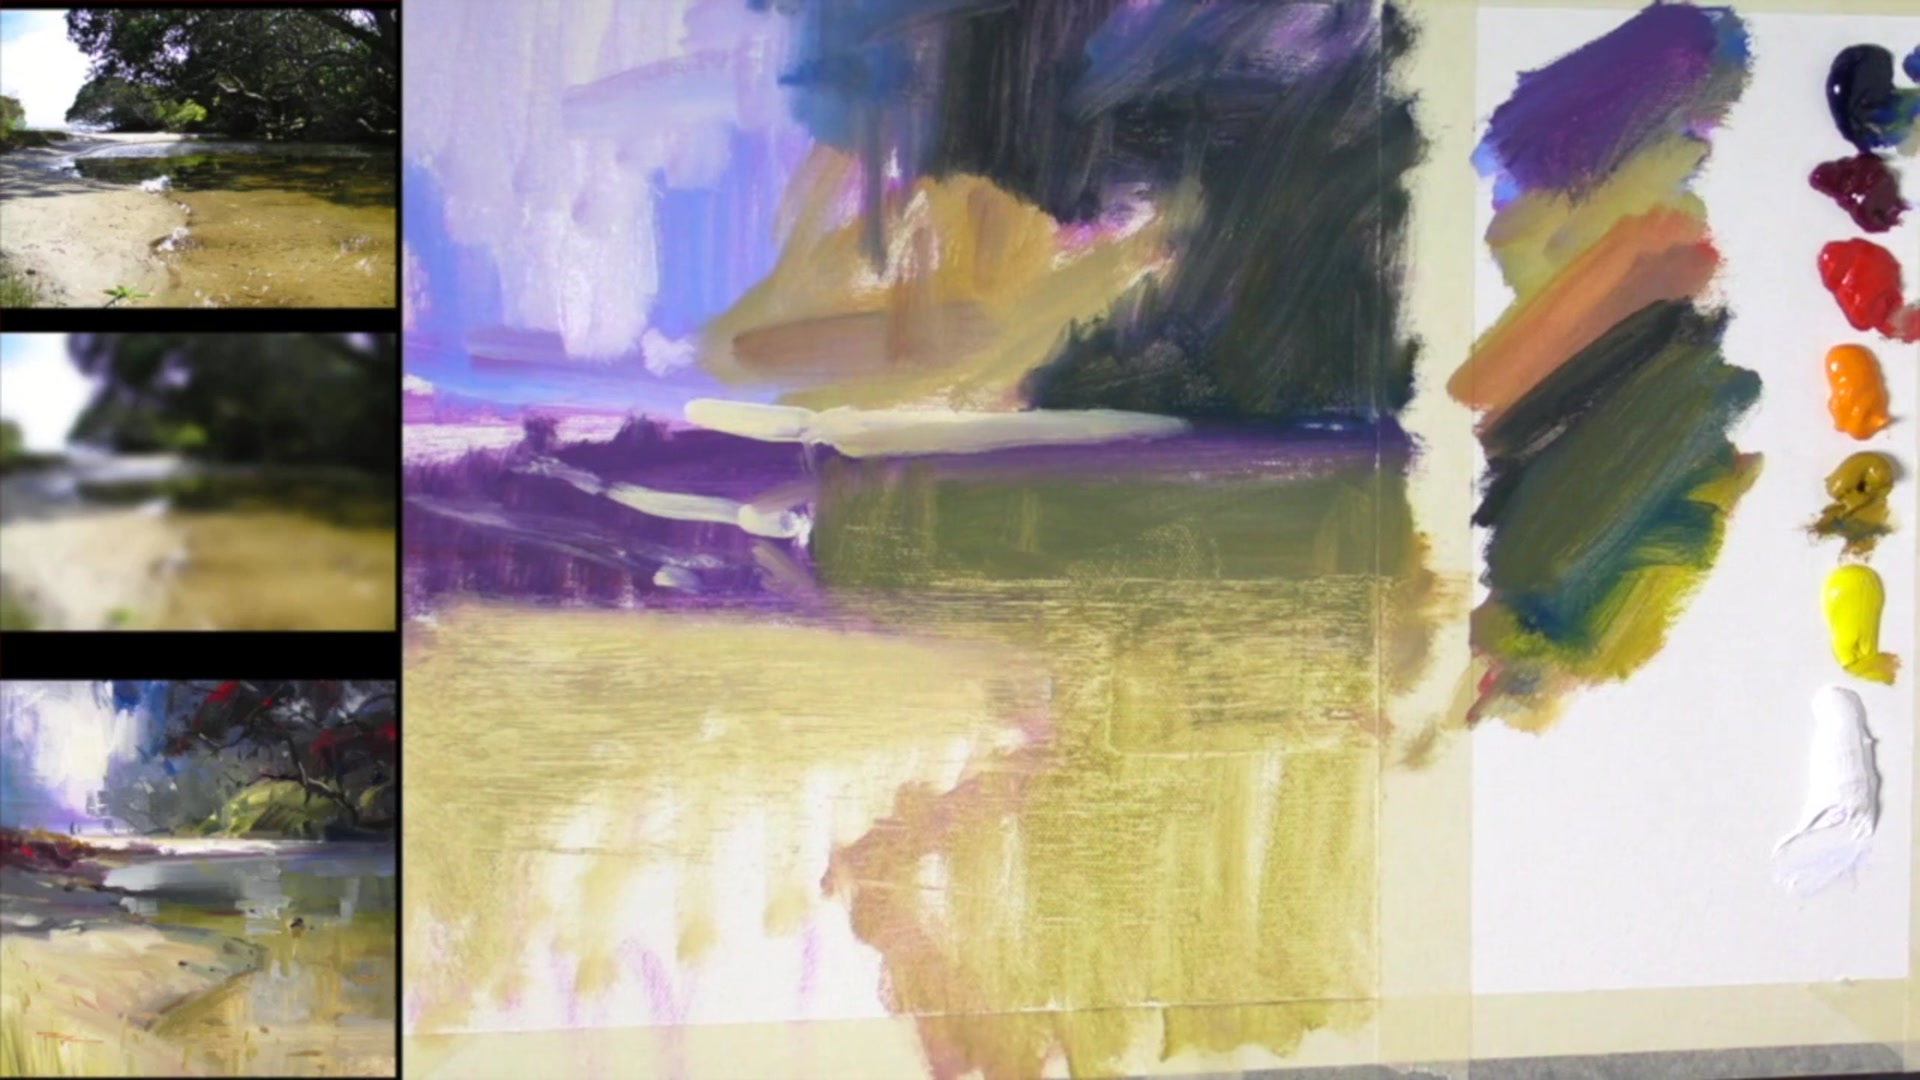
In this chapter, I invite you to explore the captivating scene of Waipu Cove, where the challenge lies not just in capturing the beauty of the landscape, but in transforming it into a vibrant tapestry of abstract elements. As we delve into this lesson, you'll learn to appreciate the interplay of color, texture, and line, focusing on the variation within the major masses. The key is to balance soft and sharp edges, creating a dynamic contrast that enhances the painting's overall aesthetic. This approach encourages you to see beyond the literal representation of sand and water, embracing the abstract qualities that make each scene unique. While this method may take longer than a traditional step-by-step approach due to its trial-and-error nature, it offers a rewarding opportunity to refine your skills and gain a deeper understanding of your materials. Remember, mistakes are part of the journey, guiding you toward a clearer vision of what you wish to achieve. So, take your time, enjoy the process, and let the scene unfold in its abstract beauty. Don't forget to visit the online resource page for additional photos and information to support your creative journey.
This guide accompanies the full video lesson. The lesson includes the complete narrated video, the printable PDF chapter, and personalised critique support.
"Waipu Cove" 11x11" Oil on Canvas by Richard Robinson
Step 8Using Tools and Softening Edges
Experiment with the Card Tool
Try using a card tool on thicker paint to see how it affects the texture. Avoid using it on thin paint as it may not be as effective. Feel free to experiment and find what works best for your style.
Soften Edges with a Large Brush
Use a large brush to soften the edges of your painting. Smooth out the texture by gently brushing over areas where you want softer transitions. Continue through the painting, softening edges where needed to create a cohesive look.
Pro tipUse a large brush to soften edges and create smooth transitions in your painting.
Embark on your painting journey by embracing both the abstract and realistic elements of your scene. Begin with a focus on the overall composition, using a variety of tools and techniques to create dynamic textures and vibrant colors. As you block in the major shapes, remember to blur your vision to simplify the scene and capture its essence without getting lost in the details.
As you progress, pay attention to the relationships between colors and values, particularly in the foreground and background. Use your tools creatively to build texture and interest, and maintain the calmness of reflective surfaces with careful brushwork. Balance detail with abstraction by stepping back and applying bold strokes when needed.
In the final stages, refine your painting with thoughtful details and finishing touches. Use a variety of brushes to add crisp edges, delicate highlights, and subtle reflections. Let your intuition guide you as you make adjustments, ensuring that each element contributes to a harmonious and engaging composition.
Points to remember
Consider both the abstract qualities and realistic elements for a balanced style.
Use walnut oil to improve paint flow and coverage on the canvas.
Blur your vision to focus on large, colorful shapes, simplifying the painting process.
Mix paint directly on the canvas for a freer, juicier look as colors blend naturally.
Pay attention to the tonal variation between the sand under the water and the dry sand.
Use horizontal or vertical strokes to maintain the calmness of reflective water.
Use a large brush to soften edges and create smooth transitions in your painting.
Darken and warm the reflections of rocks in the foreground to create the appearance of looking through the water's surface sheen.