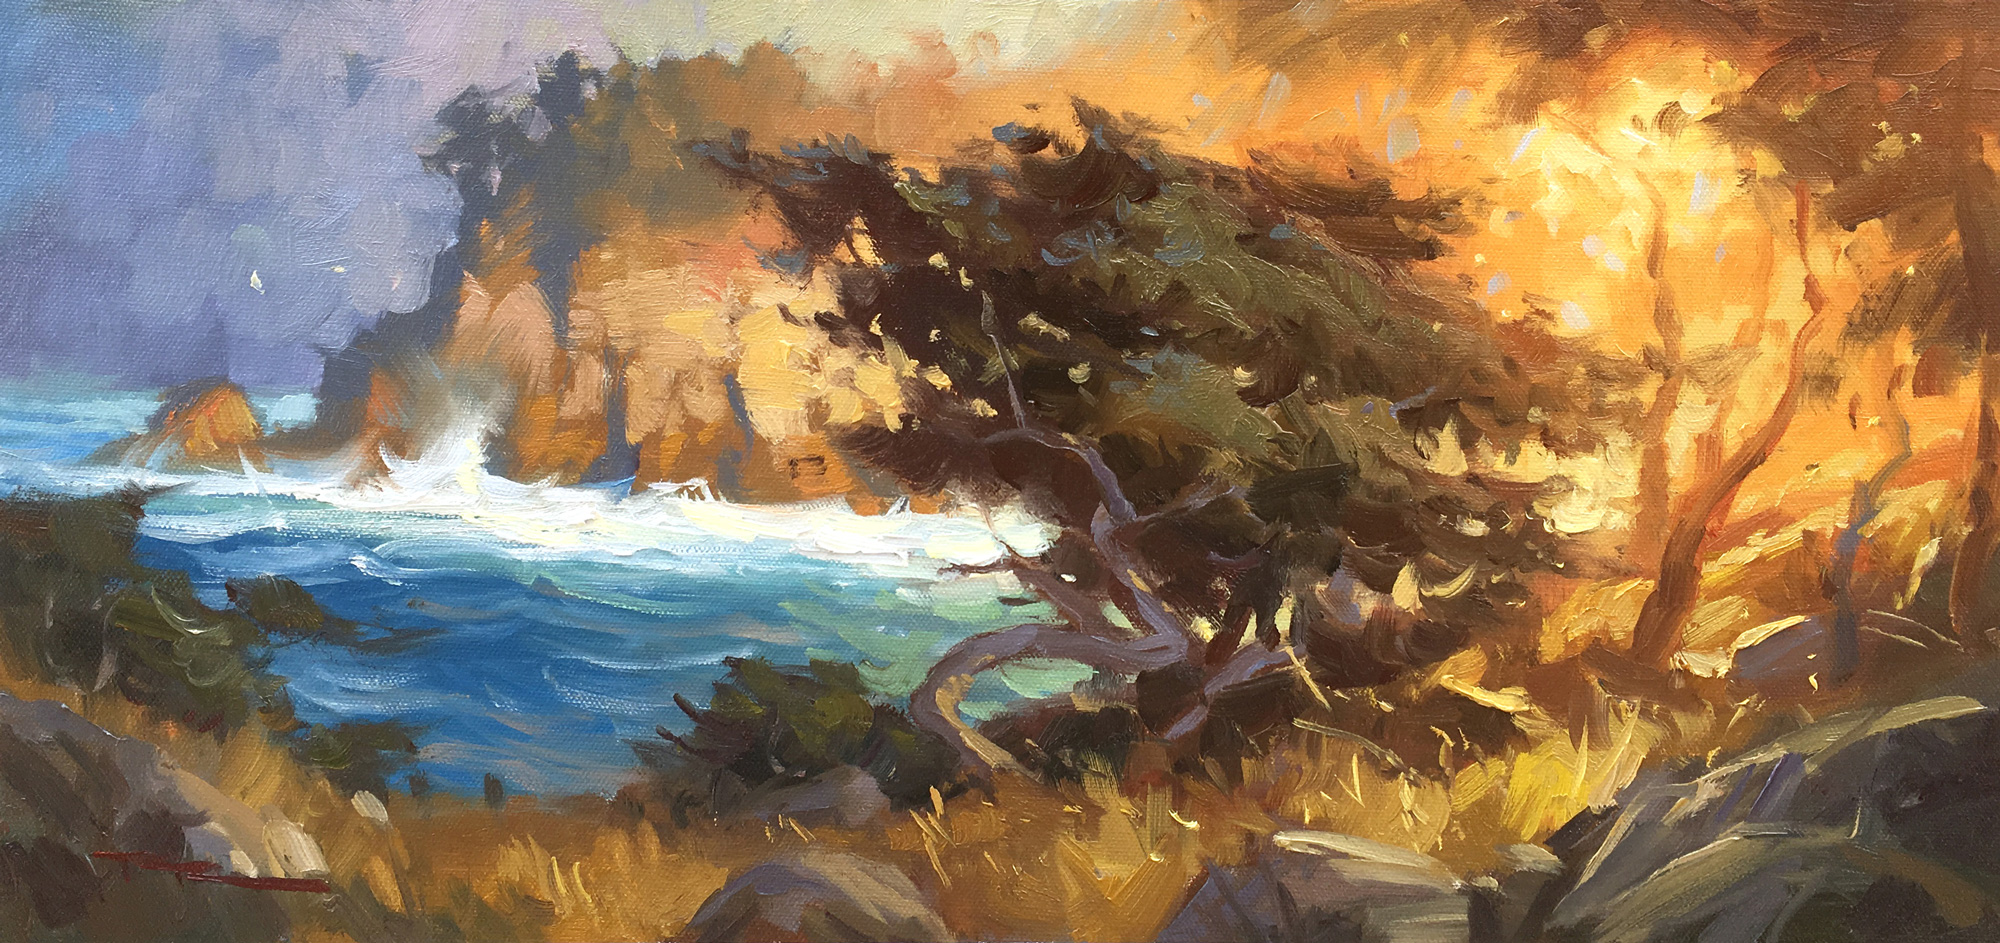
Join me on a painting adventure to one of my favorite spots, Point Lobos in California, where the beauty of nature unfolds in a breathtaking coastal scene. In this chapter, we'll explore the art of capturing the stunning impressionistic view using big brushes and the powerful technique of contre-jour lighting, or 'against the light.' This method, favored by the French and renowned galleries, creates a dramatic effect by positioning the primary light source behind the subject, resulting in striking silhouettes, glowing highlights, and atmospheric depth. As we paint, you'll learn to control values to balance high contrast, ensuring subtle variations in dark areas and avoiding harshness in the brightest spots. This approach not only enhances mood and mystery but also brings a sense of depth and warmth to your landscape. Whether you're a beginner or an advanced painter, I'll guide you step by step through this process in oils, though it's perfectly adaptable for acrylics. In just two hours, you'll have a beautiful coastal painting, or you can choose to expand your vision into a larger masterpiece. Let's pay homage to Mother Nature's generosity and bring this scene to life with glowing light and vibrant colors.
This guide accompanies the full video lesson. The lesson includes the complete narrated video, the printable PDF chapter, and personalised critique support.
"Point Lobos" 20 x 47" Oil on Canvas by Richard Robinson
Step 8Detailing Water and Foam
Mix and Apply Turquoise Off-White
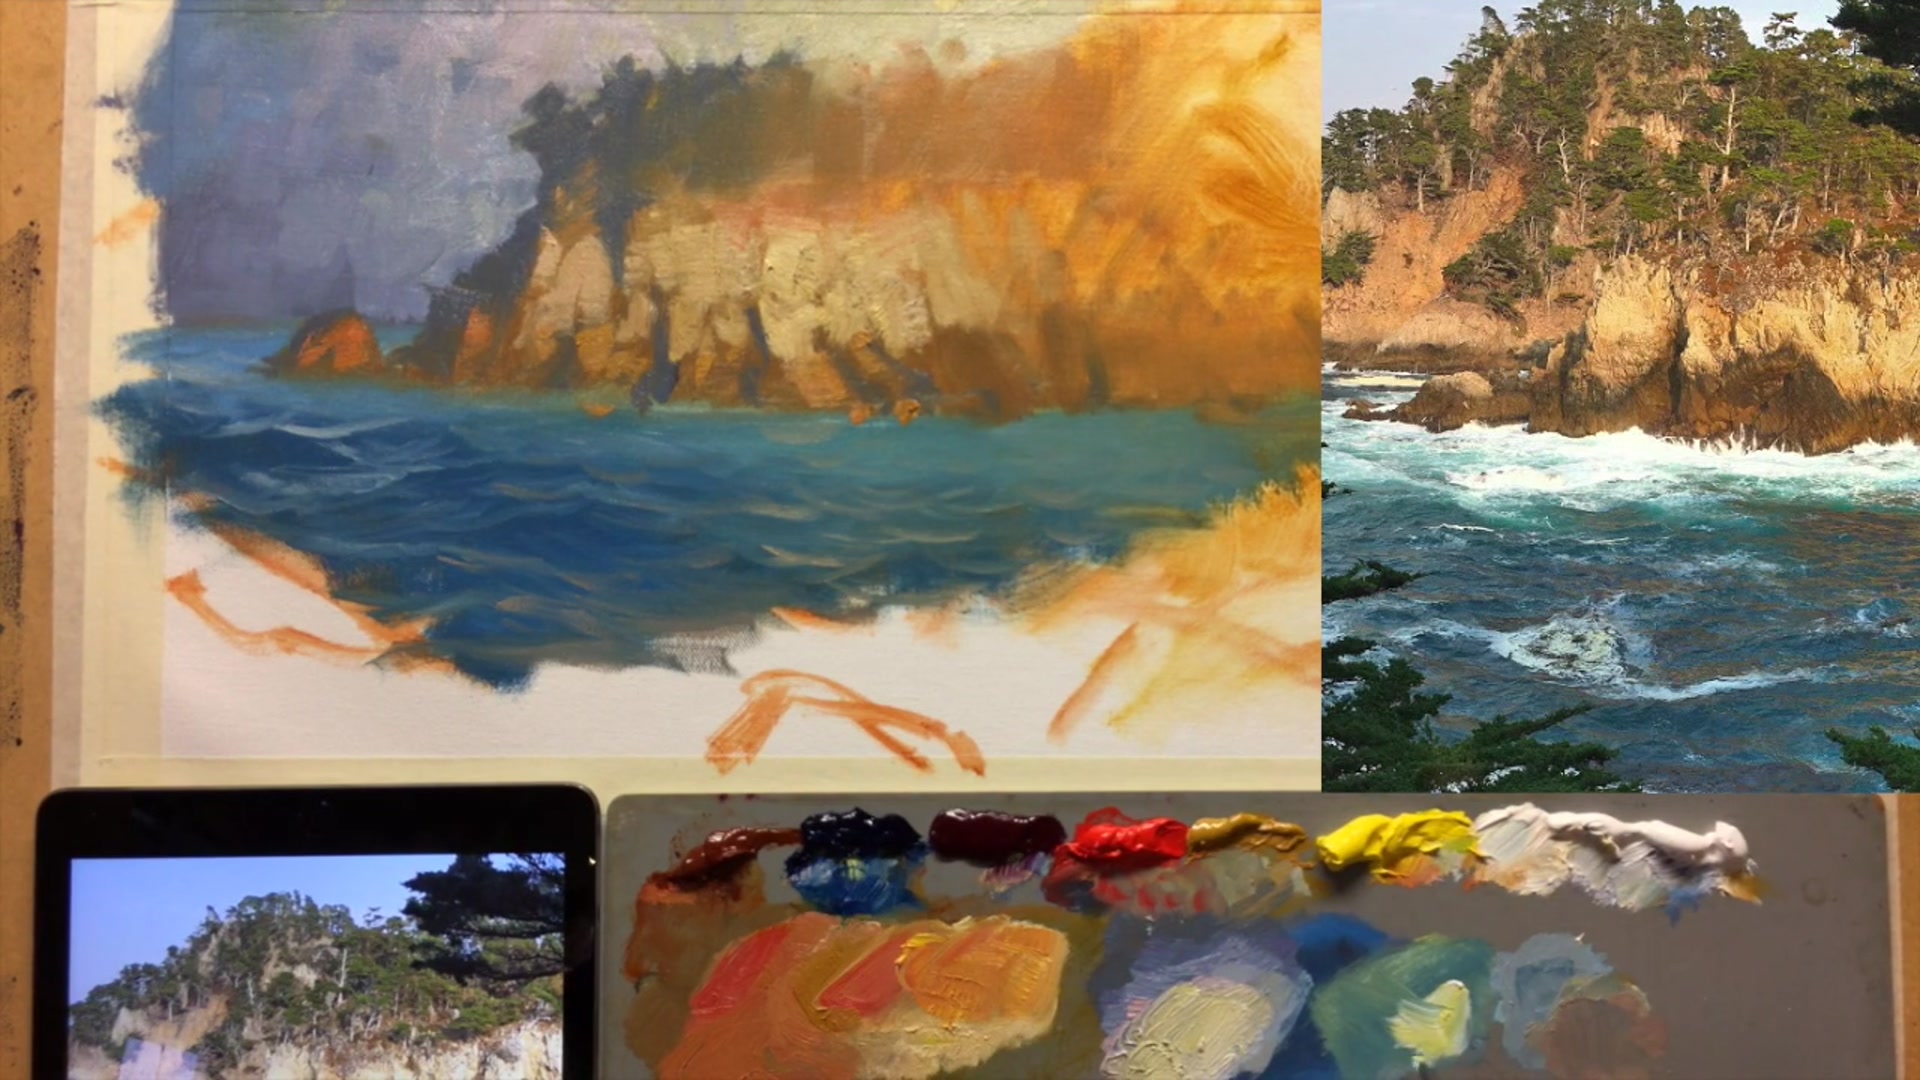
Mix some white with a little yellow and a touch of phthalo. Wipe away some of the blue from the area first to prevent it from interfering with the white. Use a clean brush or switch to a new one, then apply straight white to create a turquoise off-white effect.
Create Foam Spray Effect
Use a big brush with a bit of sky color to determine where you want a big spray of foam. Brush it into that area to set it up for the foam effect. Wipe the brush and repeat to build up the desired effect.
Detail the Foam and Water
Observe the shapes in your reference photo, focusing on how the foam interacts with the rocks. Brush upwards to mimic foam cascading off rocks, using gentle curves rather than straight edges. Clean your brush frequently to avoid unwanted color mixing.
Add Whitewash and Foam Highlights
Lightly brush straight white across the surface to create a broken effect, resembling the foam on top of the water. Pay attention to how waves tuck into shadow areas to enhance the rock face. Add small swirls of foam to enrich the water's surface.
Pro tipKeep your brush clean while detailing foam to prevent unwanted color mixing.
Embark on your painting journey by thoughtfully planning your composition. Begin with a sketch using your preferred drawing tool, focusing on the main elements like a prominent tree or a striking headland. Incorporate dynamic diagonals and off-balance elements to infuse motion into your scene. Consider the play of light, especially the sun glow, to add warmth and depth, and ensure a clear distinction between foreground and background to guide the viewer's eye.
As you lay down the initial layers, use thin applications of paint to allow for adjustments and layering. Establish your background with warm tones, and gradually build up the foreground elements with careful color transitions. Use walnut oil for thicker applications, especially in areas capturing the sunlit turquoise of the ocean. Pay attention to atmospheric effects, varying shadow shapes to avoid repetition and enhance realism.
In the final stages, focus on detailing and enhancing textures. Use a combination of brushes to create realistic water effects and foam, maintaining a clean brush to prevent unwanted color mixing. Add depth with reflections and subtle color transitions, and utilize impasto techniques to emphasize focal points like the foreground tree. As you finish, ensure your glowing areas are vibrant and your distant trees add depth and contrast, completing a dynamic and atmospheric scene.
Points to remember
Use diagonals and off-balance elements to create motion in your composition.
Apply initial layers thinly for easy adjustments and layering.
Use walnut oil instead of solvent for thicker paint applications.
Avoid repetitive patterns in shadow shapes by varying their forms.
Keep your brush clean while detailing foam to prevent unwanted color mixing.
Gradually darken the color as you work outward from the center to create a glowing effect.
Vary the size and angle of your brushstrokes to create a natural look for distant trees.
Use impasto technique to create texture, making the tree the focal point of the scene.