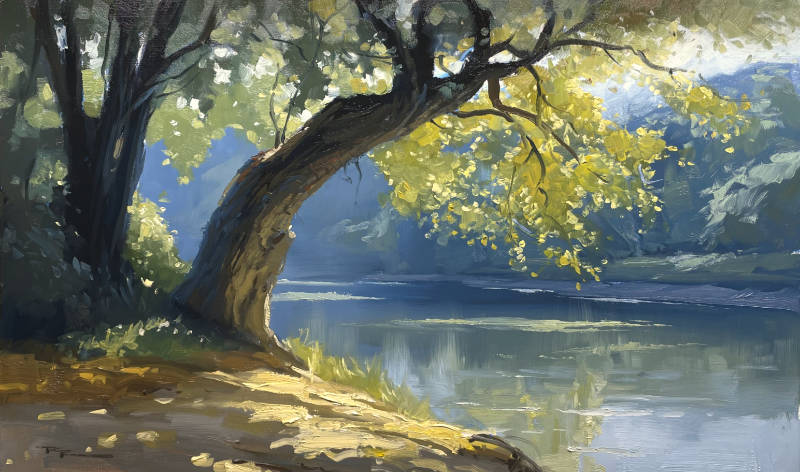
In this chapter, we embark on a creative journey with 'The River Bend,' a delightful scene from the Rangiteiki River in New Zealand, captured in a 10x14" oil painting. We'll explore the process of transforming a simple photograph into a captivating piece of art, using both traditional techniques and the innovative assistance of AI. Starting with a triple-primed MDF board, I'll guide you through selecting and emphasizing the elements you love most in the scene—perhaps the play of dappled light through the trees or the serene curve of the river. We'll consider the shape and size of your canvas, making necessary adjustments to the composition to ensure harmony and focus. As we paint, we'll delve into the joys of alla prima, working wet-on-wet to maintain freshness and spontaneity. You'll learn to balance detail and simplicity, using a range of techniques to bring the scene to life. Whether you choose to incorporate AI in your process or not, this chapter is about finding joy in painting and letting curiosity lead you to new artistic paths. Together, we'll create a beautiful painting that captures the essence of this tranquil river bend, step by step.
This guide accompanies the full video lesson. The lesson includes the complete narrated video, the printable PDF chapter, and personalised critique support.
'The River Bend" 10x1" Oil on Board by Richard Robinson
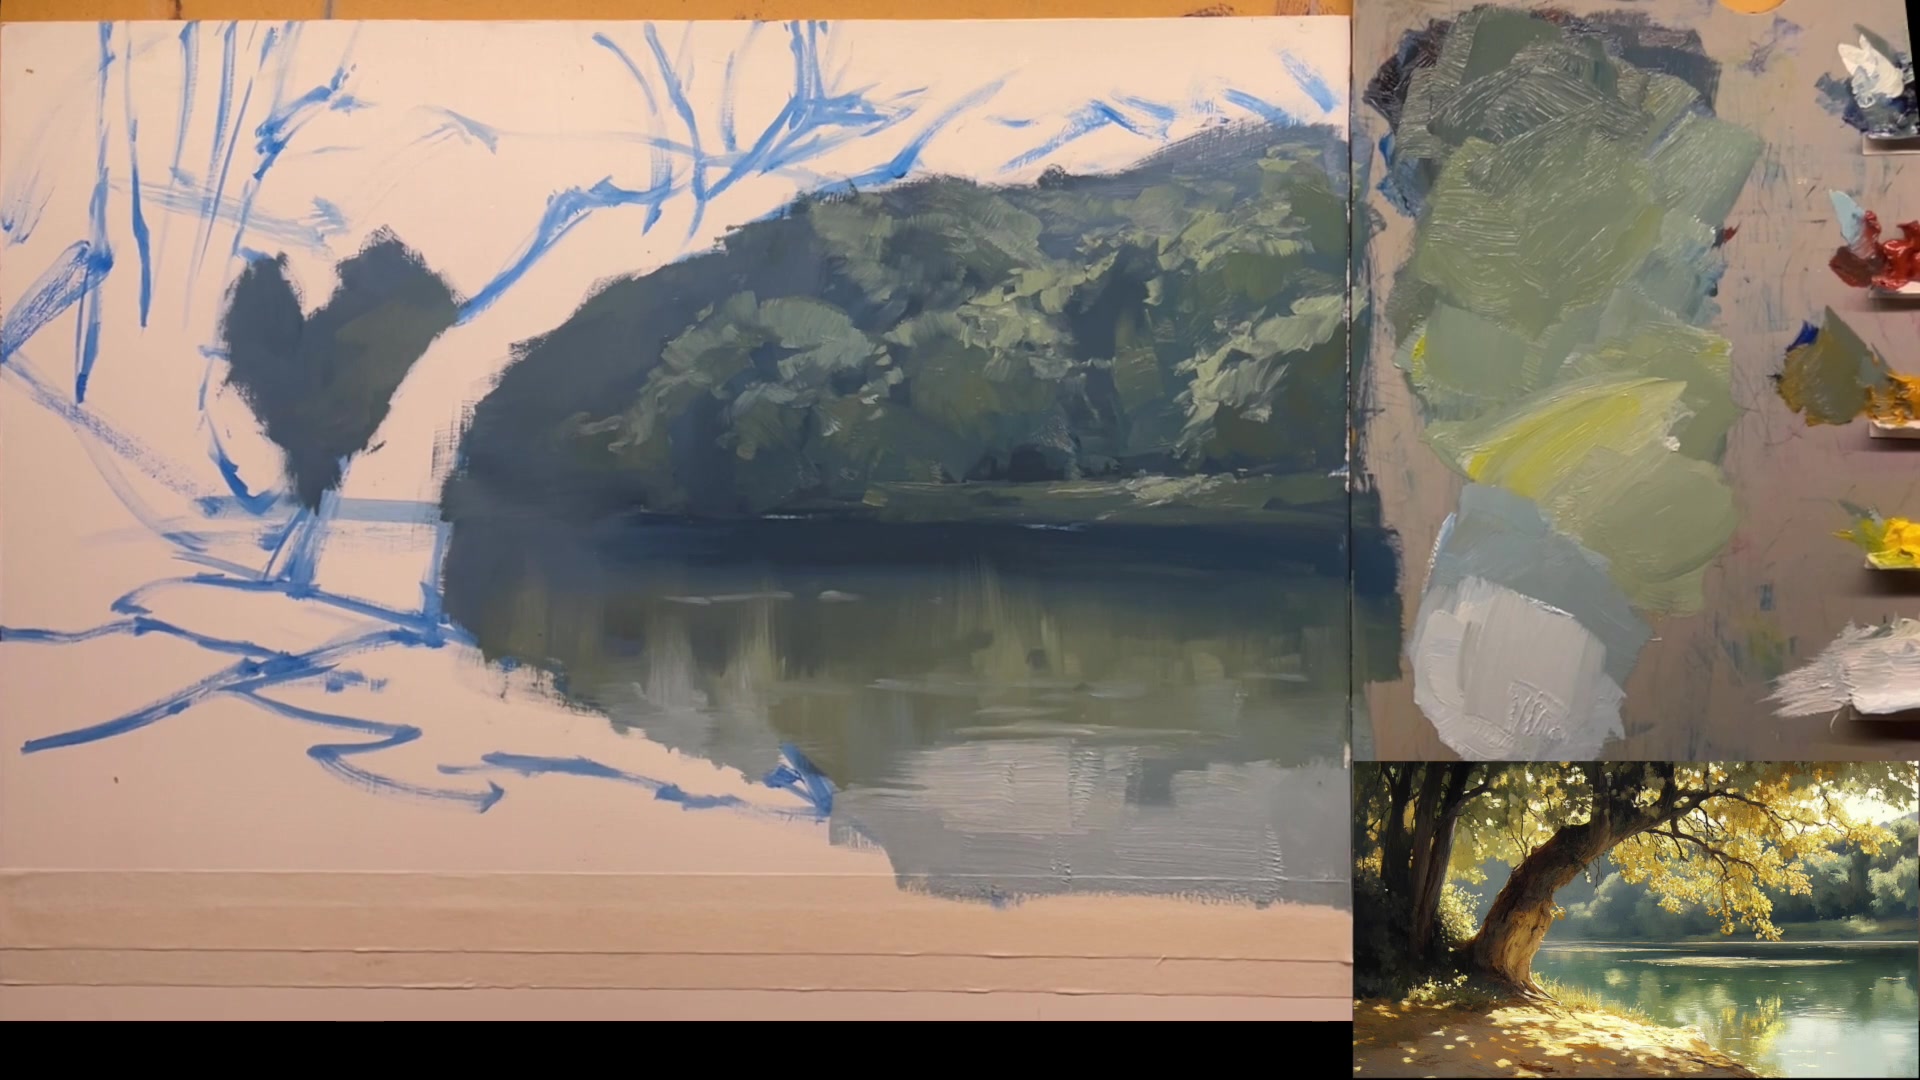
Step 10Sky and Hill Transitions
Block in the Sky
Carefully block in a little bit of the sky, painting around the dark edge to keep the paint clean. Fill in the area completely before adjusting the edge to maintain a neat appearance.
Add Texture to the Sky
Add a few little spots within the sky area to enhance the texture. This will add interest and depth to your sky.
Transition to the Hill
Move down to the hill area and use a downward brushstroke to create a soft edge. This soft edge simulates the effect of light blowing out the hill, enhancing the sensation of light.
Refine the Hill's Edge
If the brush picks up muddy colors, clean it and wipe off the area. Add back in the lighter color to keep the edge pure and bright.
Pro tipUse a downward brushstroke to create a soft edge on the hill, enhancing the light effect.
Embark on your painting journey by thoroughly analyzing the scene you wish to capture. Identify and emphasize the elements that draw your attention, ensuring they become the focal point of your composition. Adjust the composition to fit your canvas size, and modify any awkward elements to create a harmonious scene. Use digital sketching to refine your design, focusing on interesting shapes and cohesive elements.
Utilize AI tools to generate a reference image that aligns with your vision, and begin blocking in your sketch with your chosen medium. Establish the horizon line and main elements with precision, using straight lines to shape curves for easier management. As you paint the background, mix ample paint to maintain color consistency and build texture, considering atmospheric perspective to create depth.
Incorporate reflections and atmospheric perspective by using varied brush strokes and color mixes. Pay attention to the interplay of light and shadow, ensuring reflections are slightly darker for realism. As you add details to the foreground and tree trunk, use a large brush with varied strokes to create natural textures and avoid uniformity. Finally, enhance the scene with foliage and tree details, using half tones to create a glowing effect and bring your painting to life.
Points to remember
Choose the elements you love most and make them the focal point.
Ensure the tree trunk has character by adding curves.
Experiment with different settings in the AI generator.
Use straight lines to shape curves for easier management.
Mix more paint than you think you'll need for consistency.
Leave spots of the darkest green visible to suggest shadows.
Keep your brush clean when transitioning from light to dark.
Use varied brush strokes to create natural textures and depth.